by Cyrus Nemani, Over a decade of designing and consulting for jewelry brands, partner at Bella Findings/Gempacked.com |
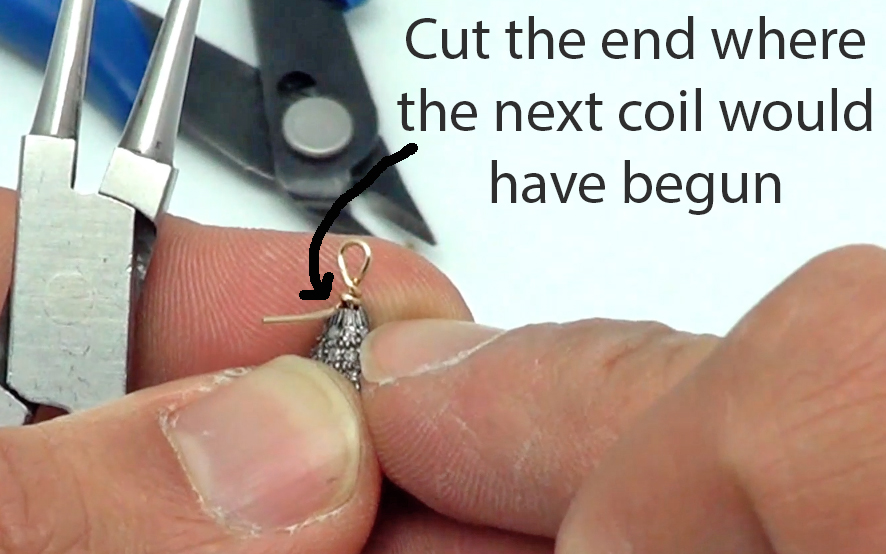
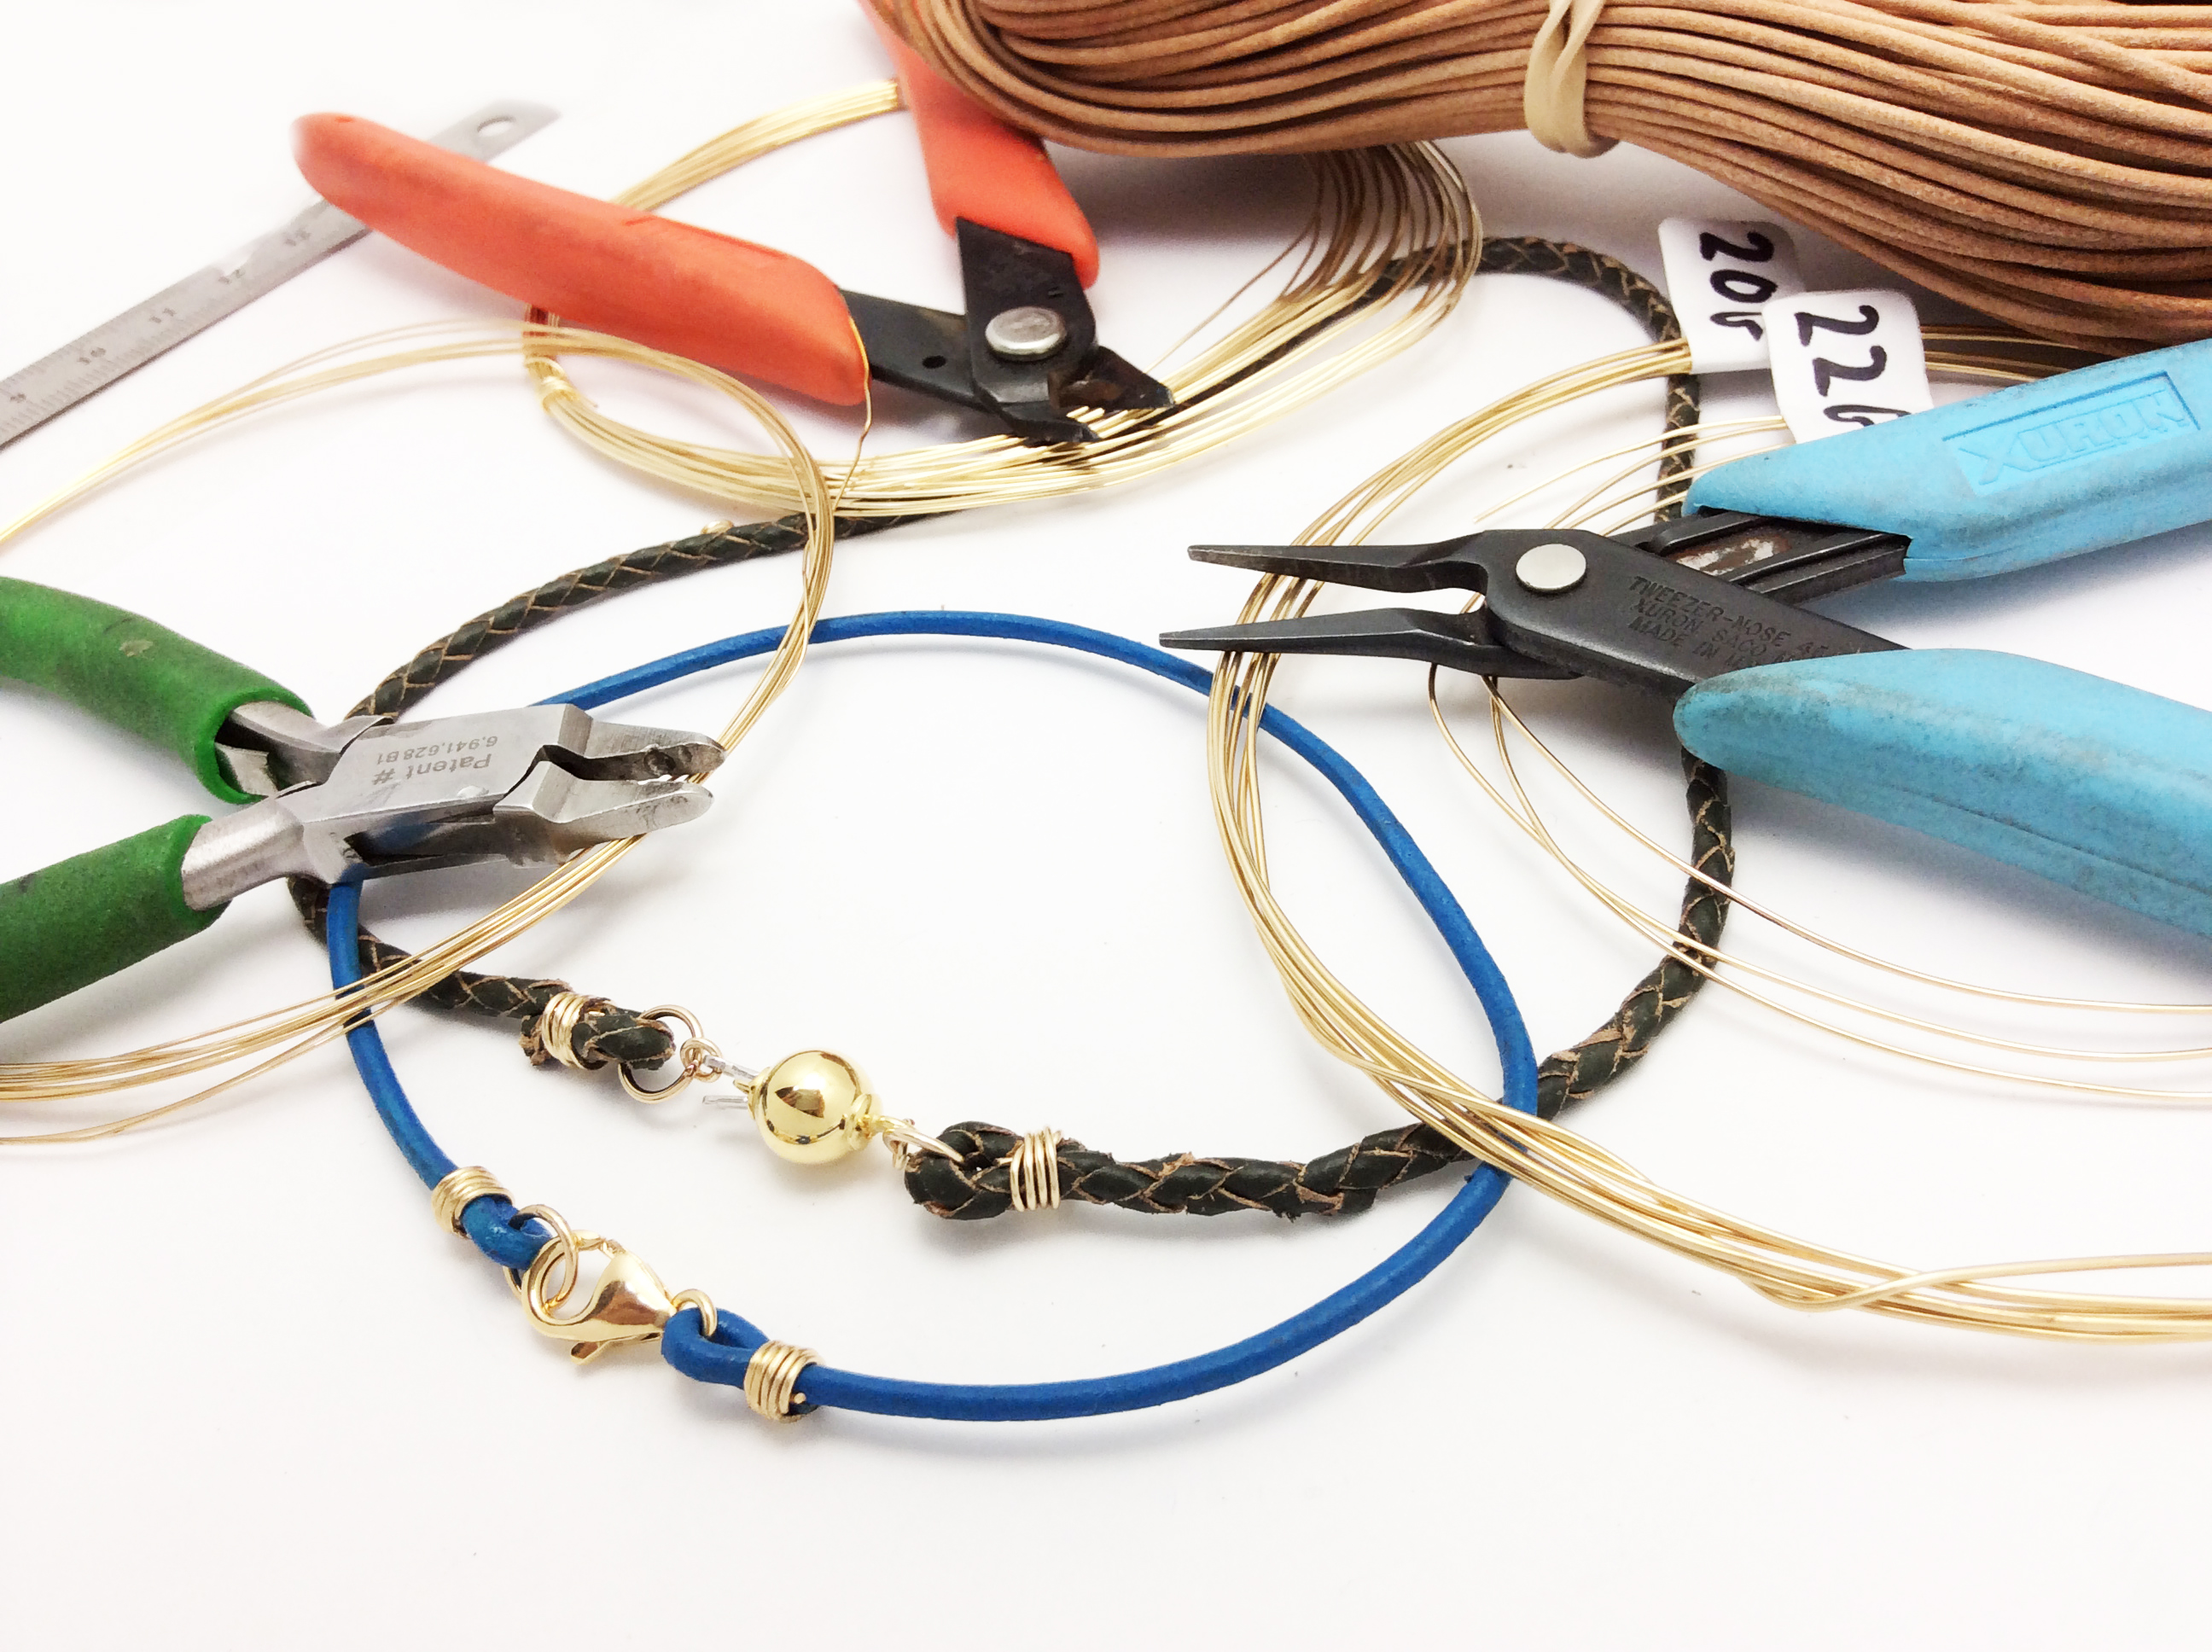
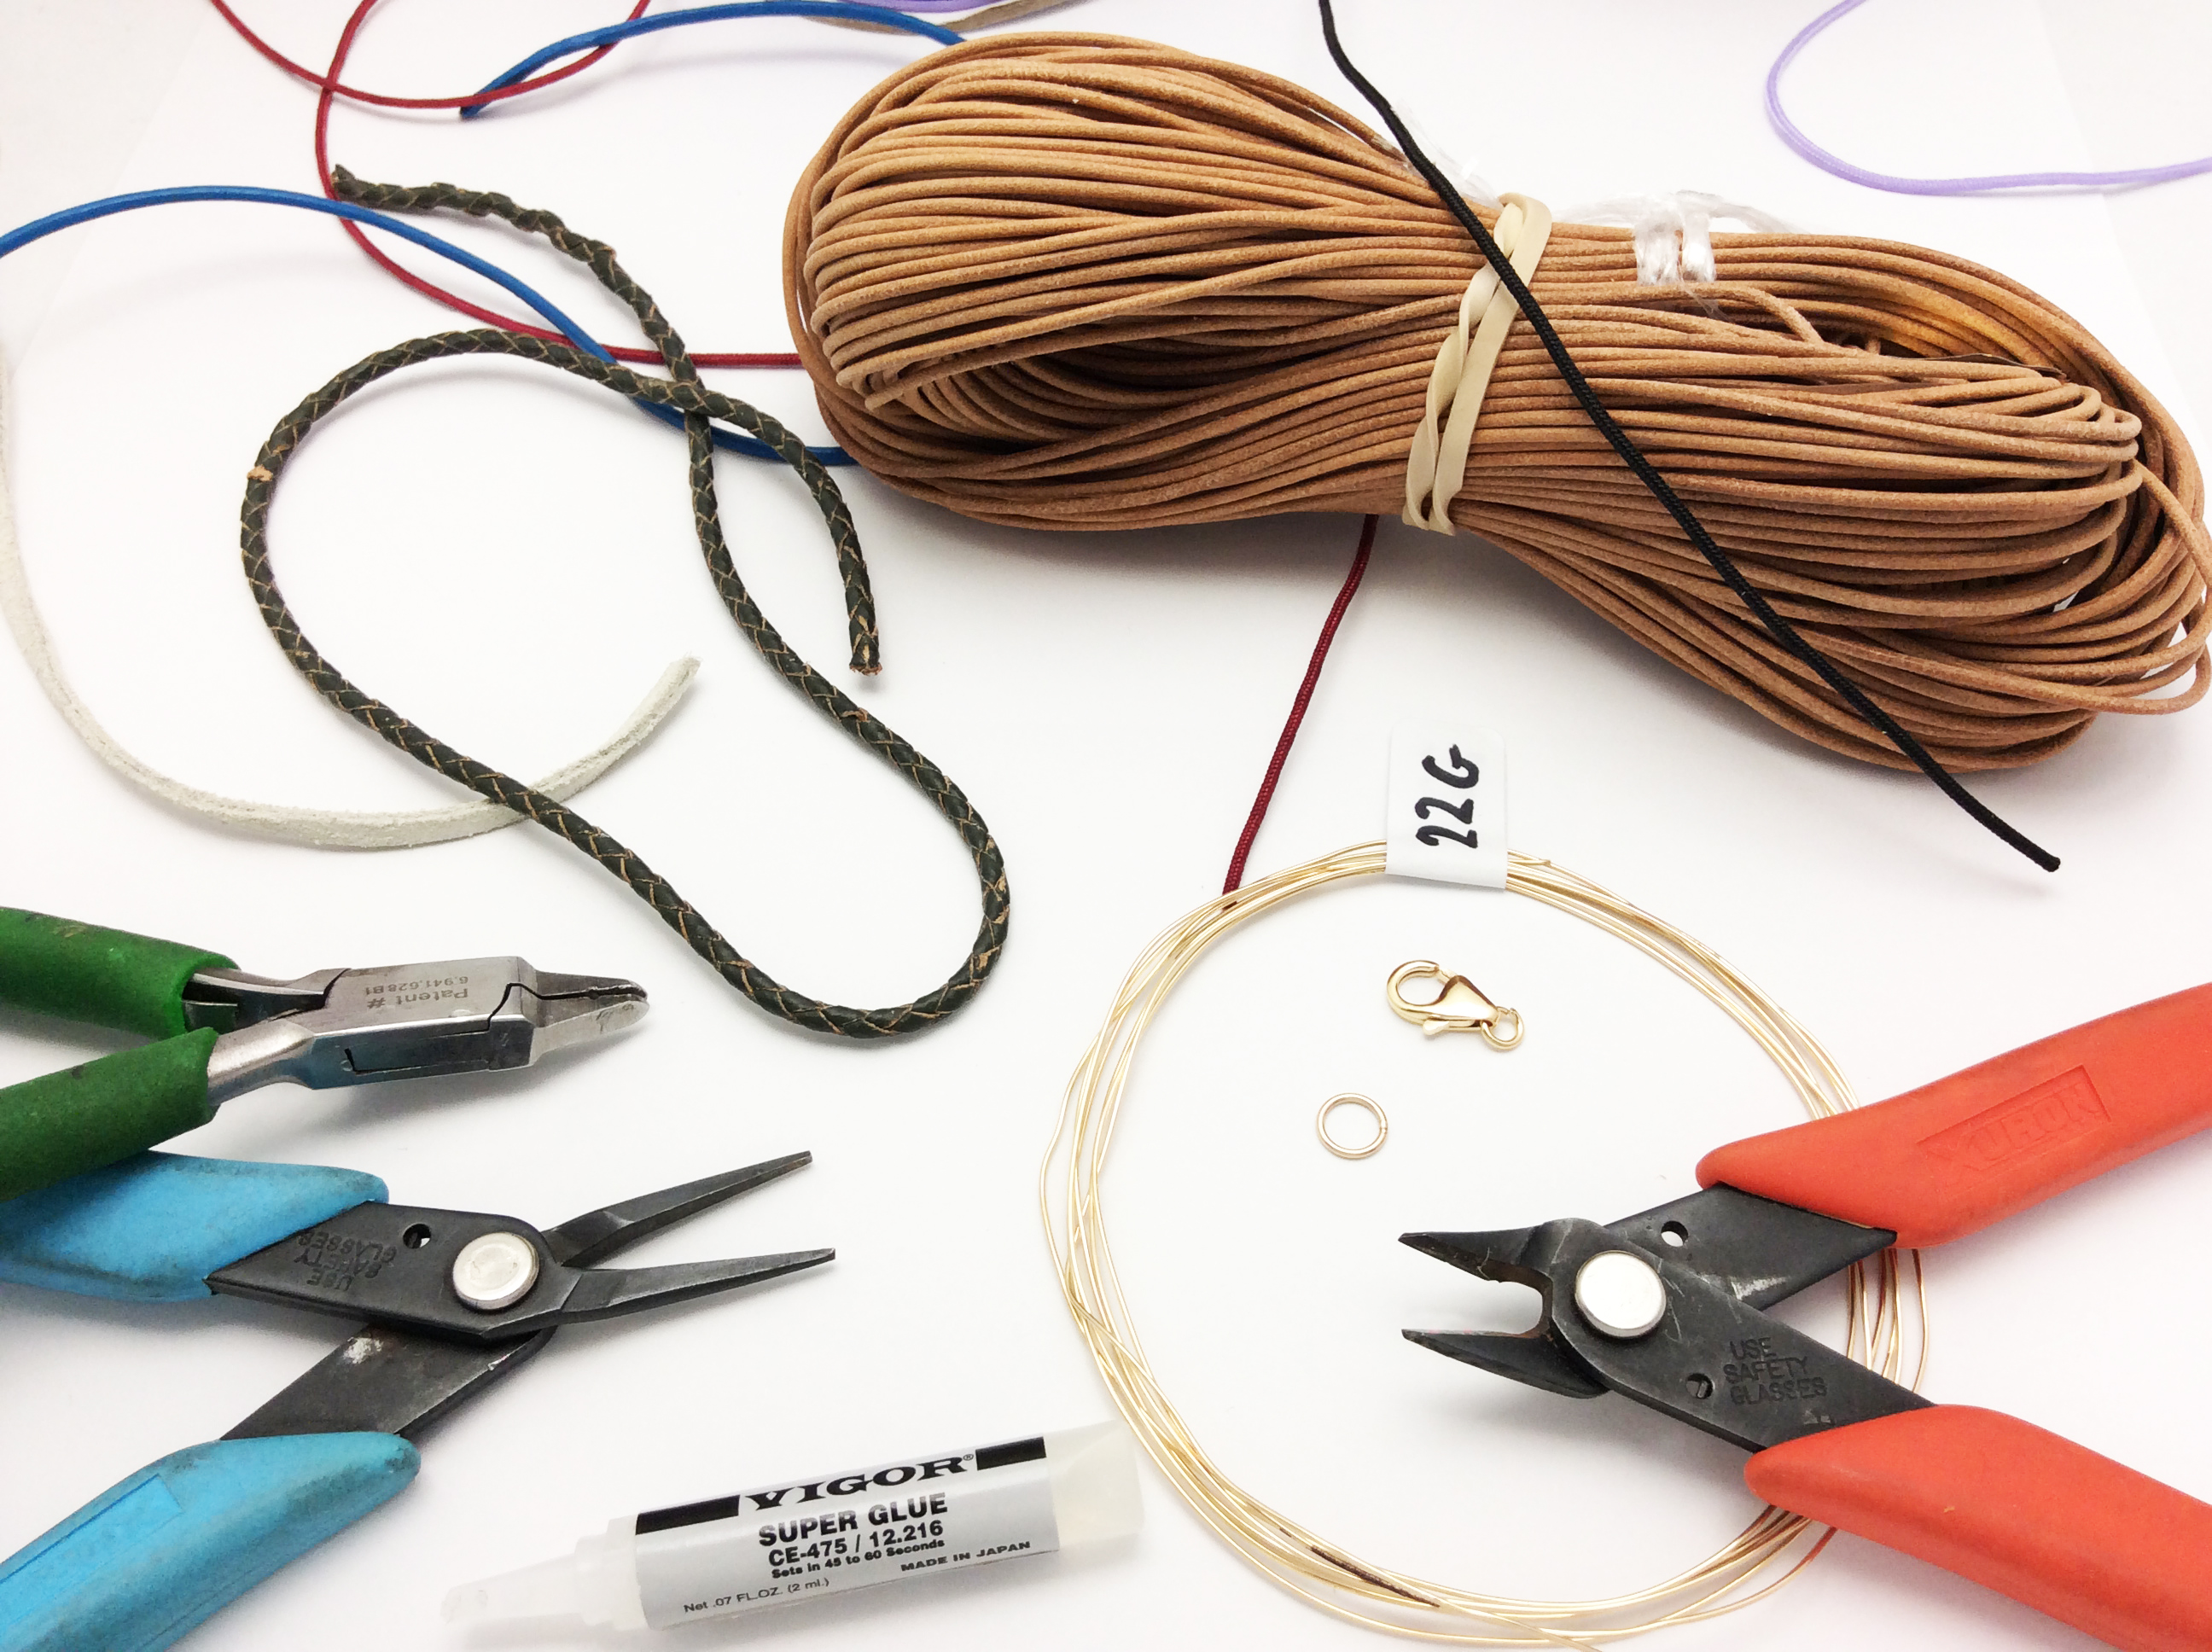
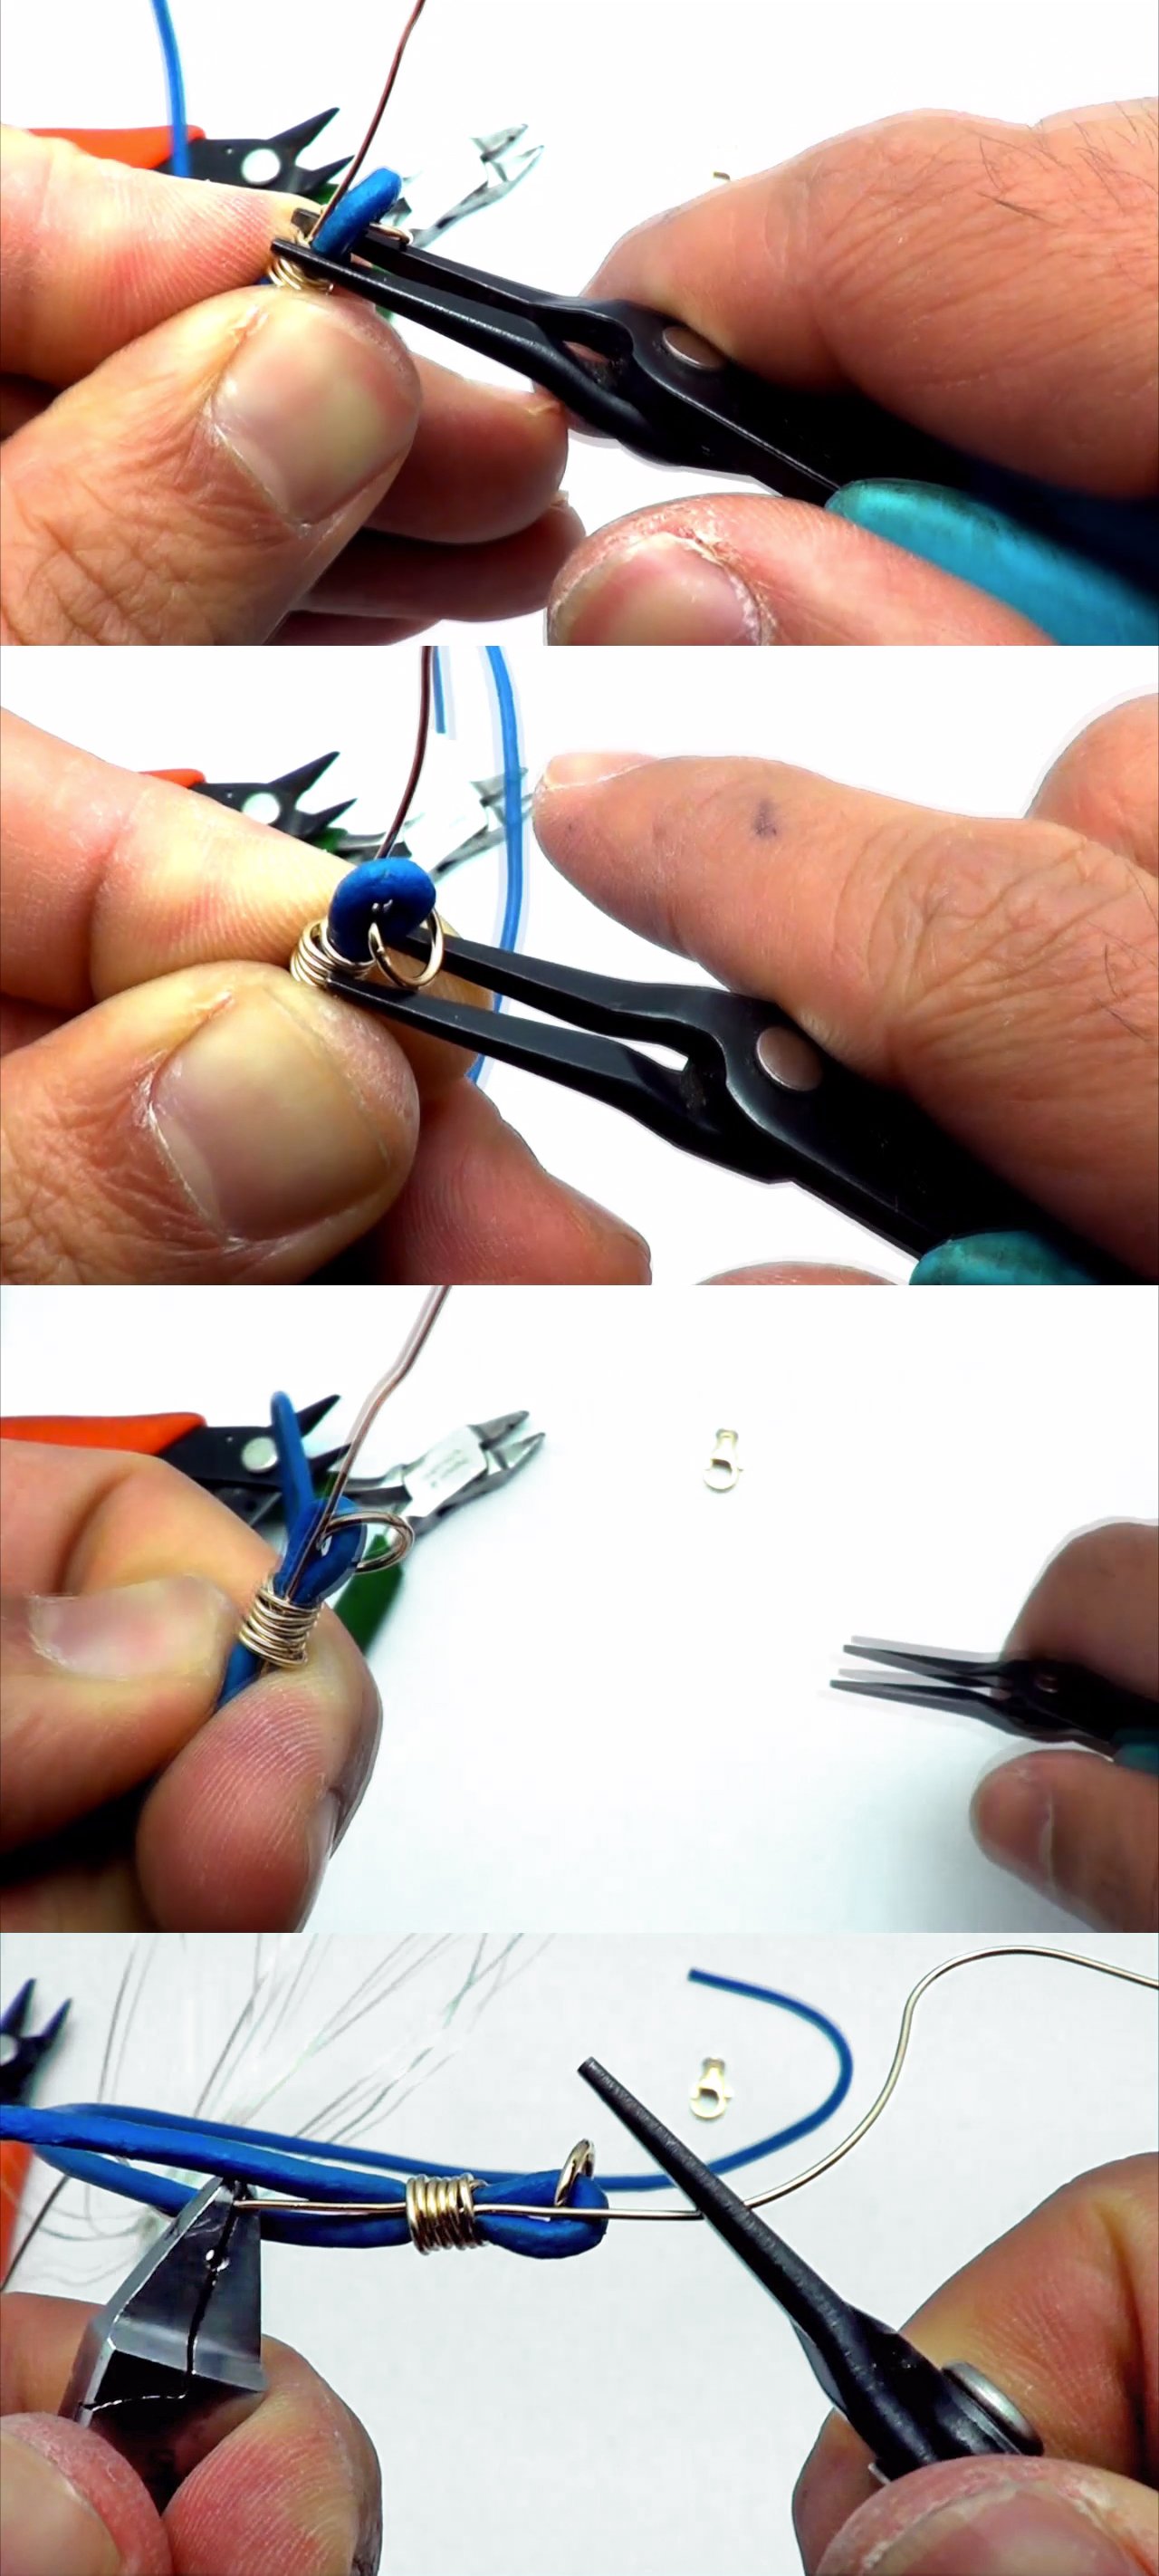
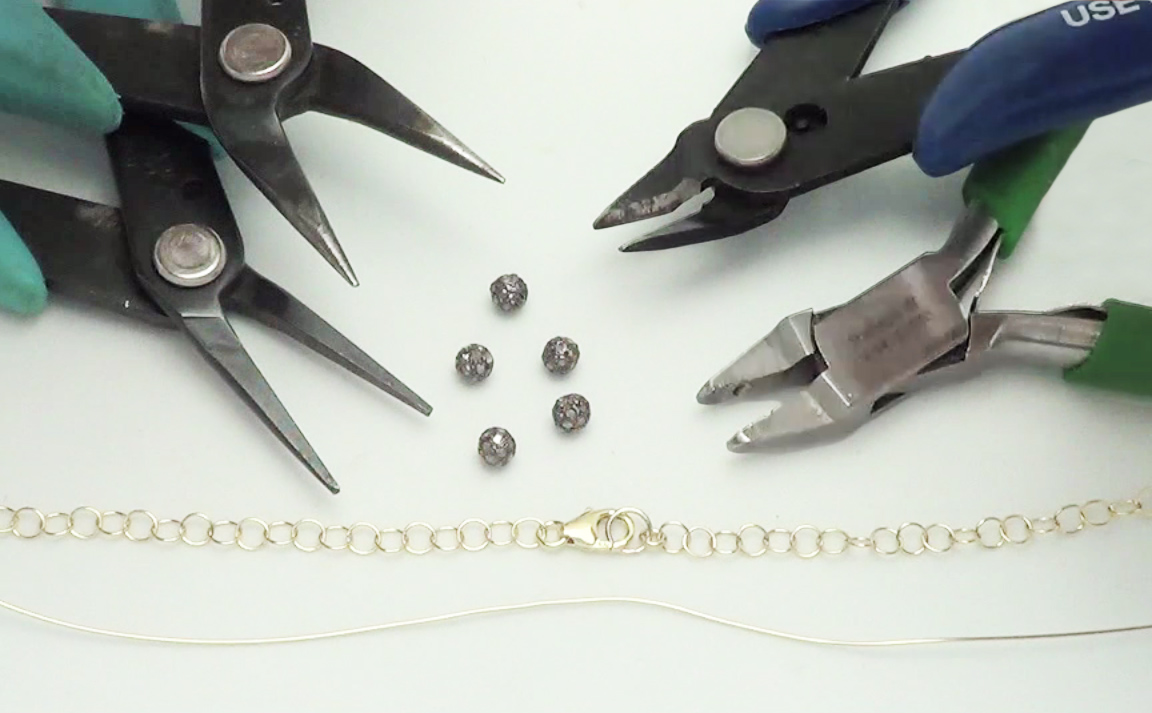
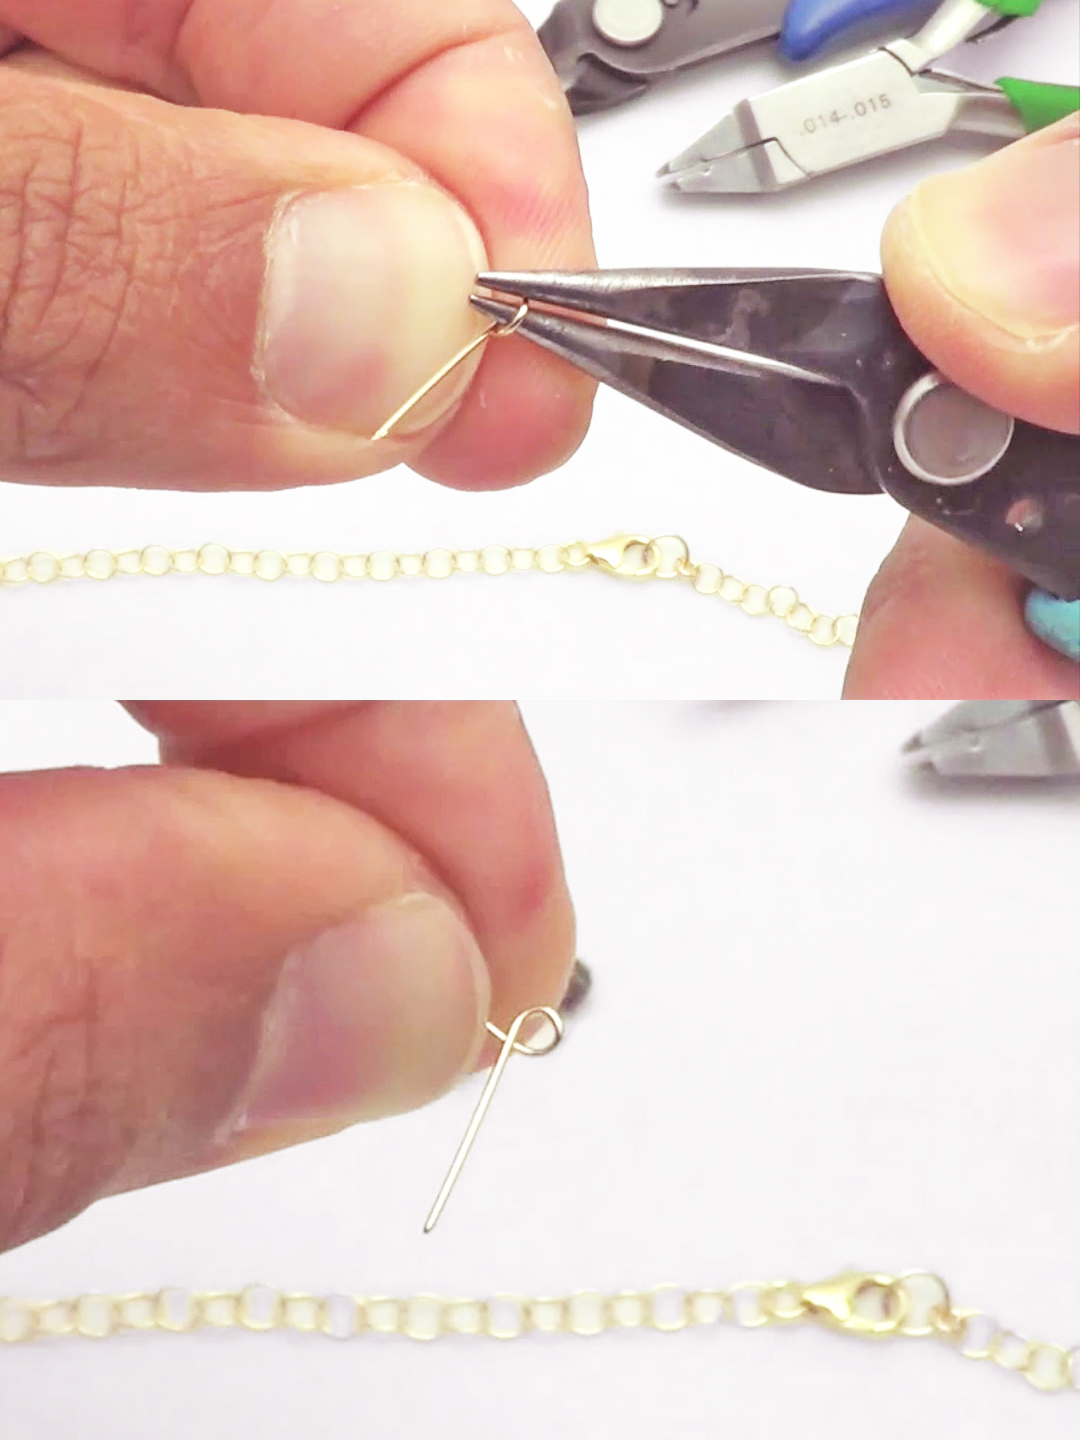
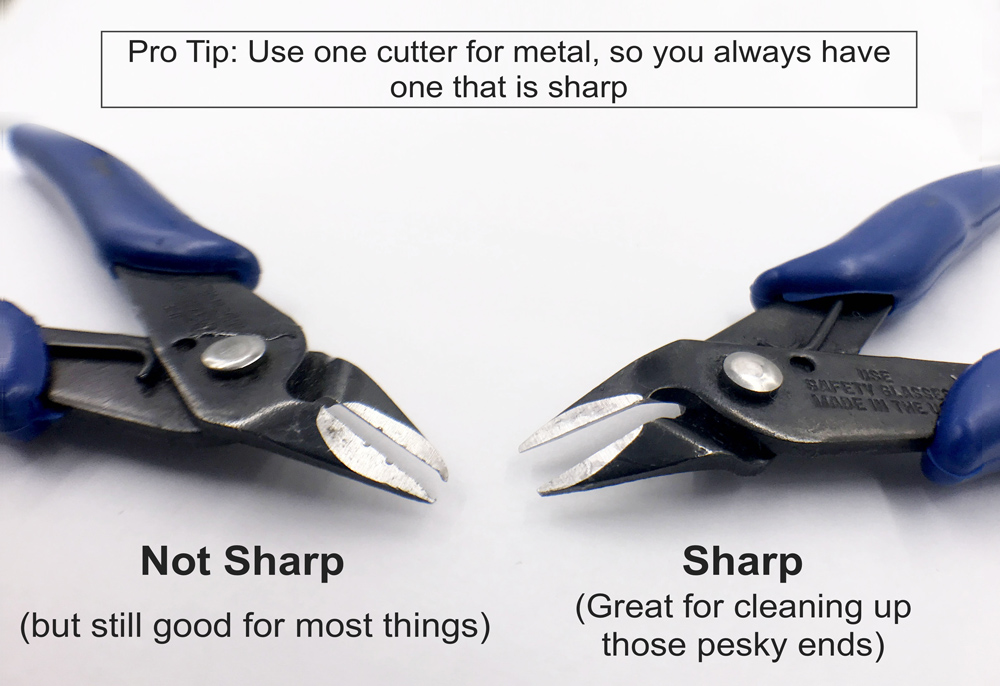
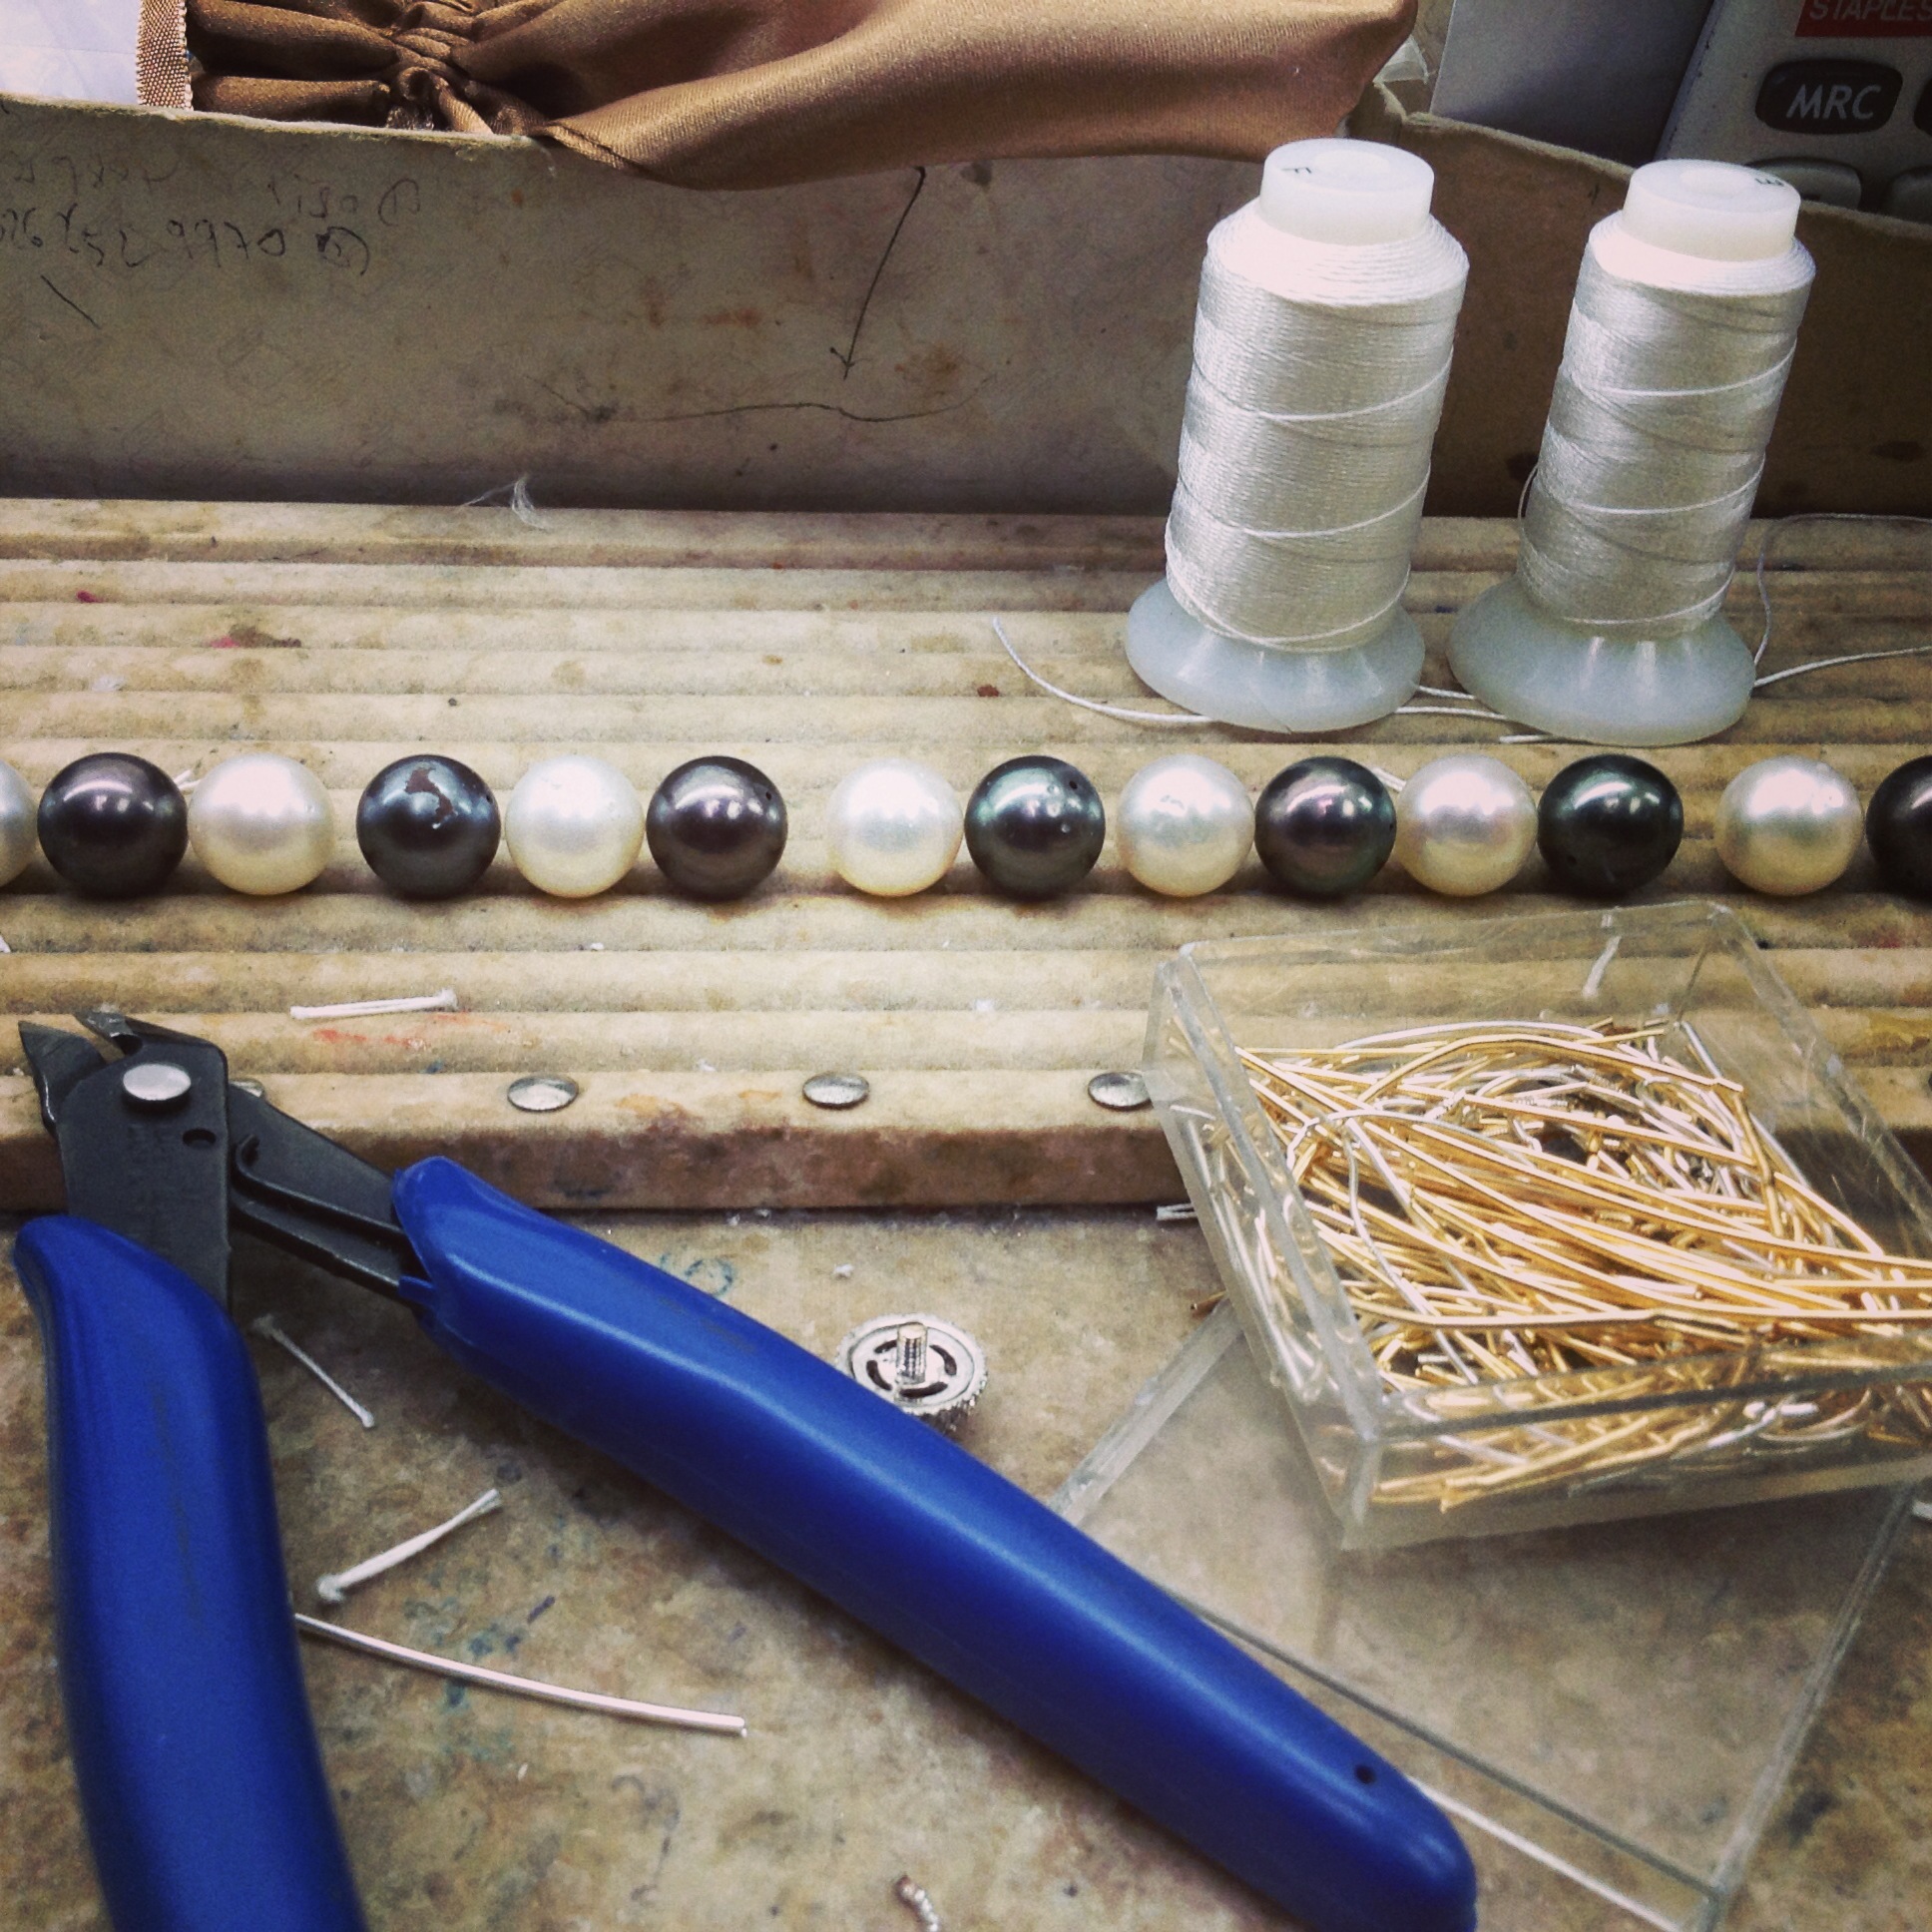
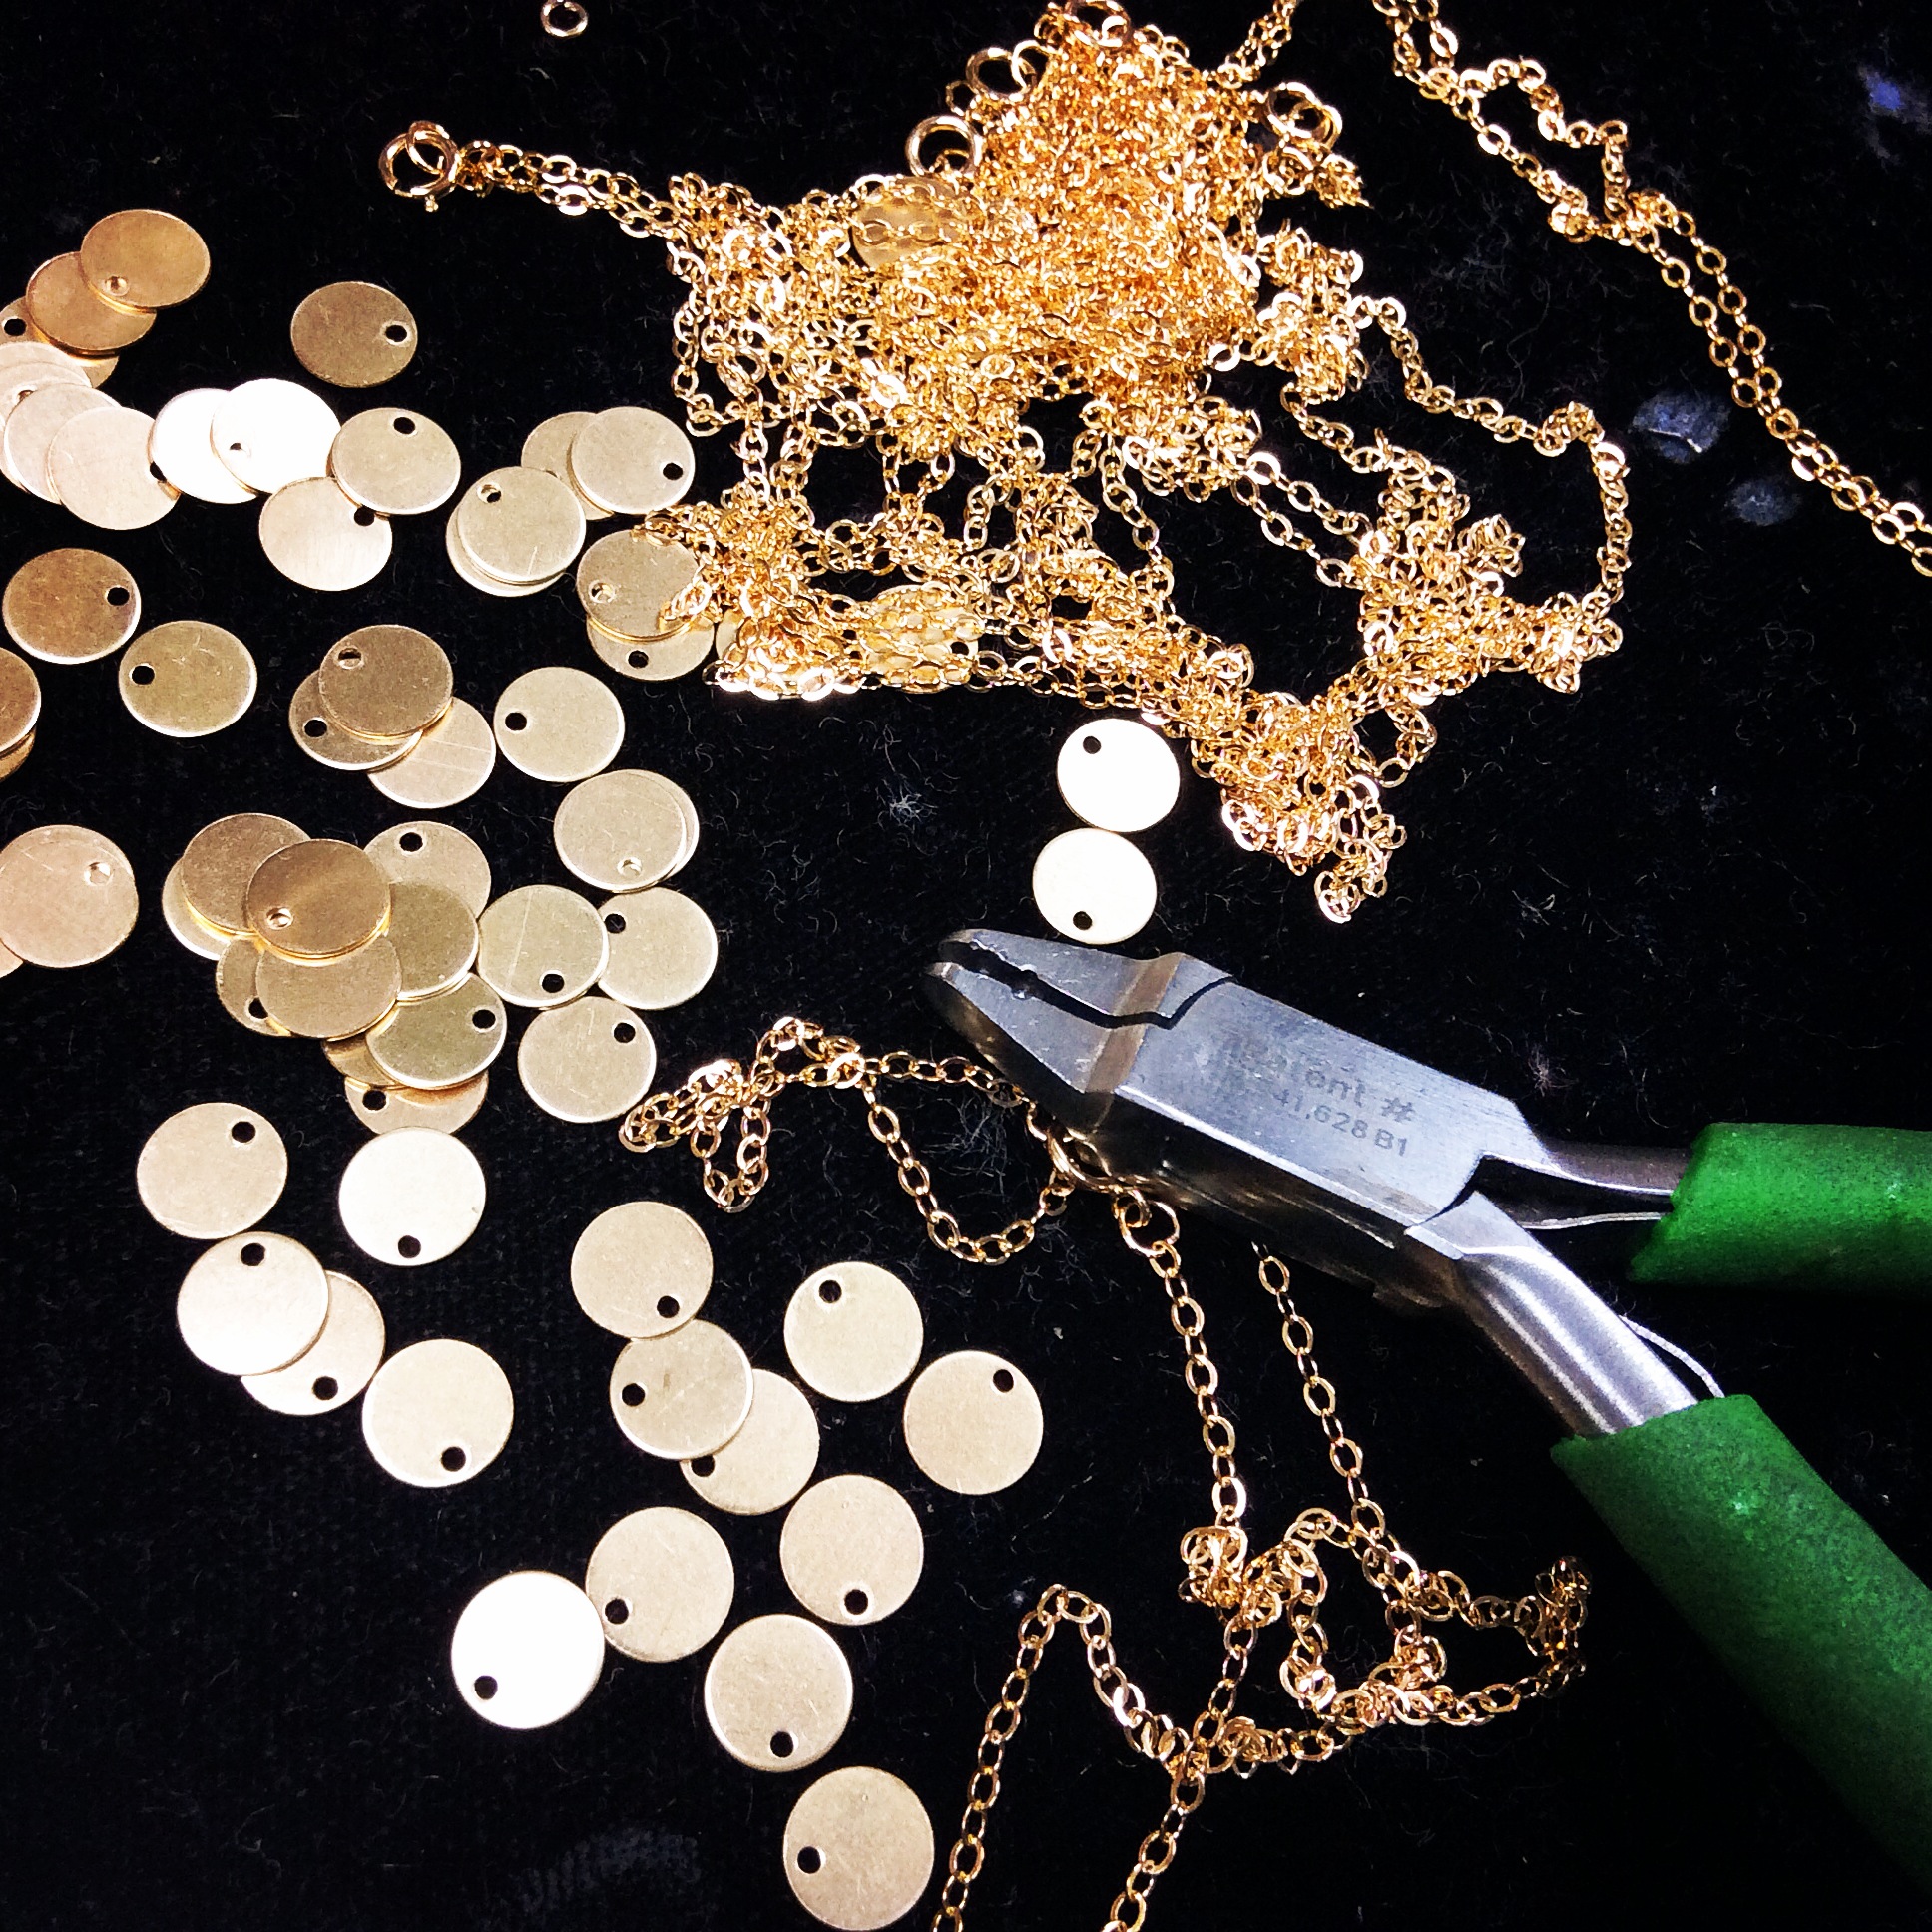
Cutters are probably the tools you’ll go through the most because basically every jewelry project requires them. Whether it is stringing, wire wrapping, or even casting, you’ll need a trusty pair or two to get it done. It is a good idea to have at least two sets of cutters–one for soft things like thread, and one for harder things like wire, chains and metals. Having a dedicated cutter for soft items will make touching up your jobs easier, and they will stay sharper for longer. When your new cutters eventually become dull, you can start using them for things that require more force and less precision.
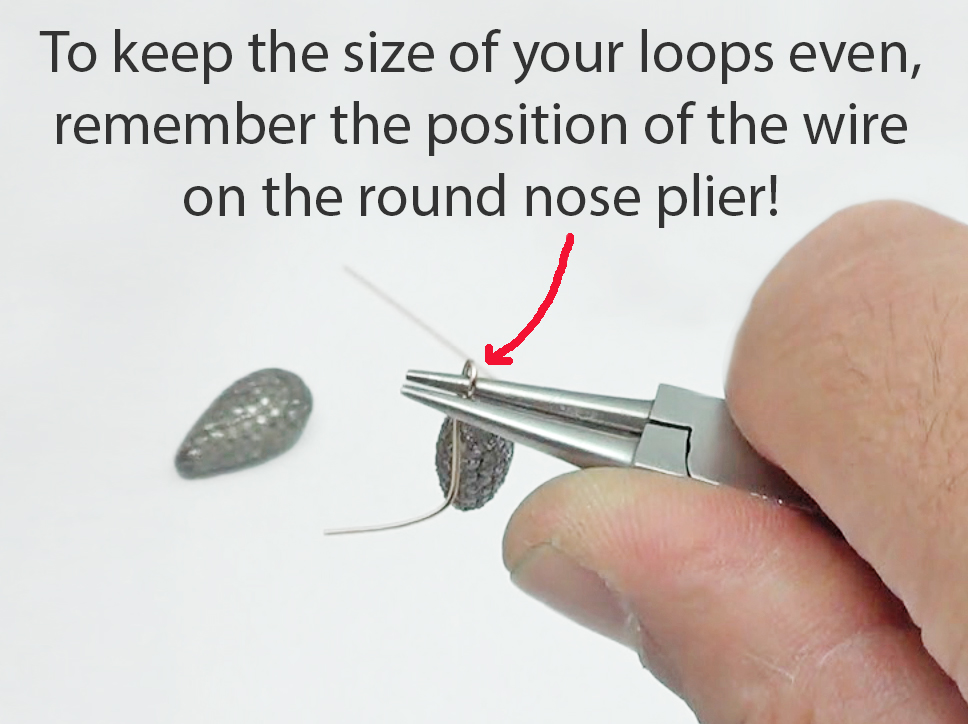
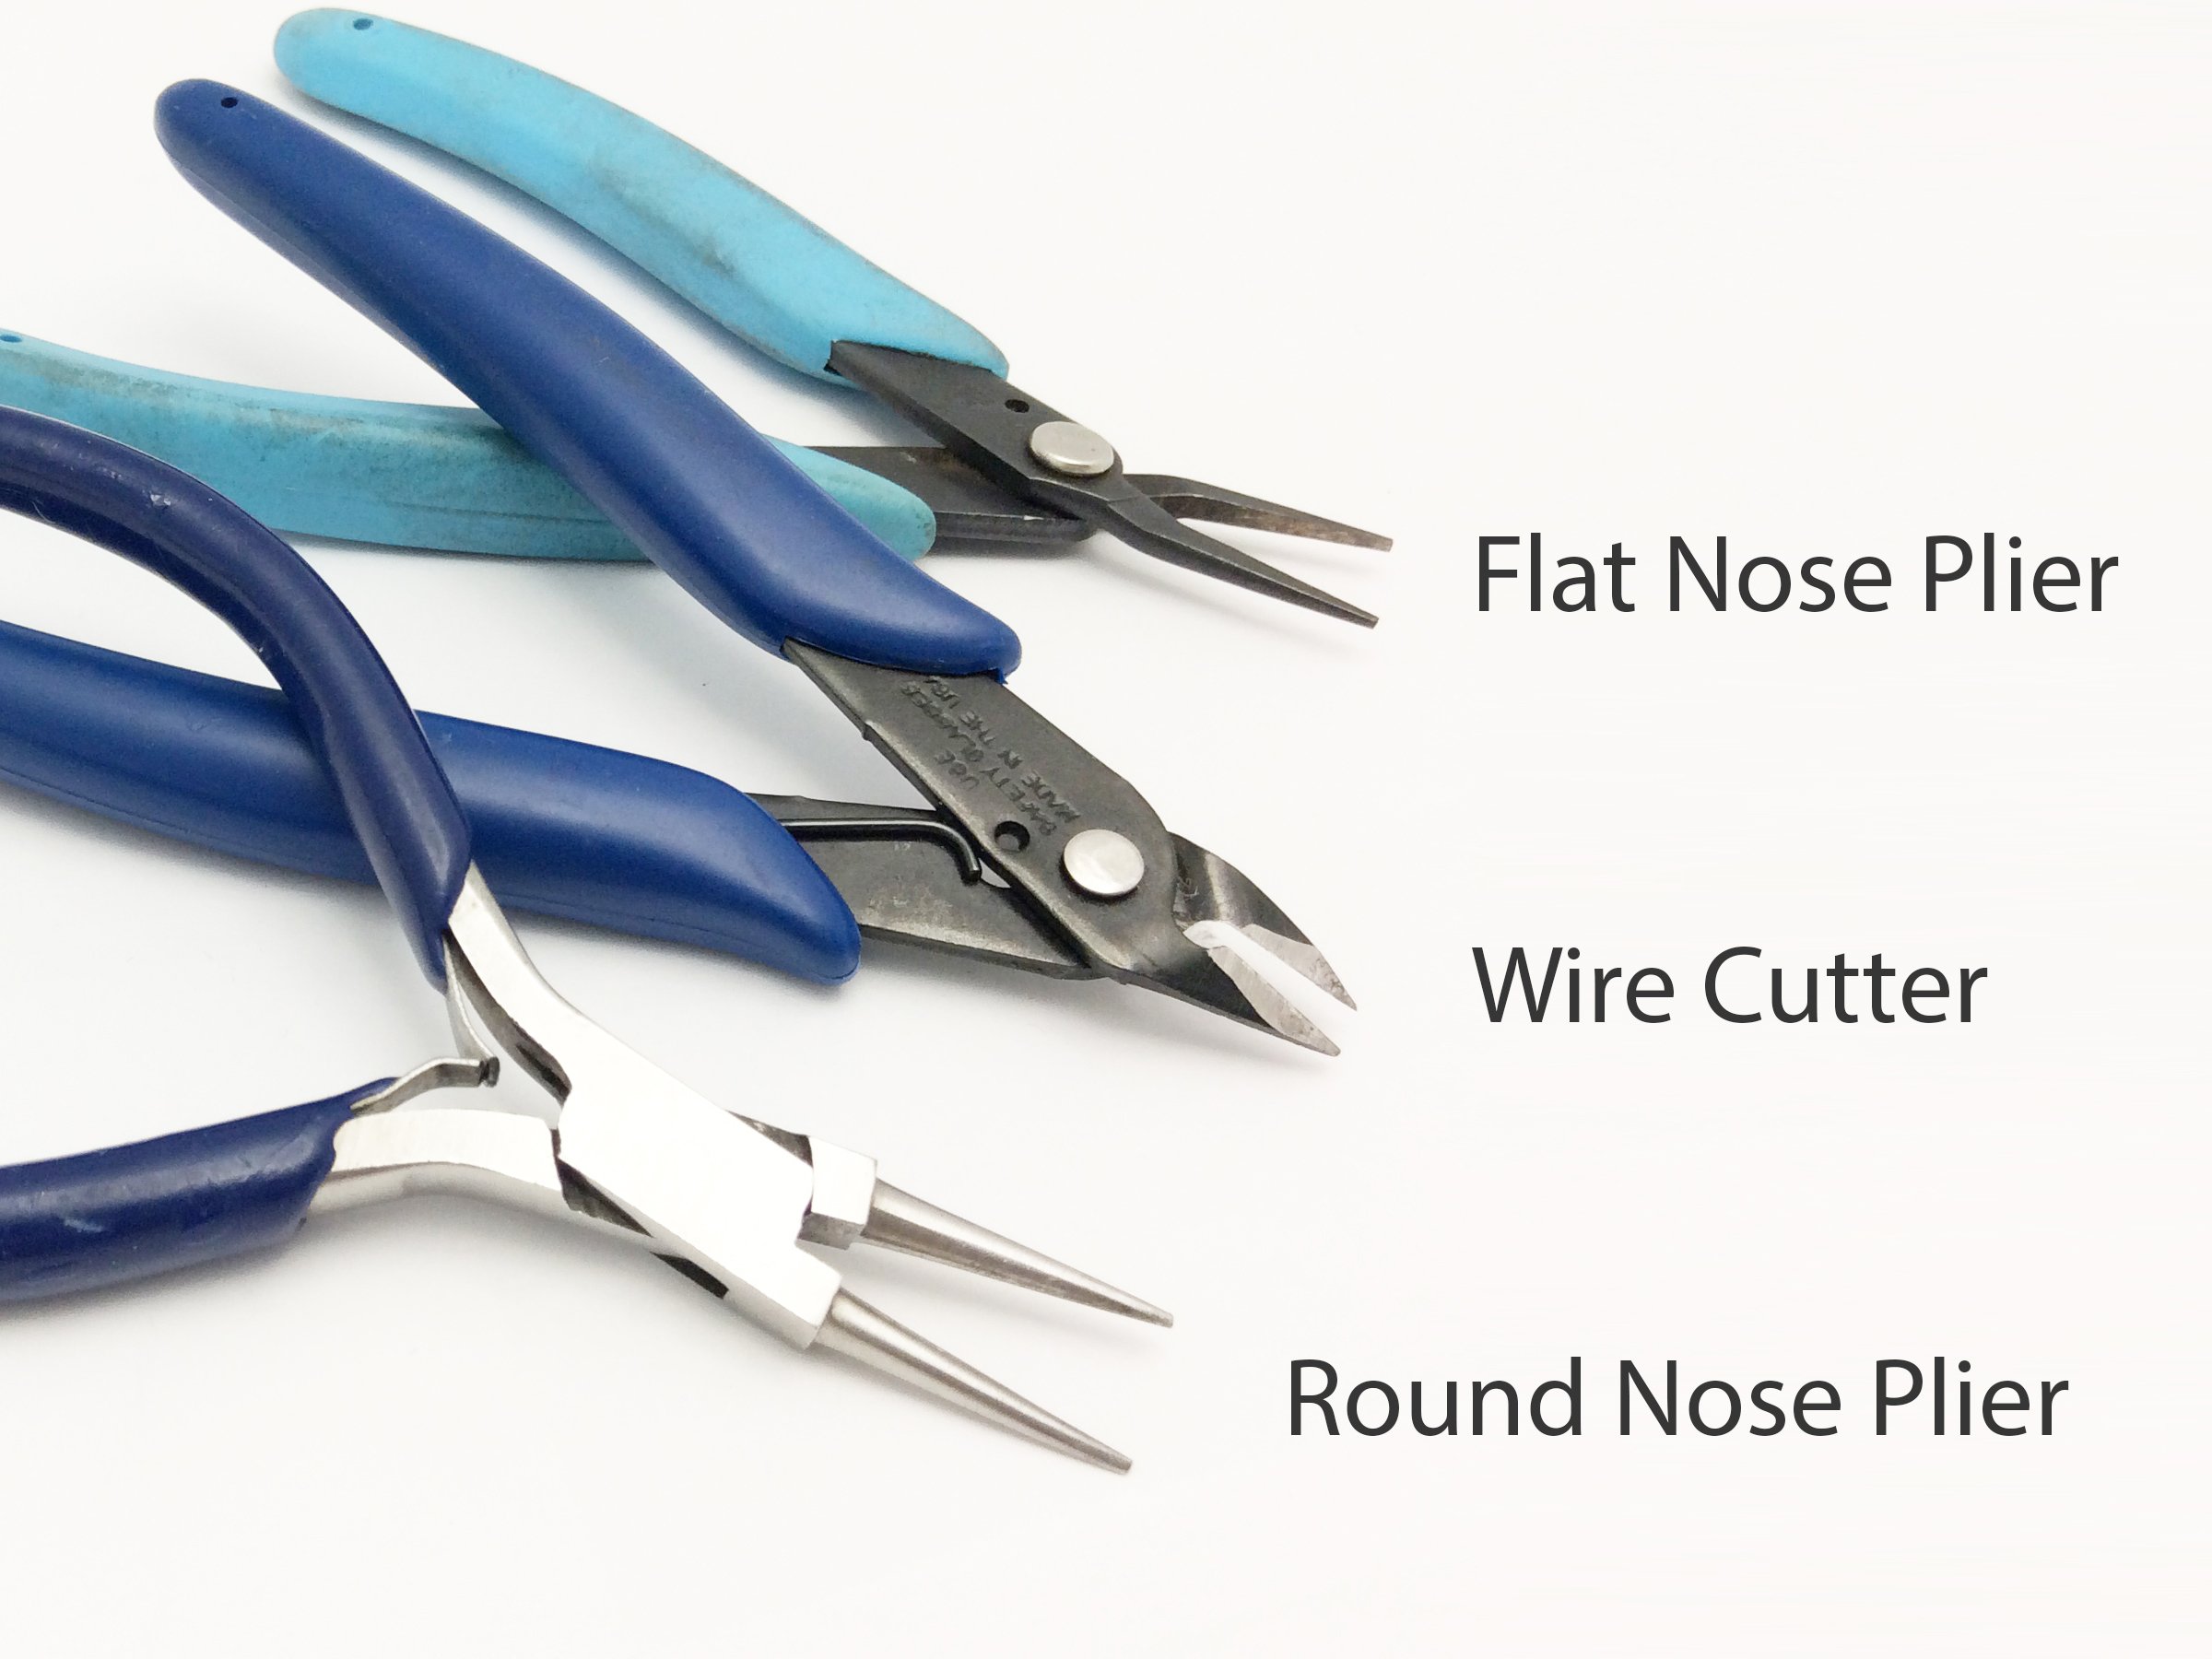
Pliers, are pretty straight forward all purpose tools. The type of pliers that you need depend on the specific type of design. For example, if you are doing wire wrapping chains, you will need a round nose and a flat nose. If you want to read more on wire wrapping, we have other dedicated guides for them here. When you visit GemPacked, we can guide you toward the ones that will best suit your needs and budget.
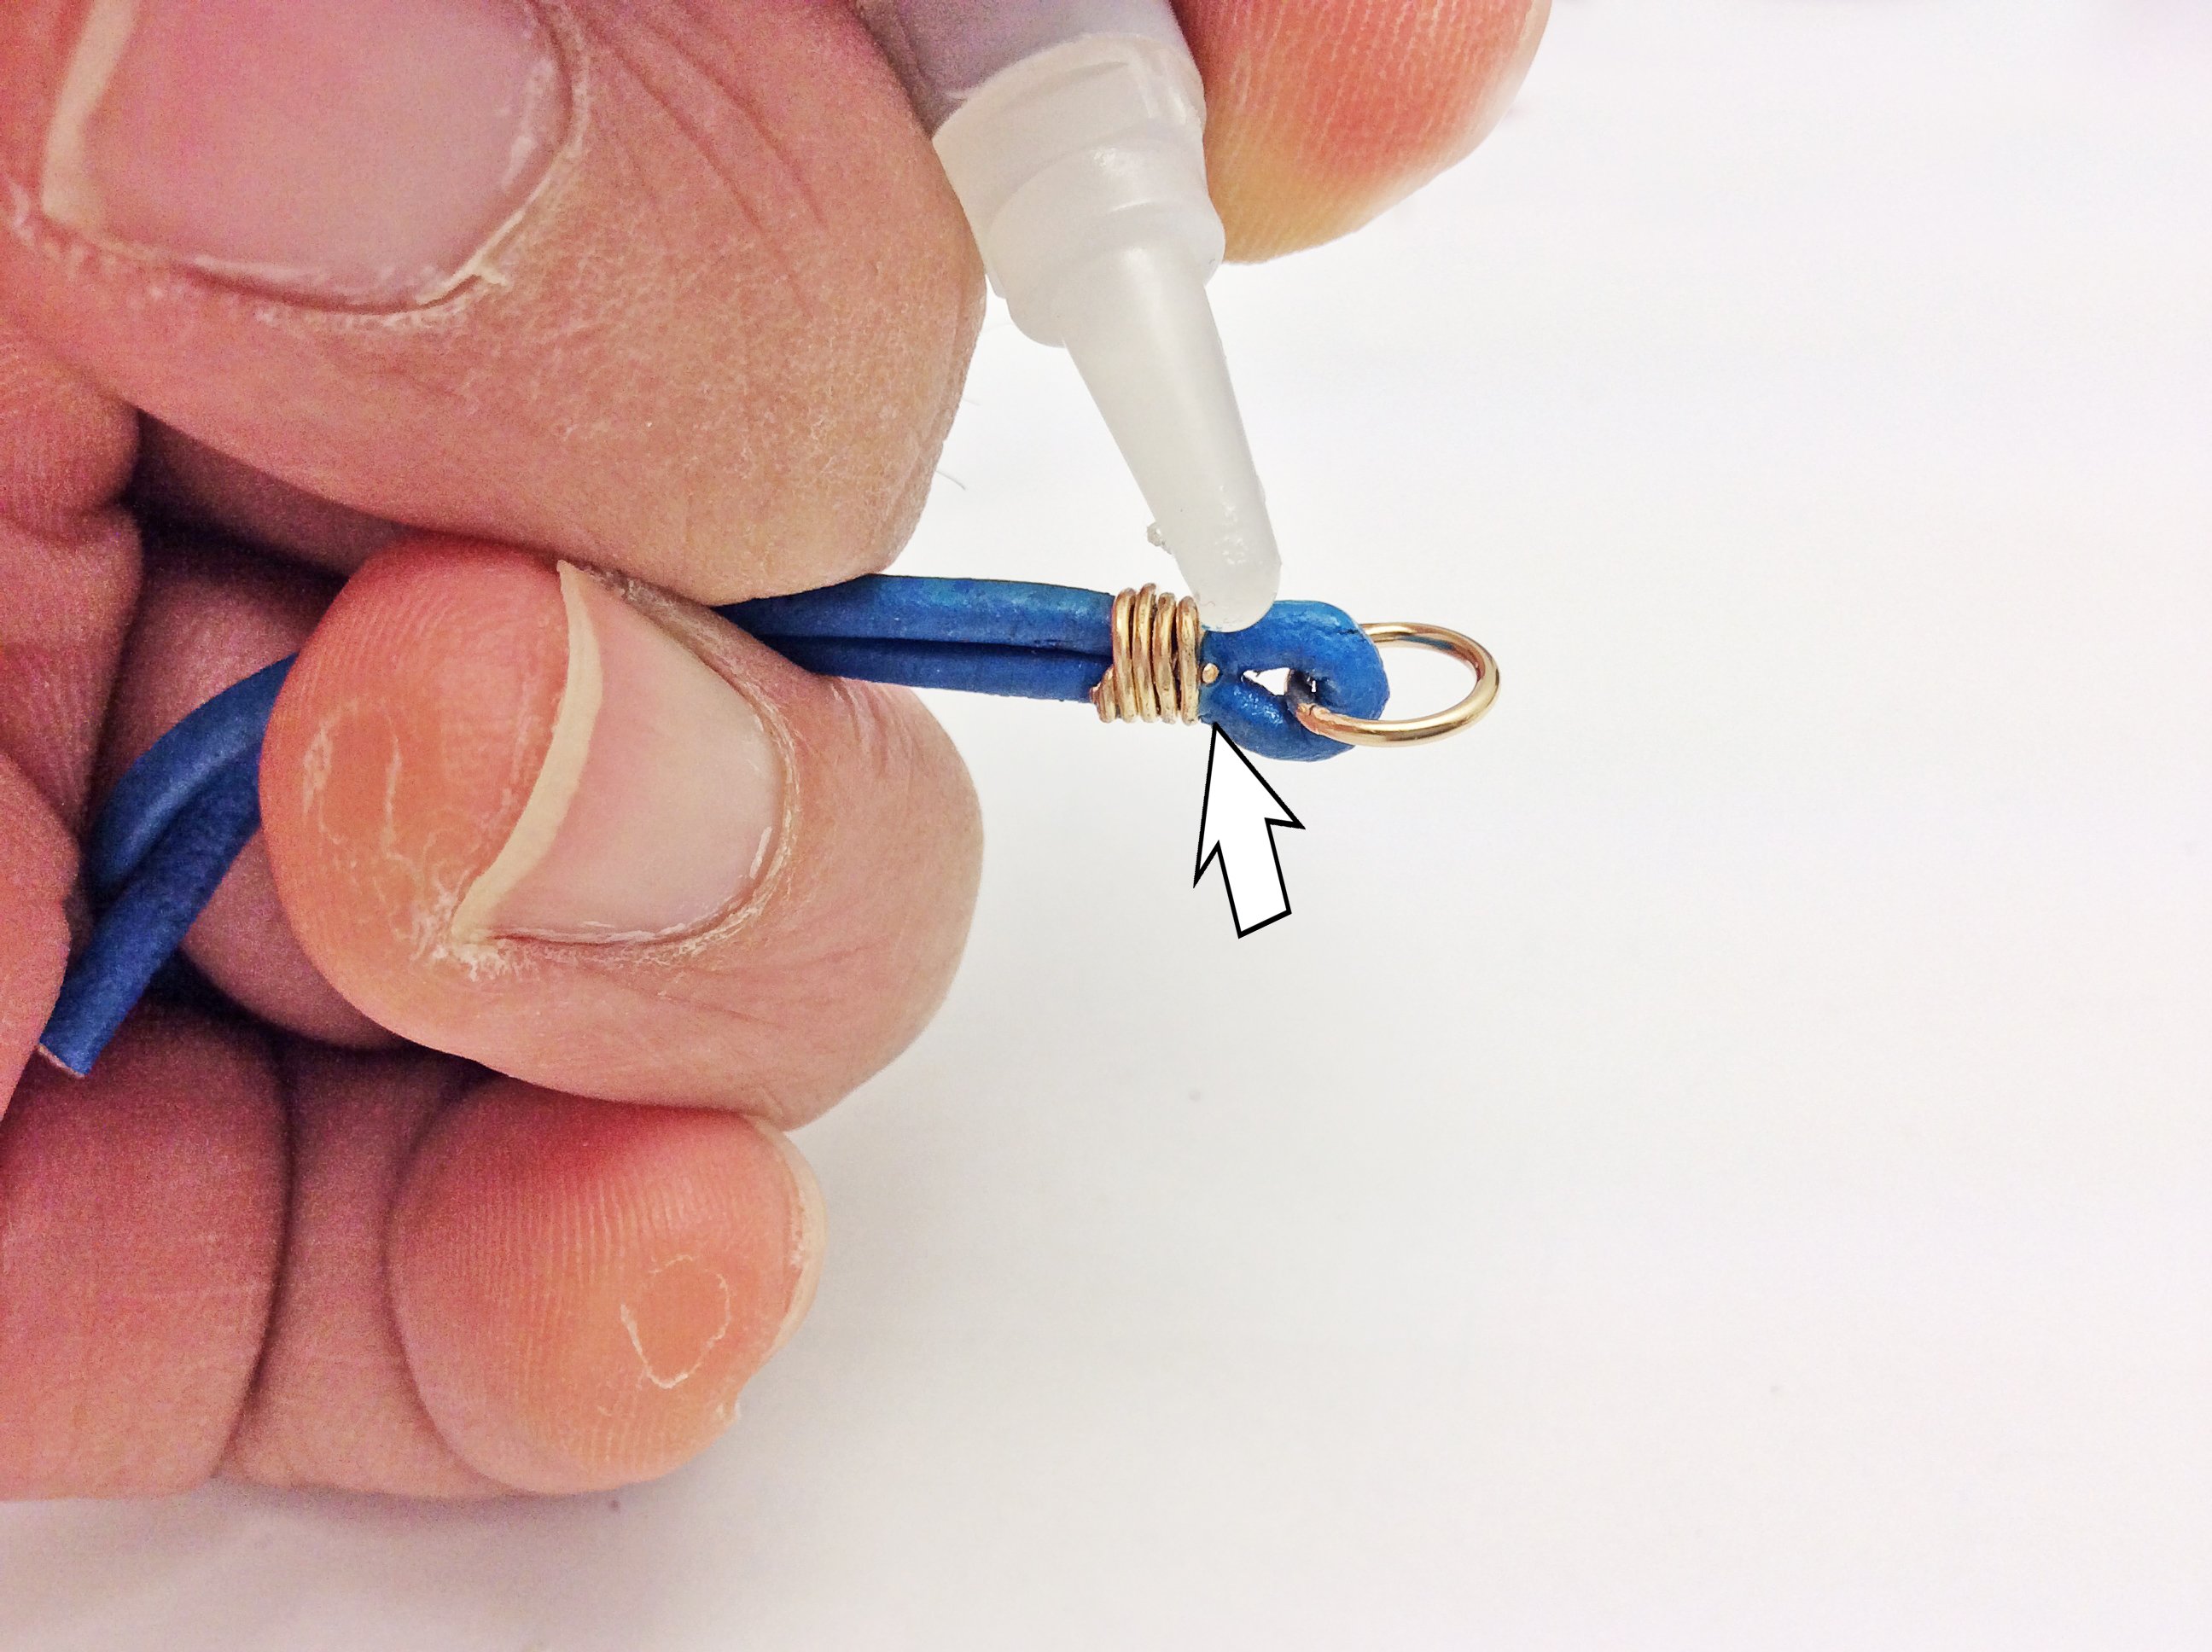
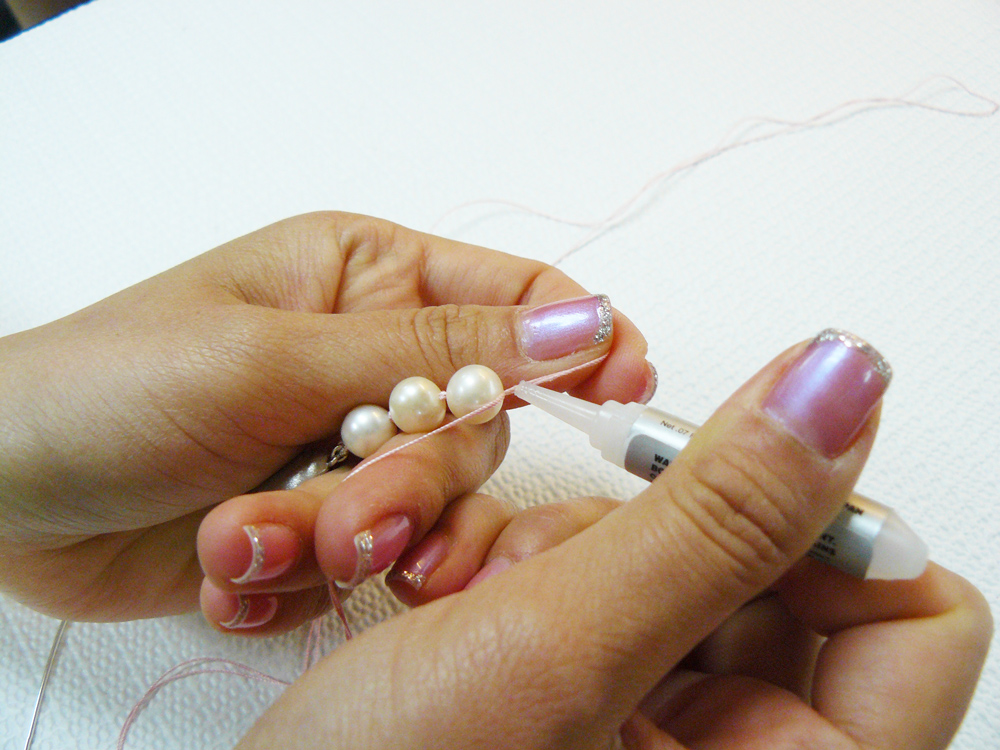
Super glue is essential for stringing jobs and can be a lifesaver when doing minor repairs. Super glue generally dries clear and sets within around 1 minute, but can cause problems if not applied properly. For example, if you use too much on thread or leather, it may dry cloudy and white or make the area brittle. Anyone who has made jewelry can also relate to having their fingers stuck together (hint: acetone or nail polish remover works wonders). Experience is key so you end up using the right amount, and only in the places that you need it.
Jewelry making is all about proportions, so measuring tape is absolutely essential. You need to keep track of spacing, and ensure that the final lengths of your pieces come out as you envisioned. Good numbers to remember are that standard lengths necklaces for women are around 16-18 inches, and bracelets are usually 6.75 to 7.5 inches.
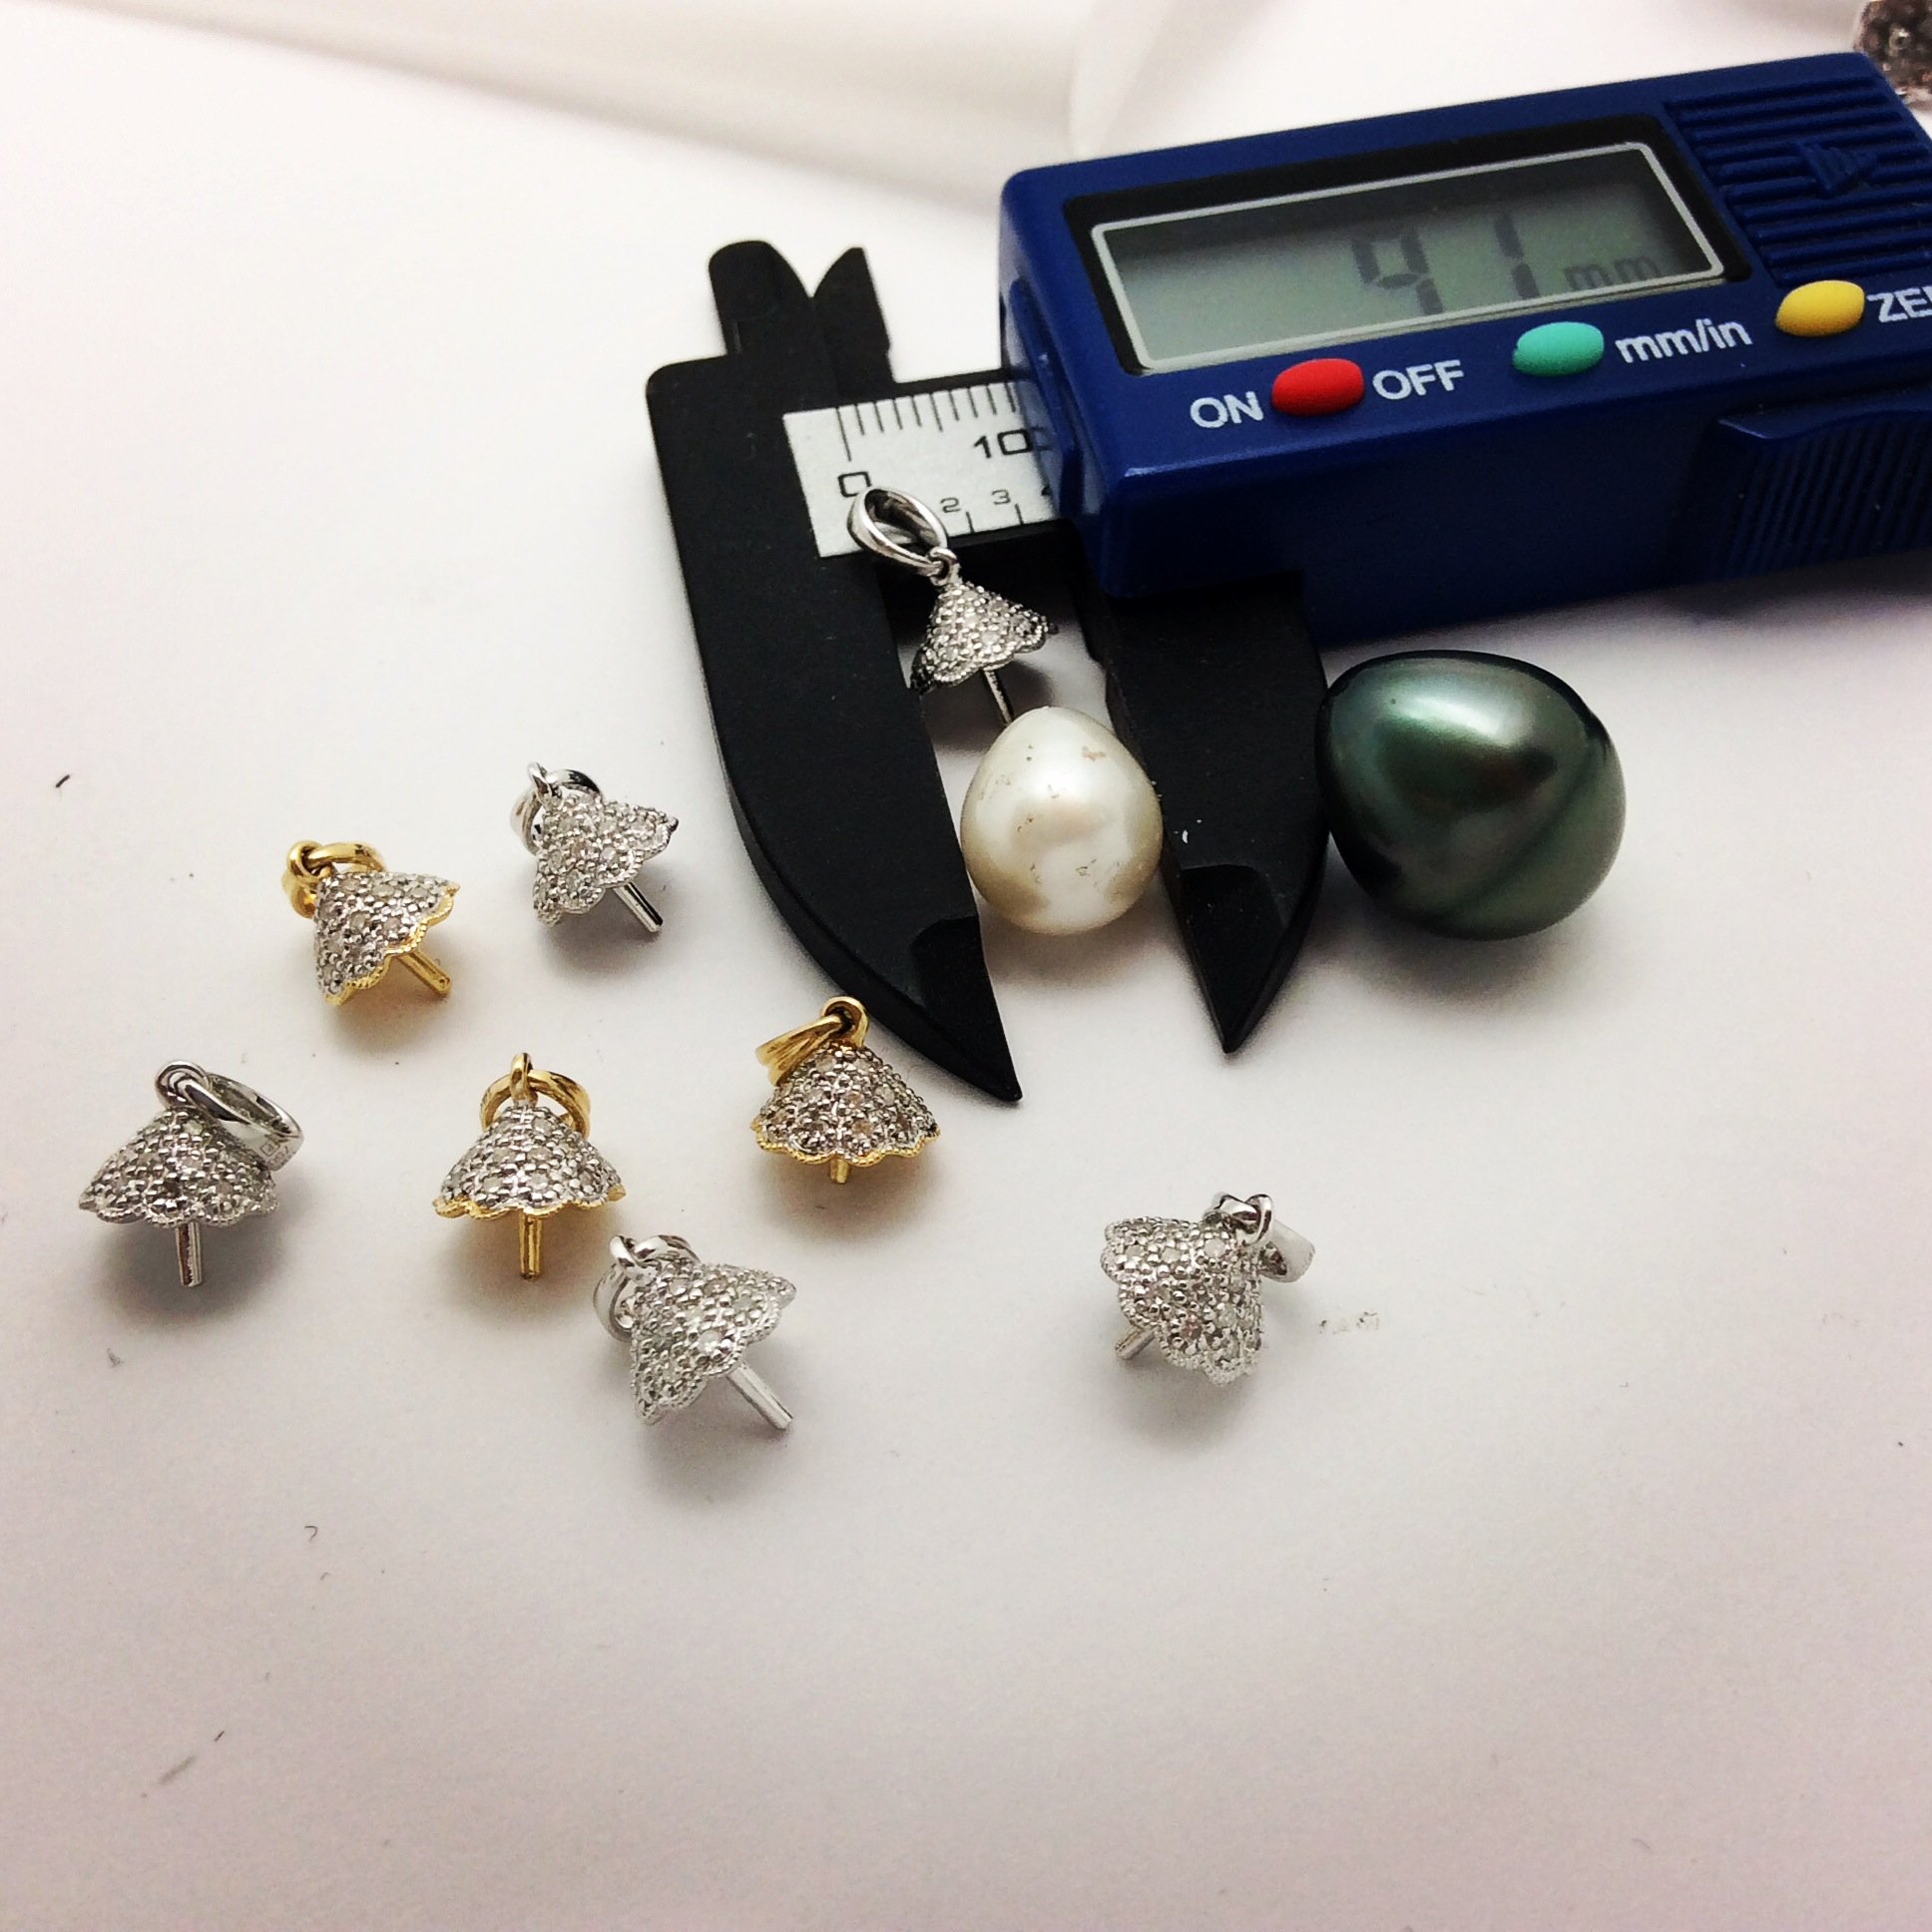
We use measuring tape for finished pieces, but calipers are best for measuring the dimensions of individual parts. Calipers are either digital or analog, and usually measure in millimeters, or inches. These are great for reordering the parts you need like jump rings or beads.
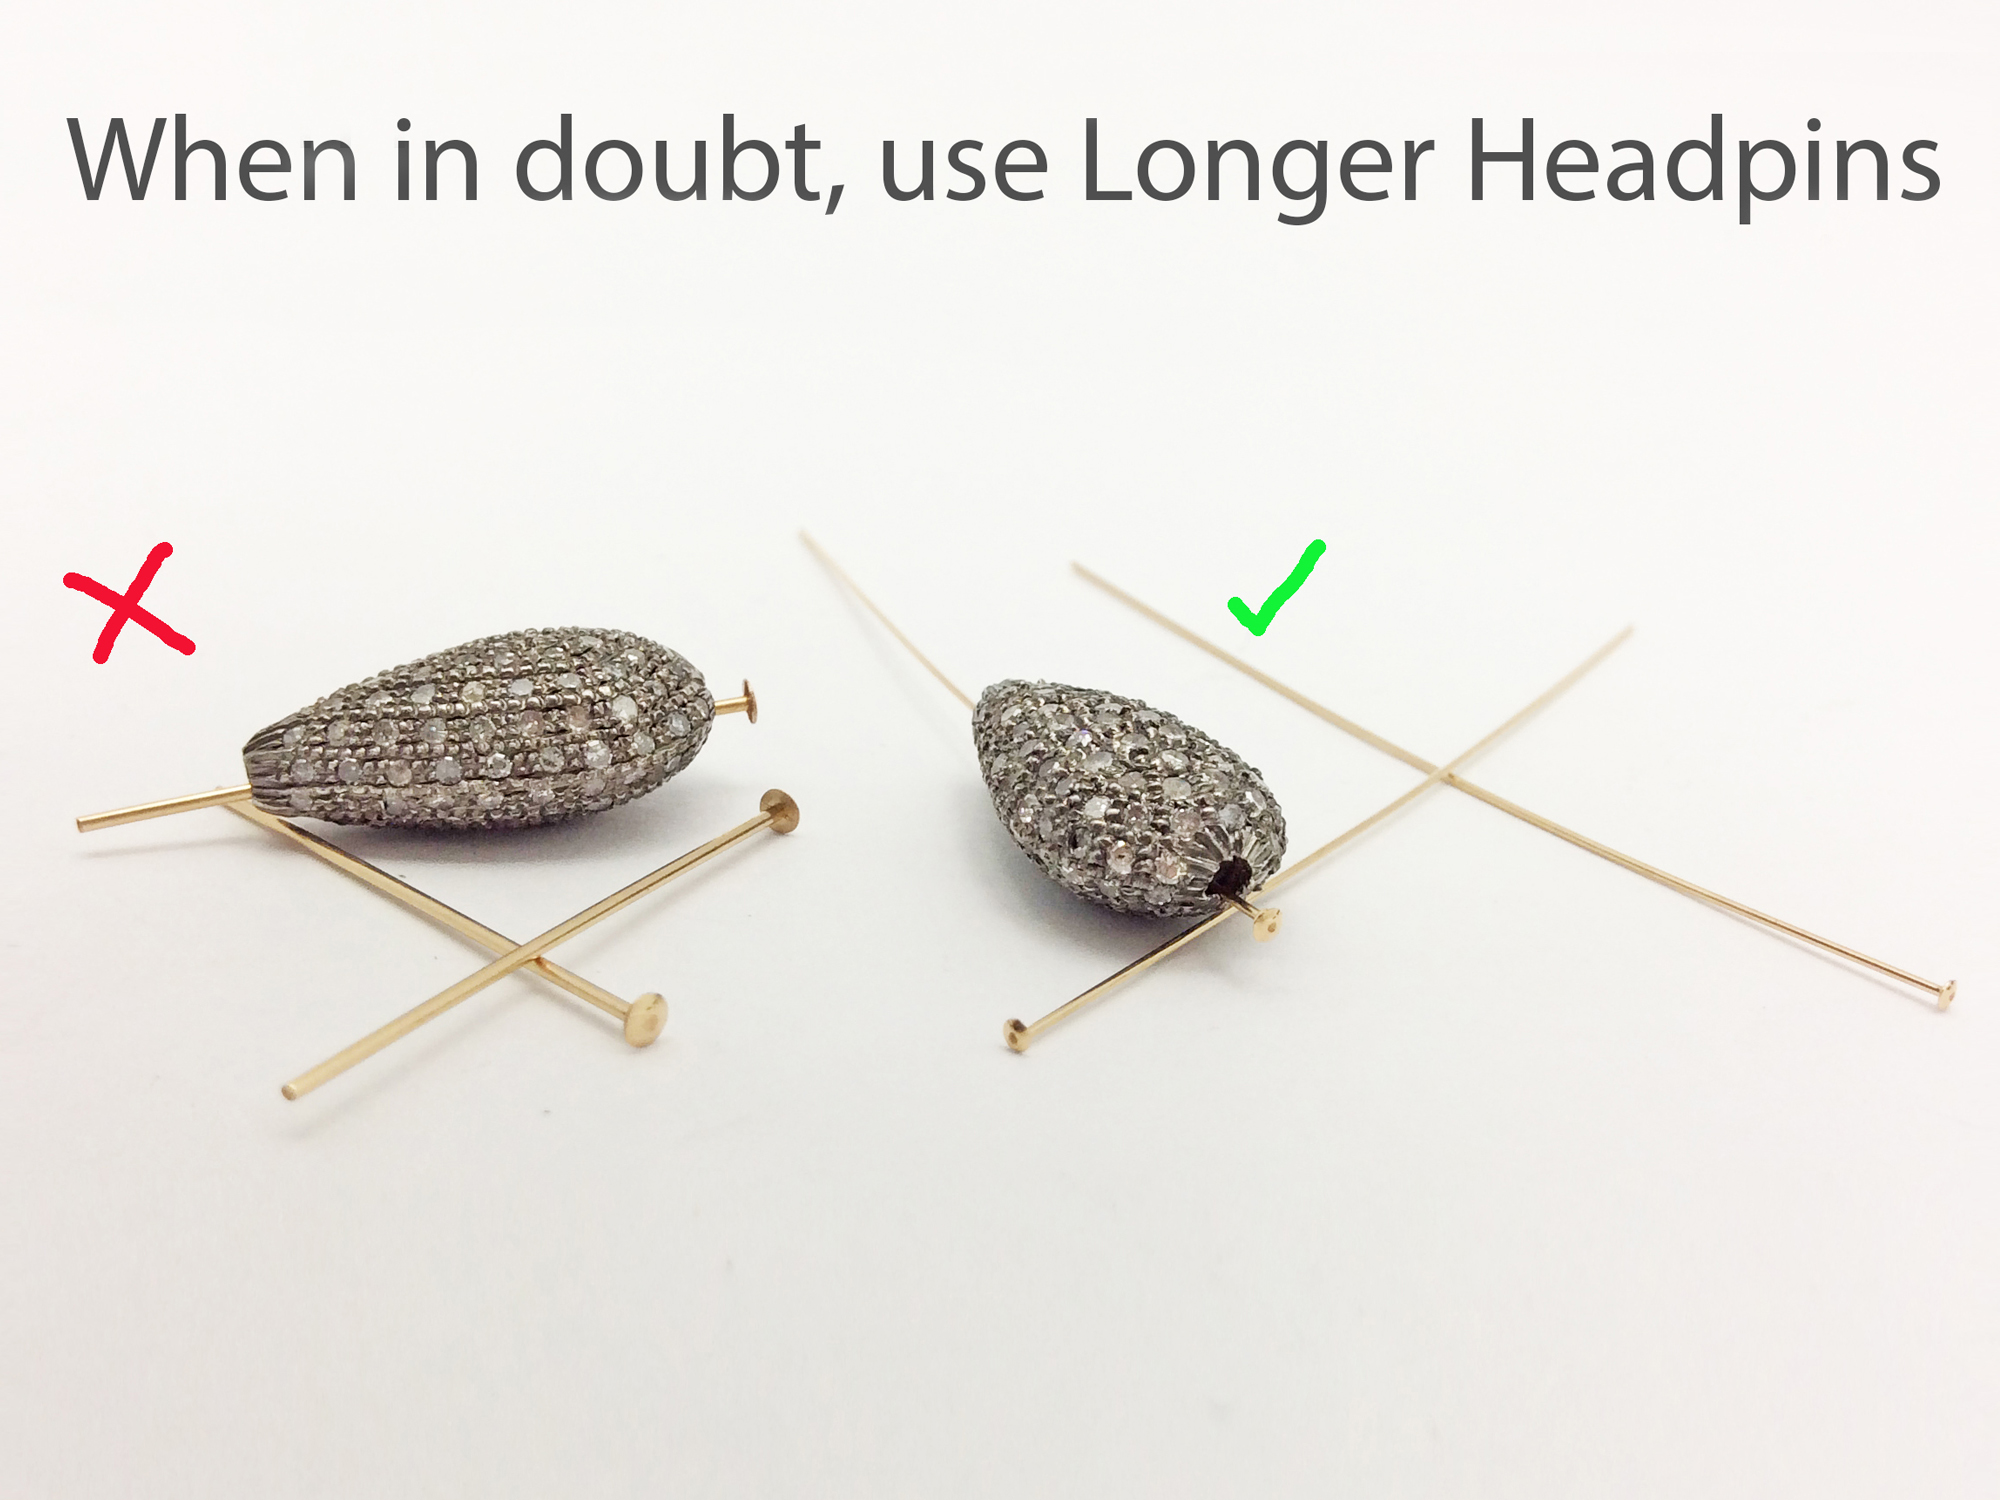
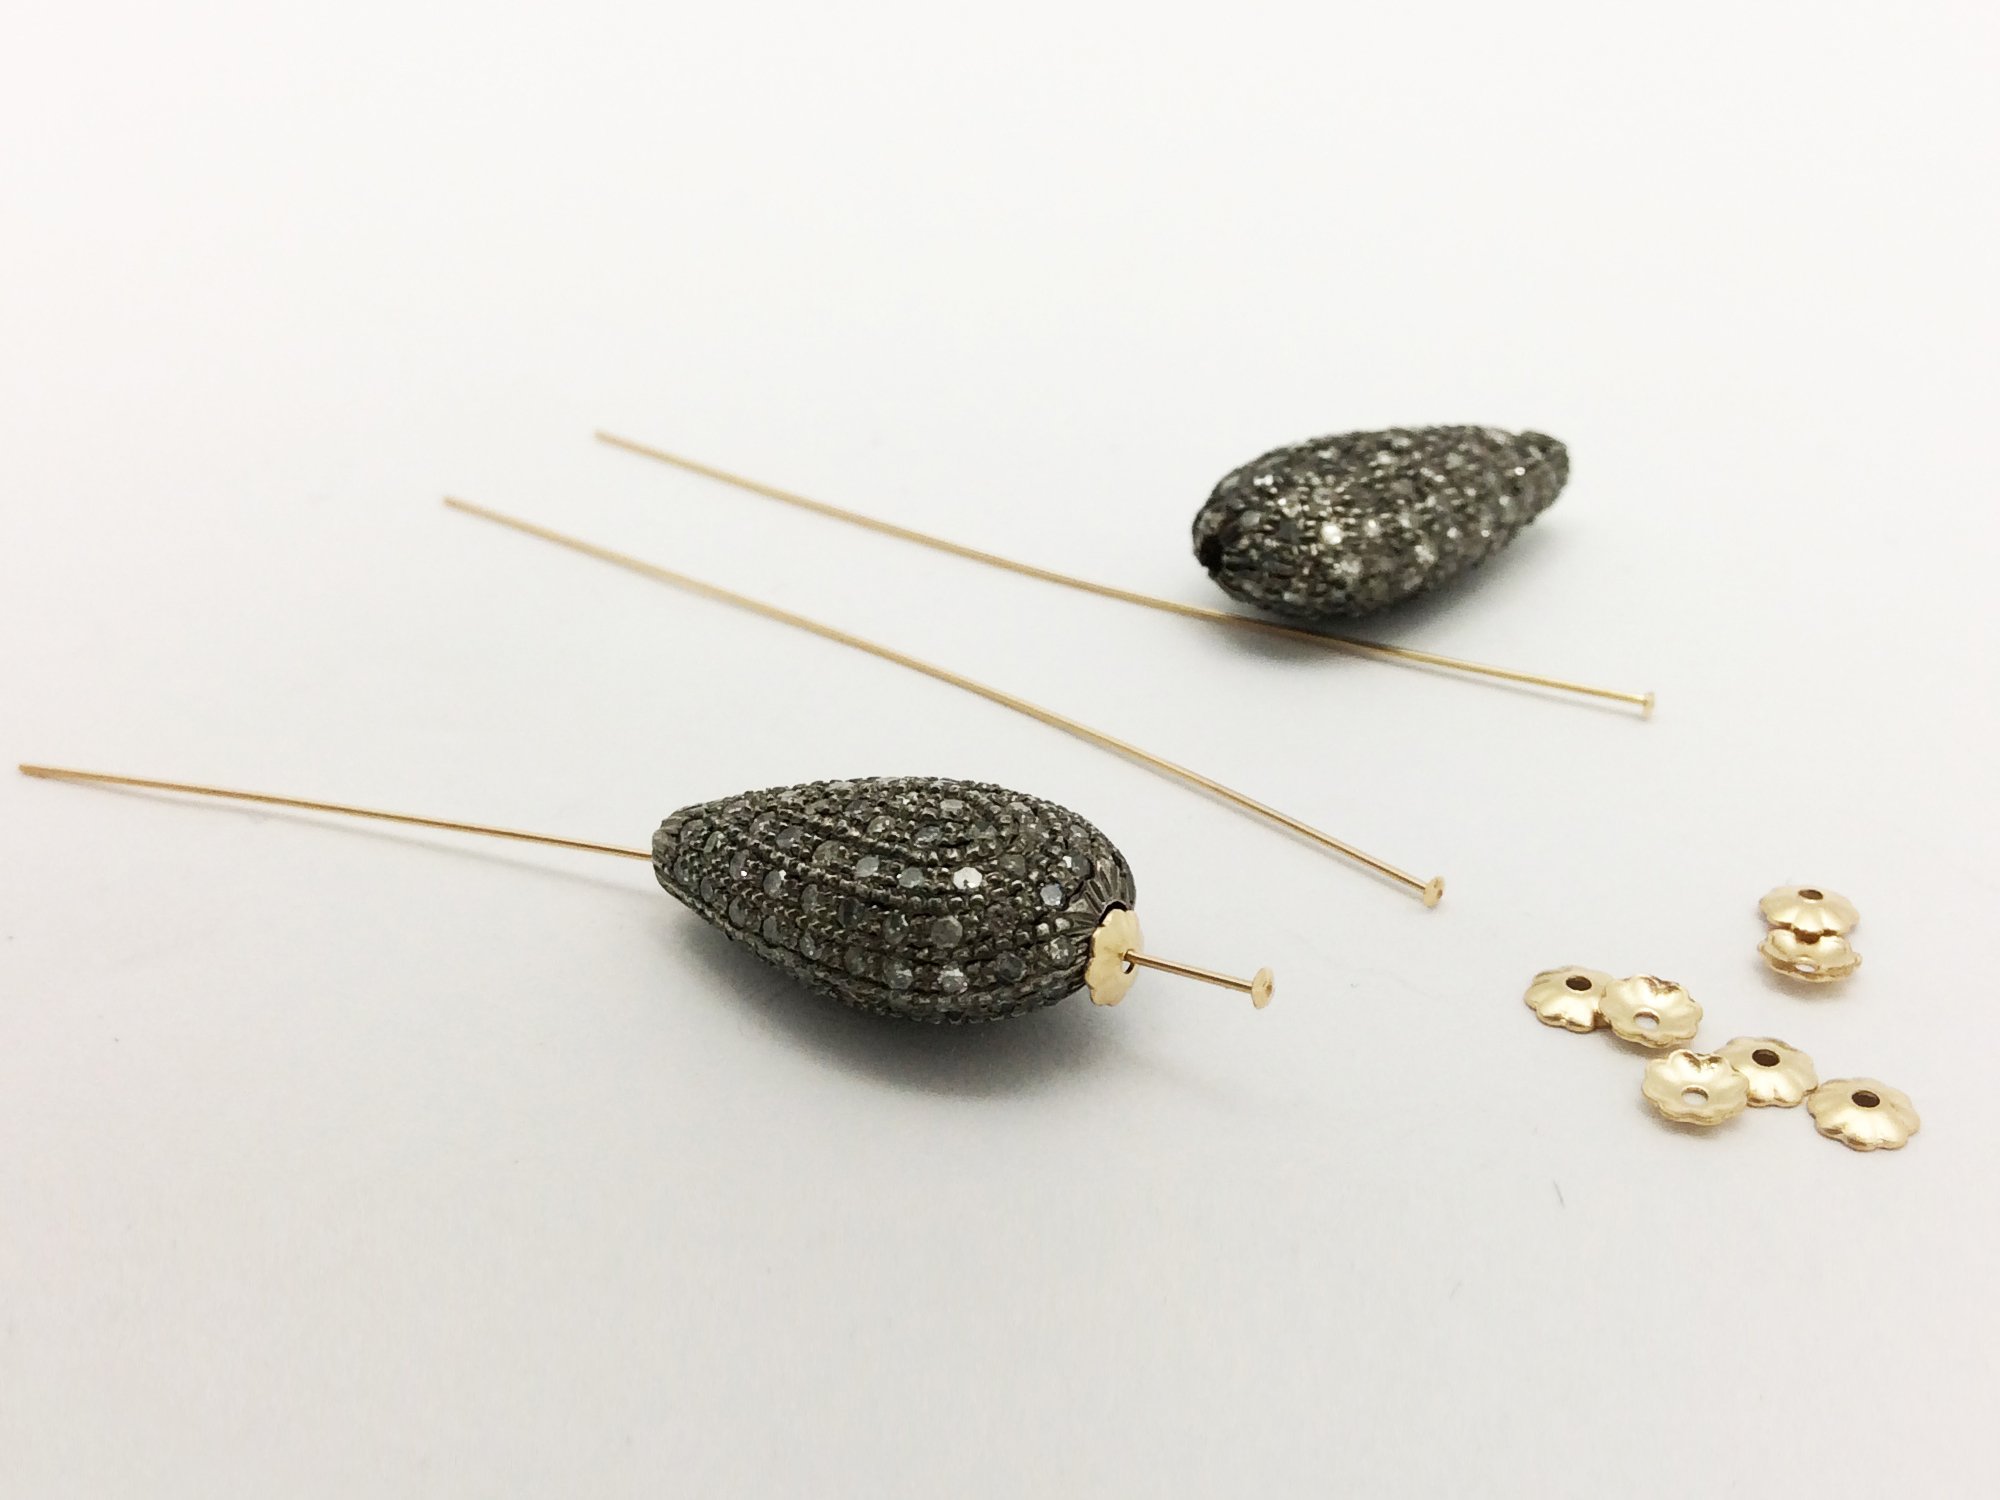
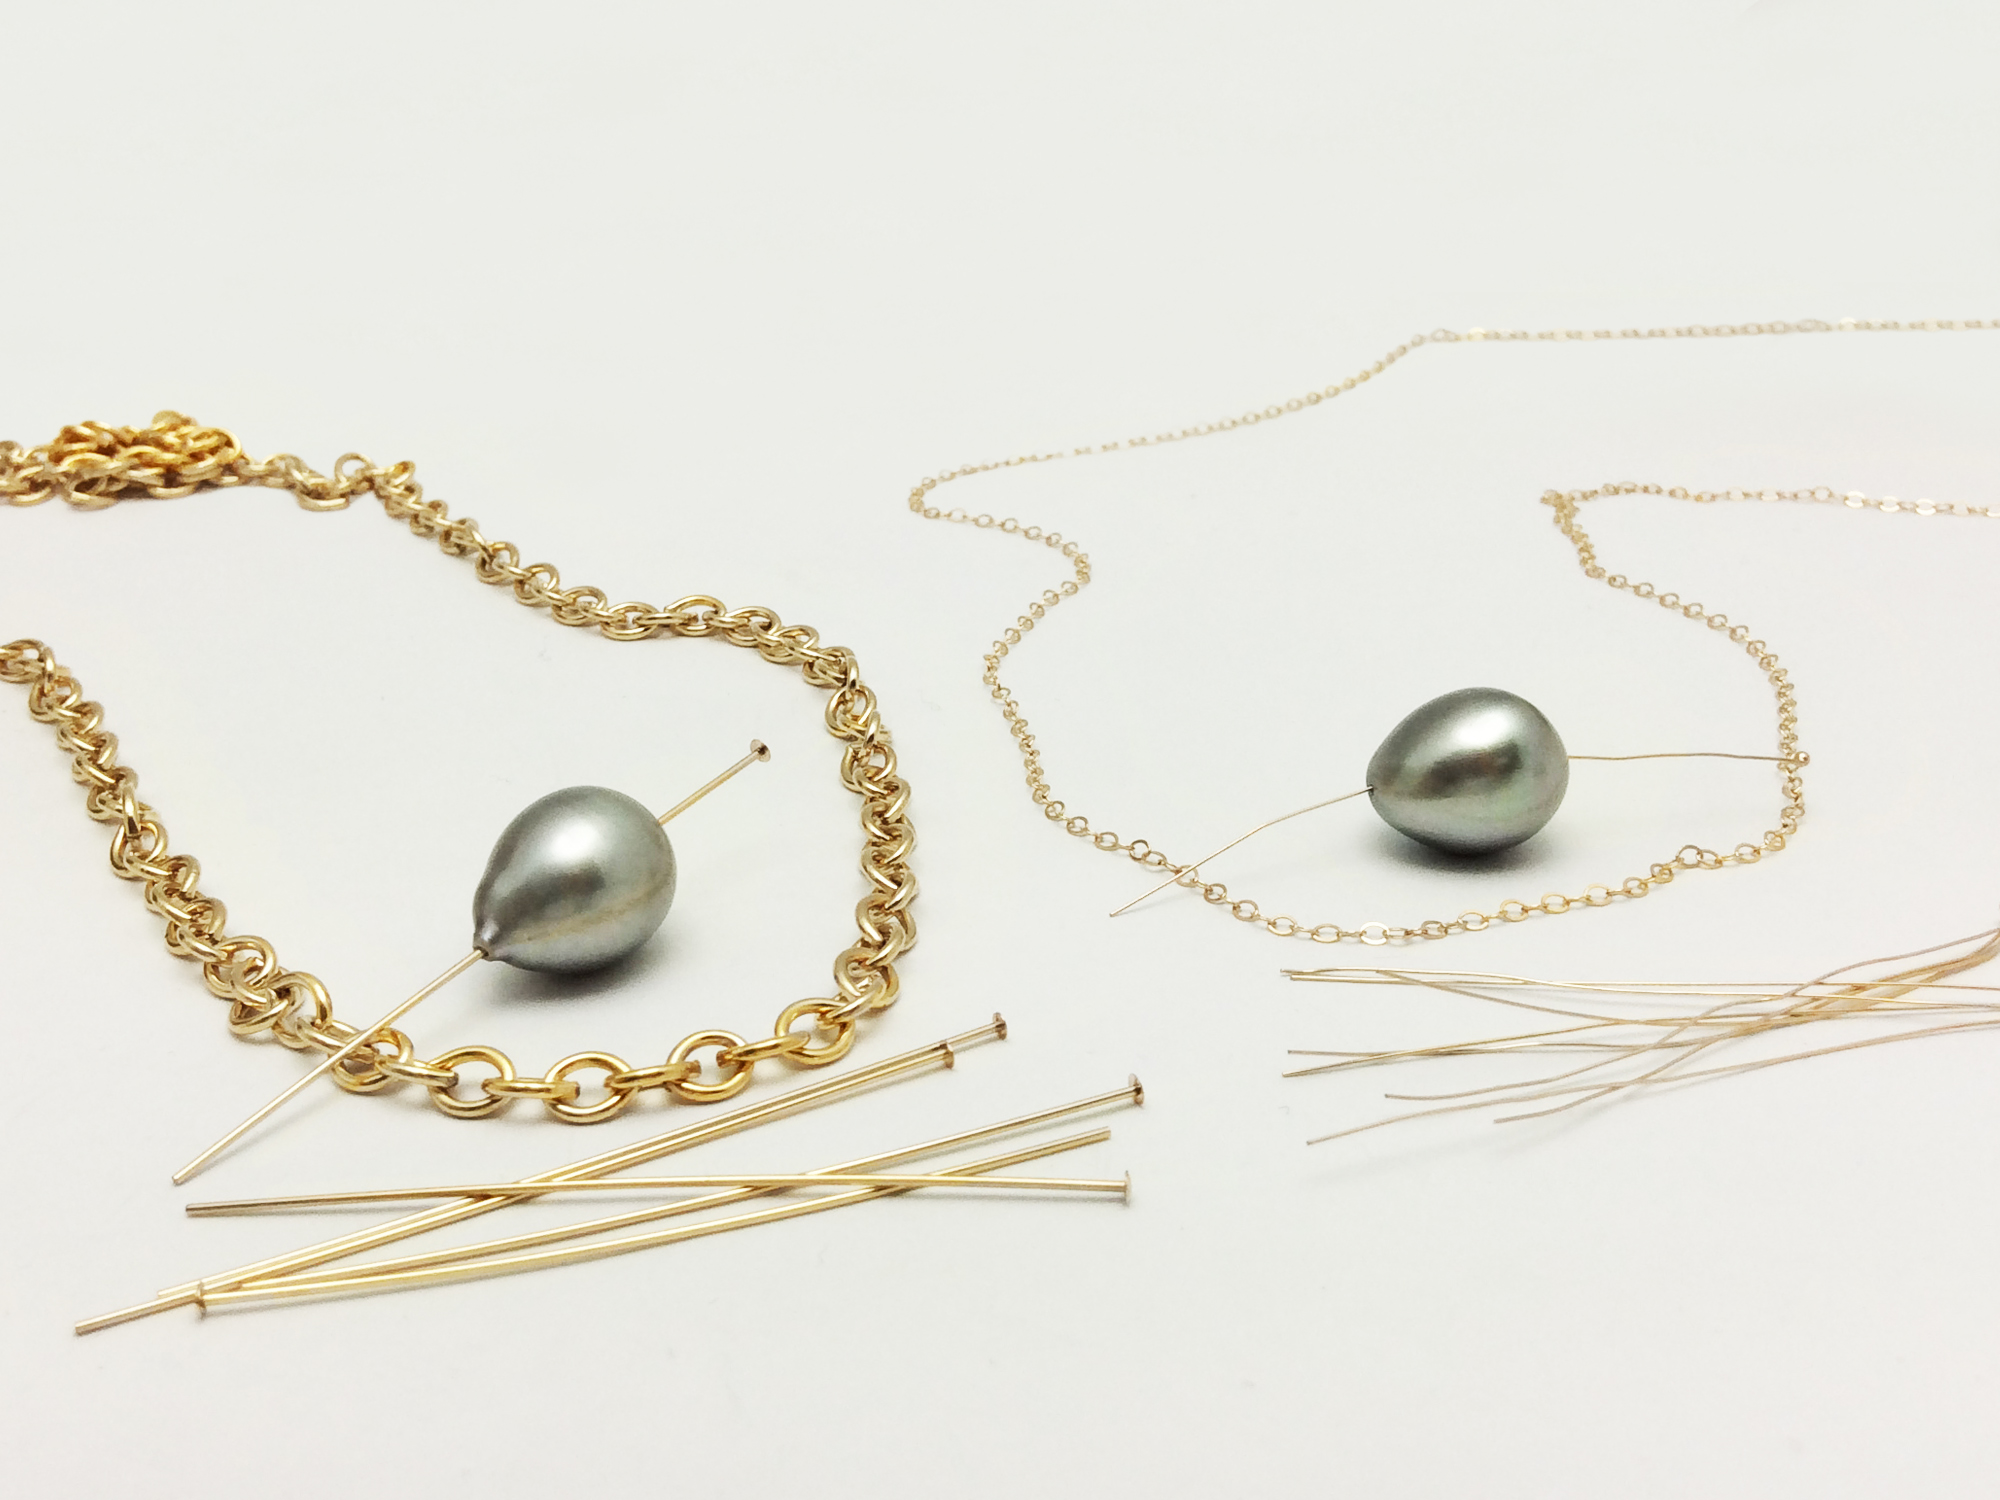
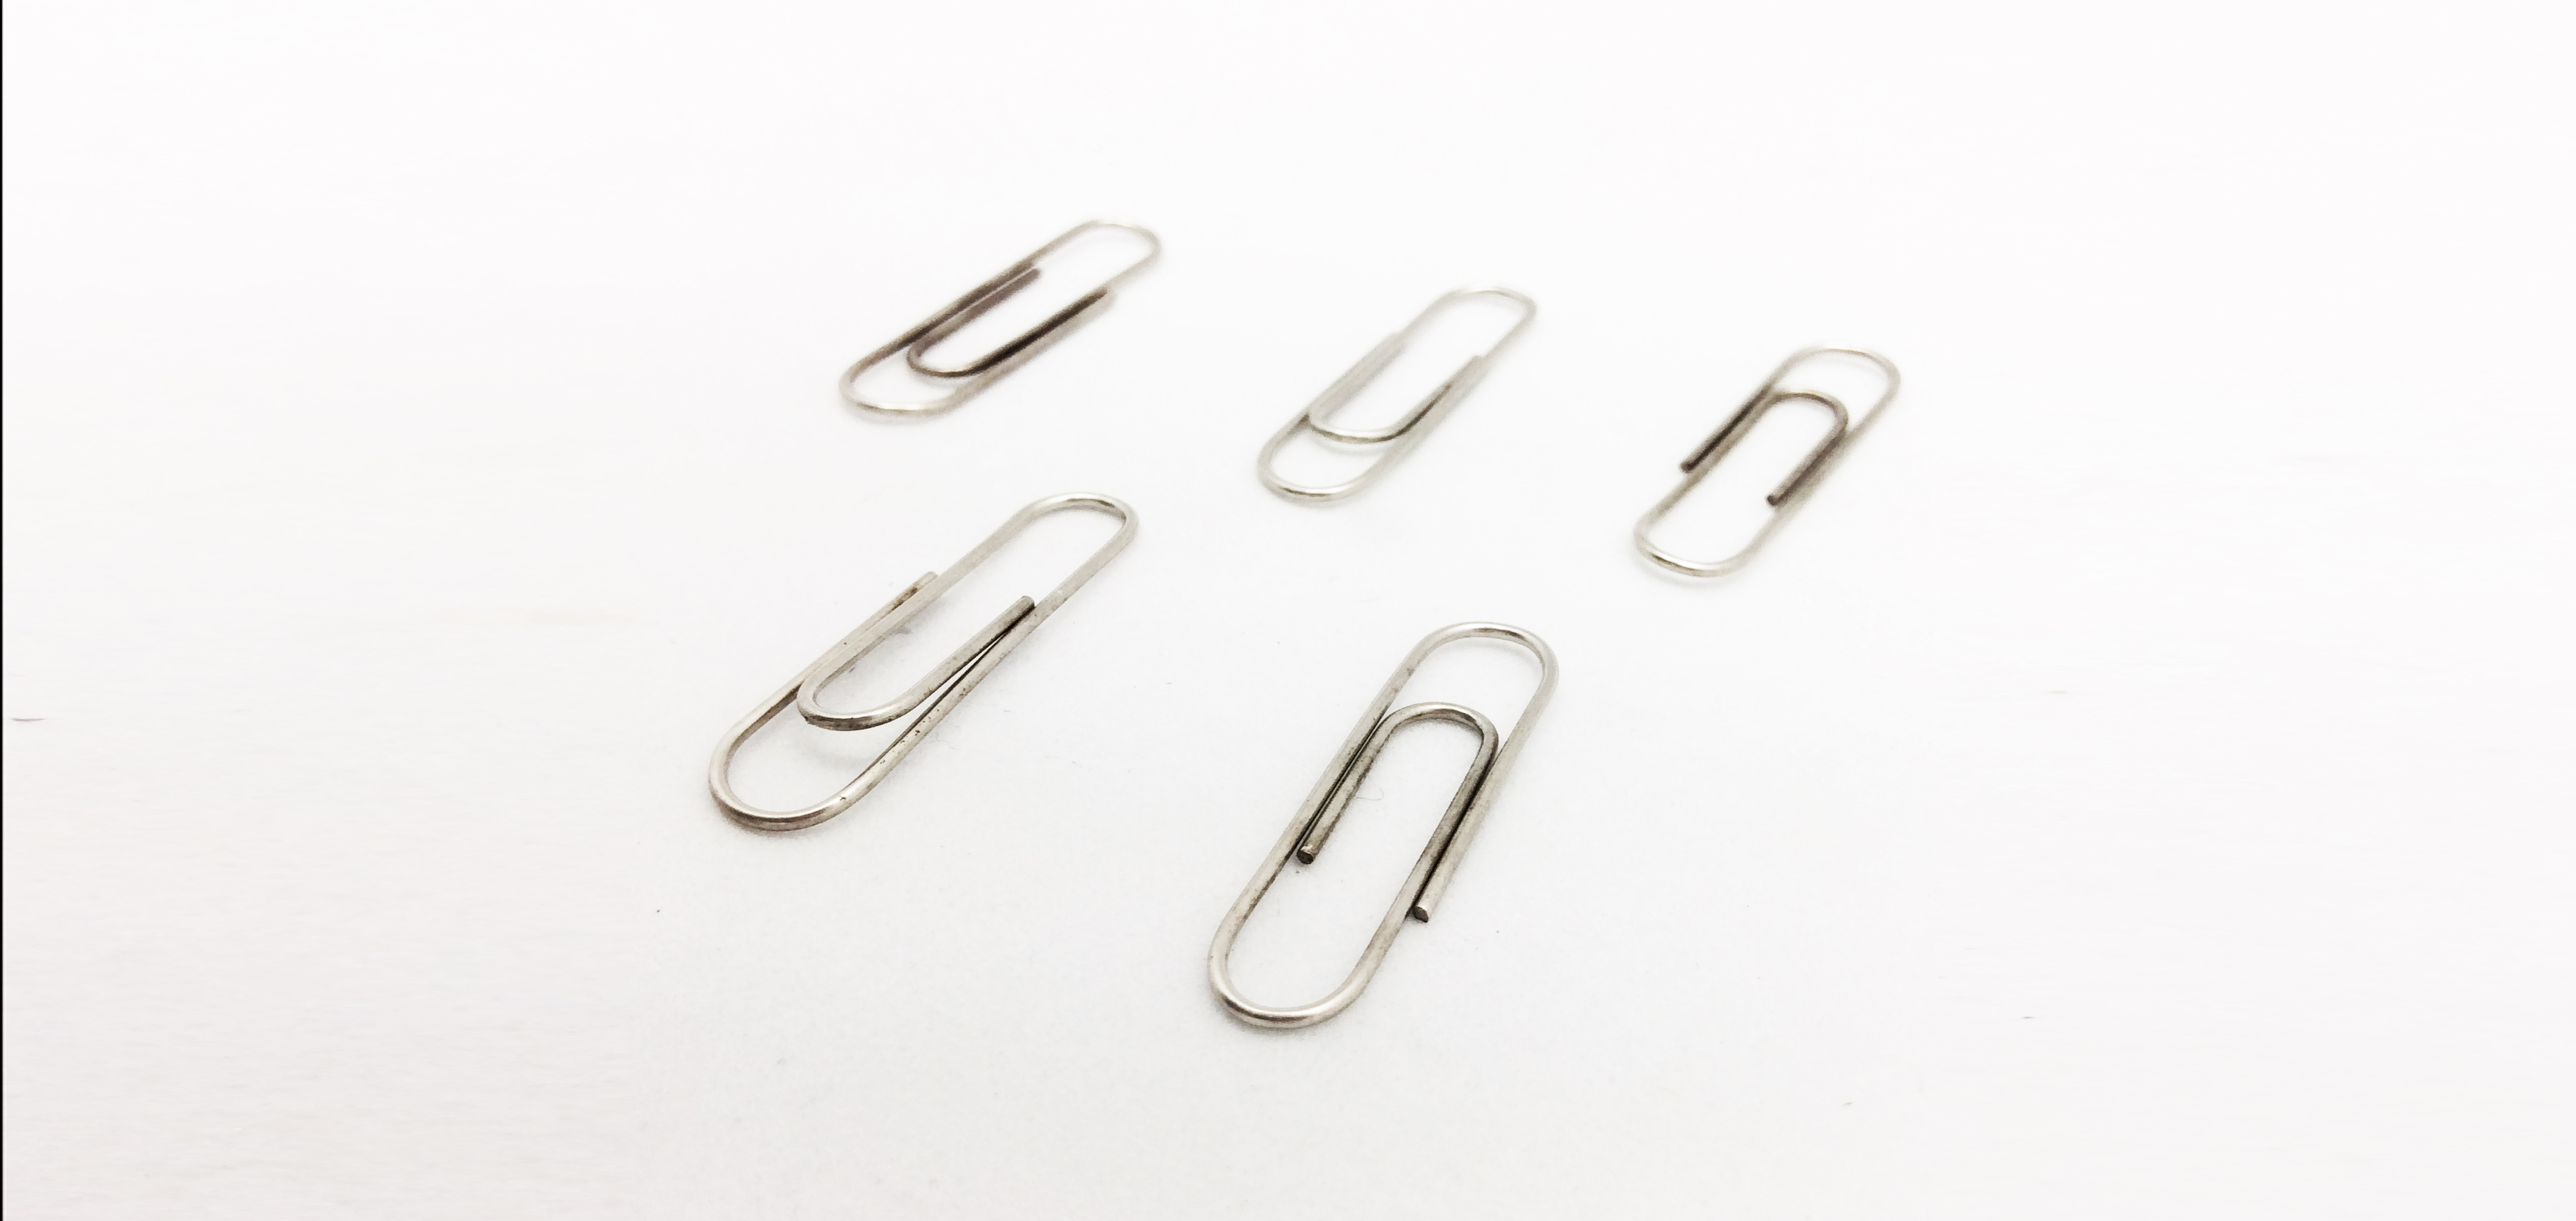
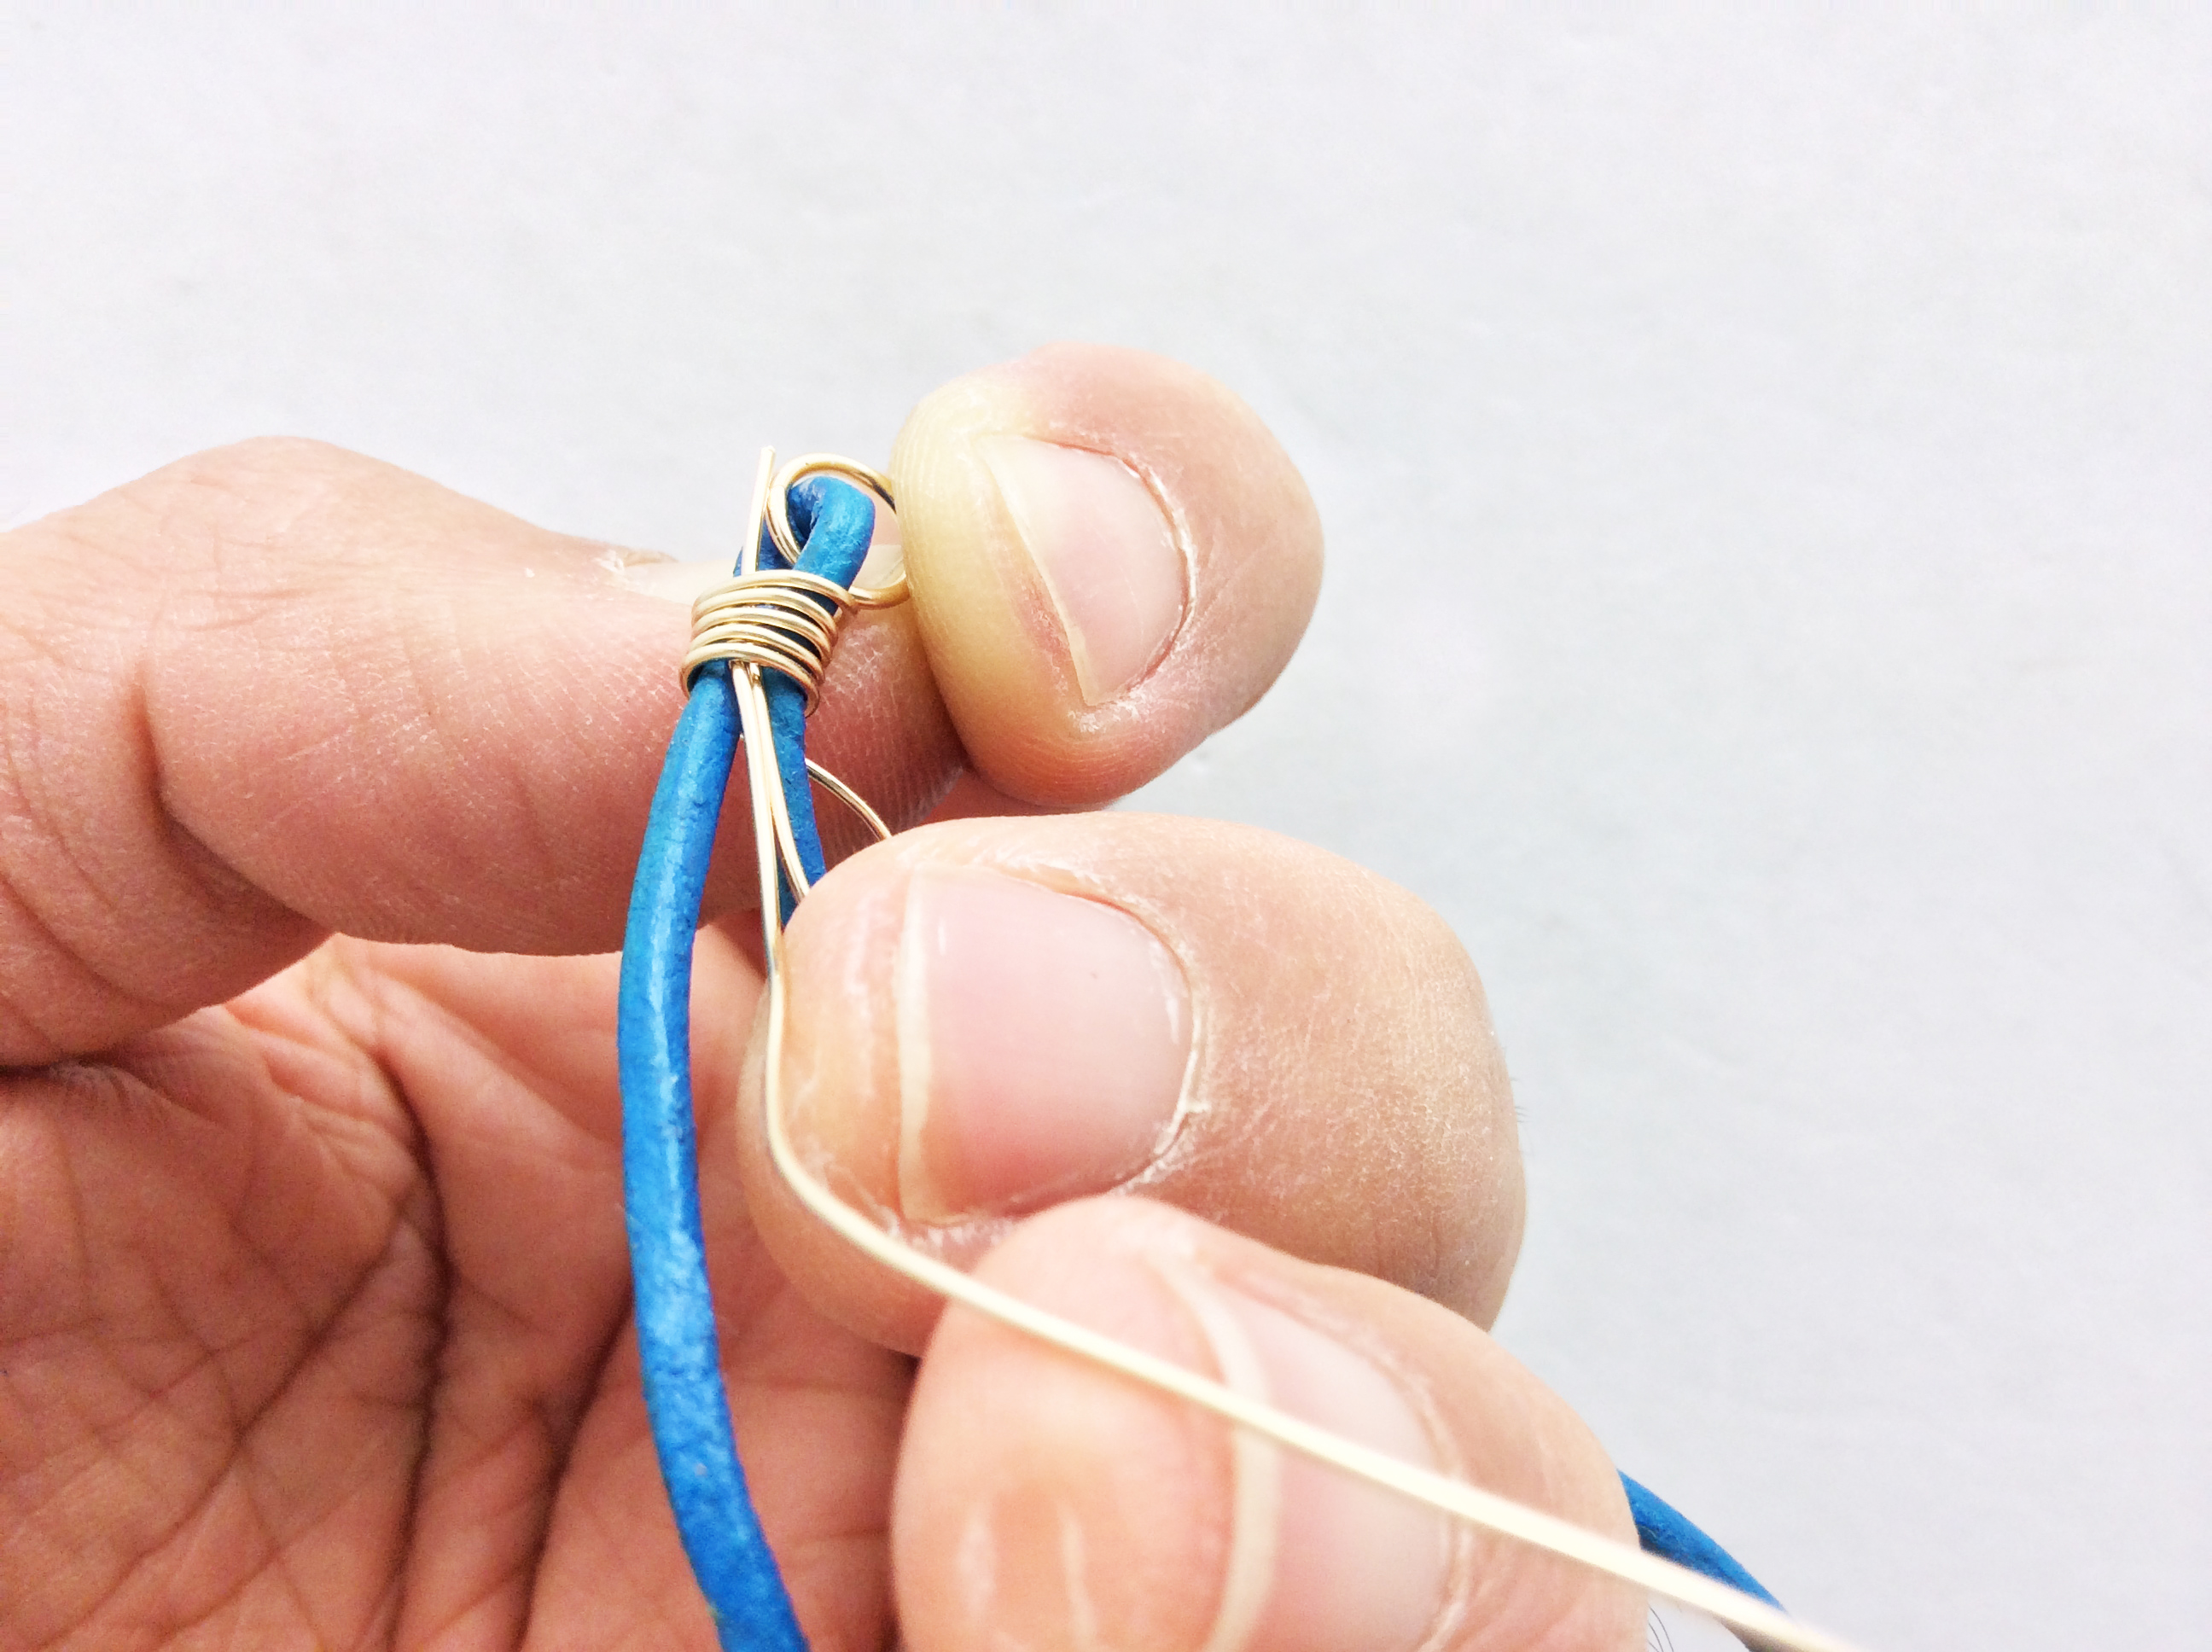
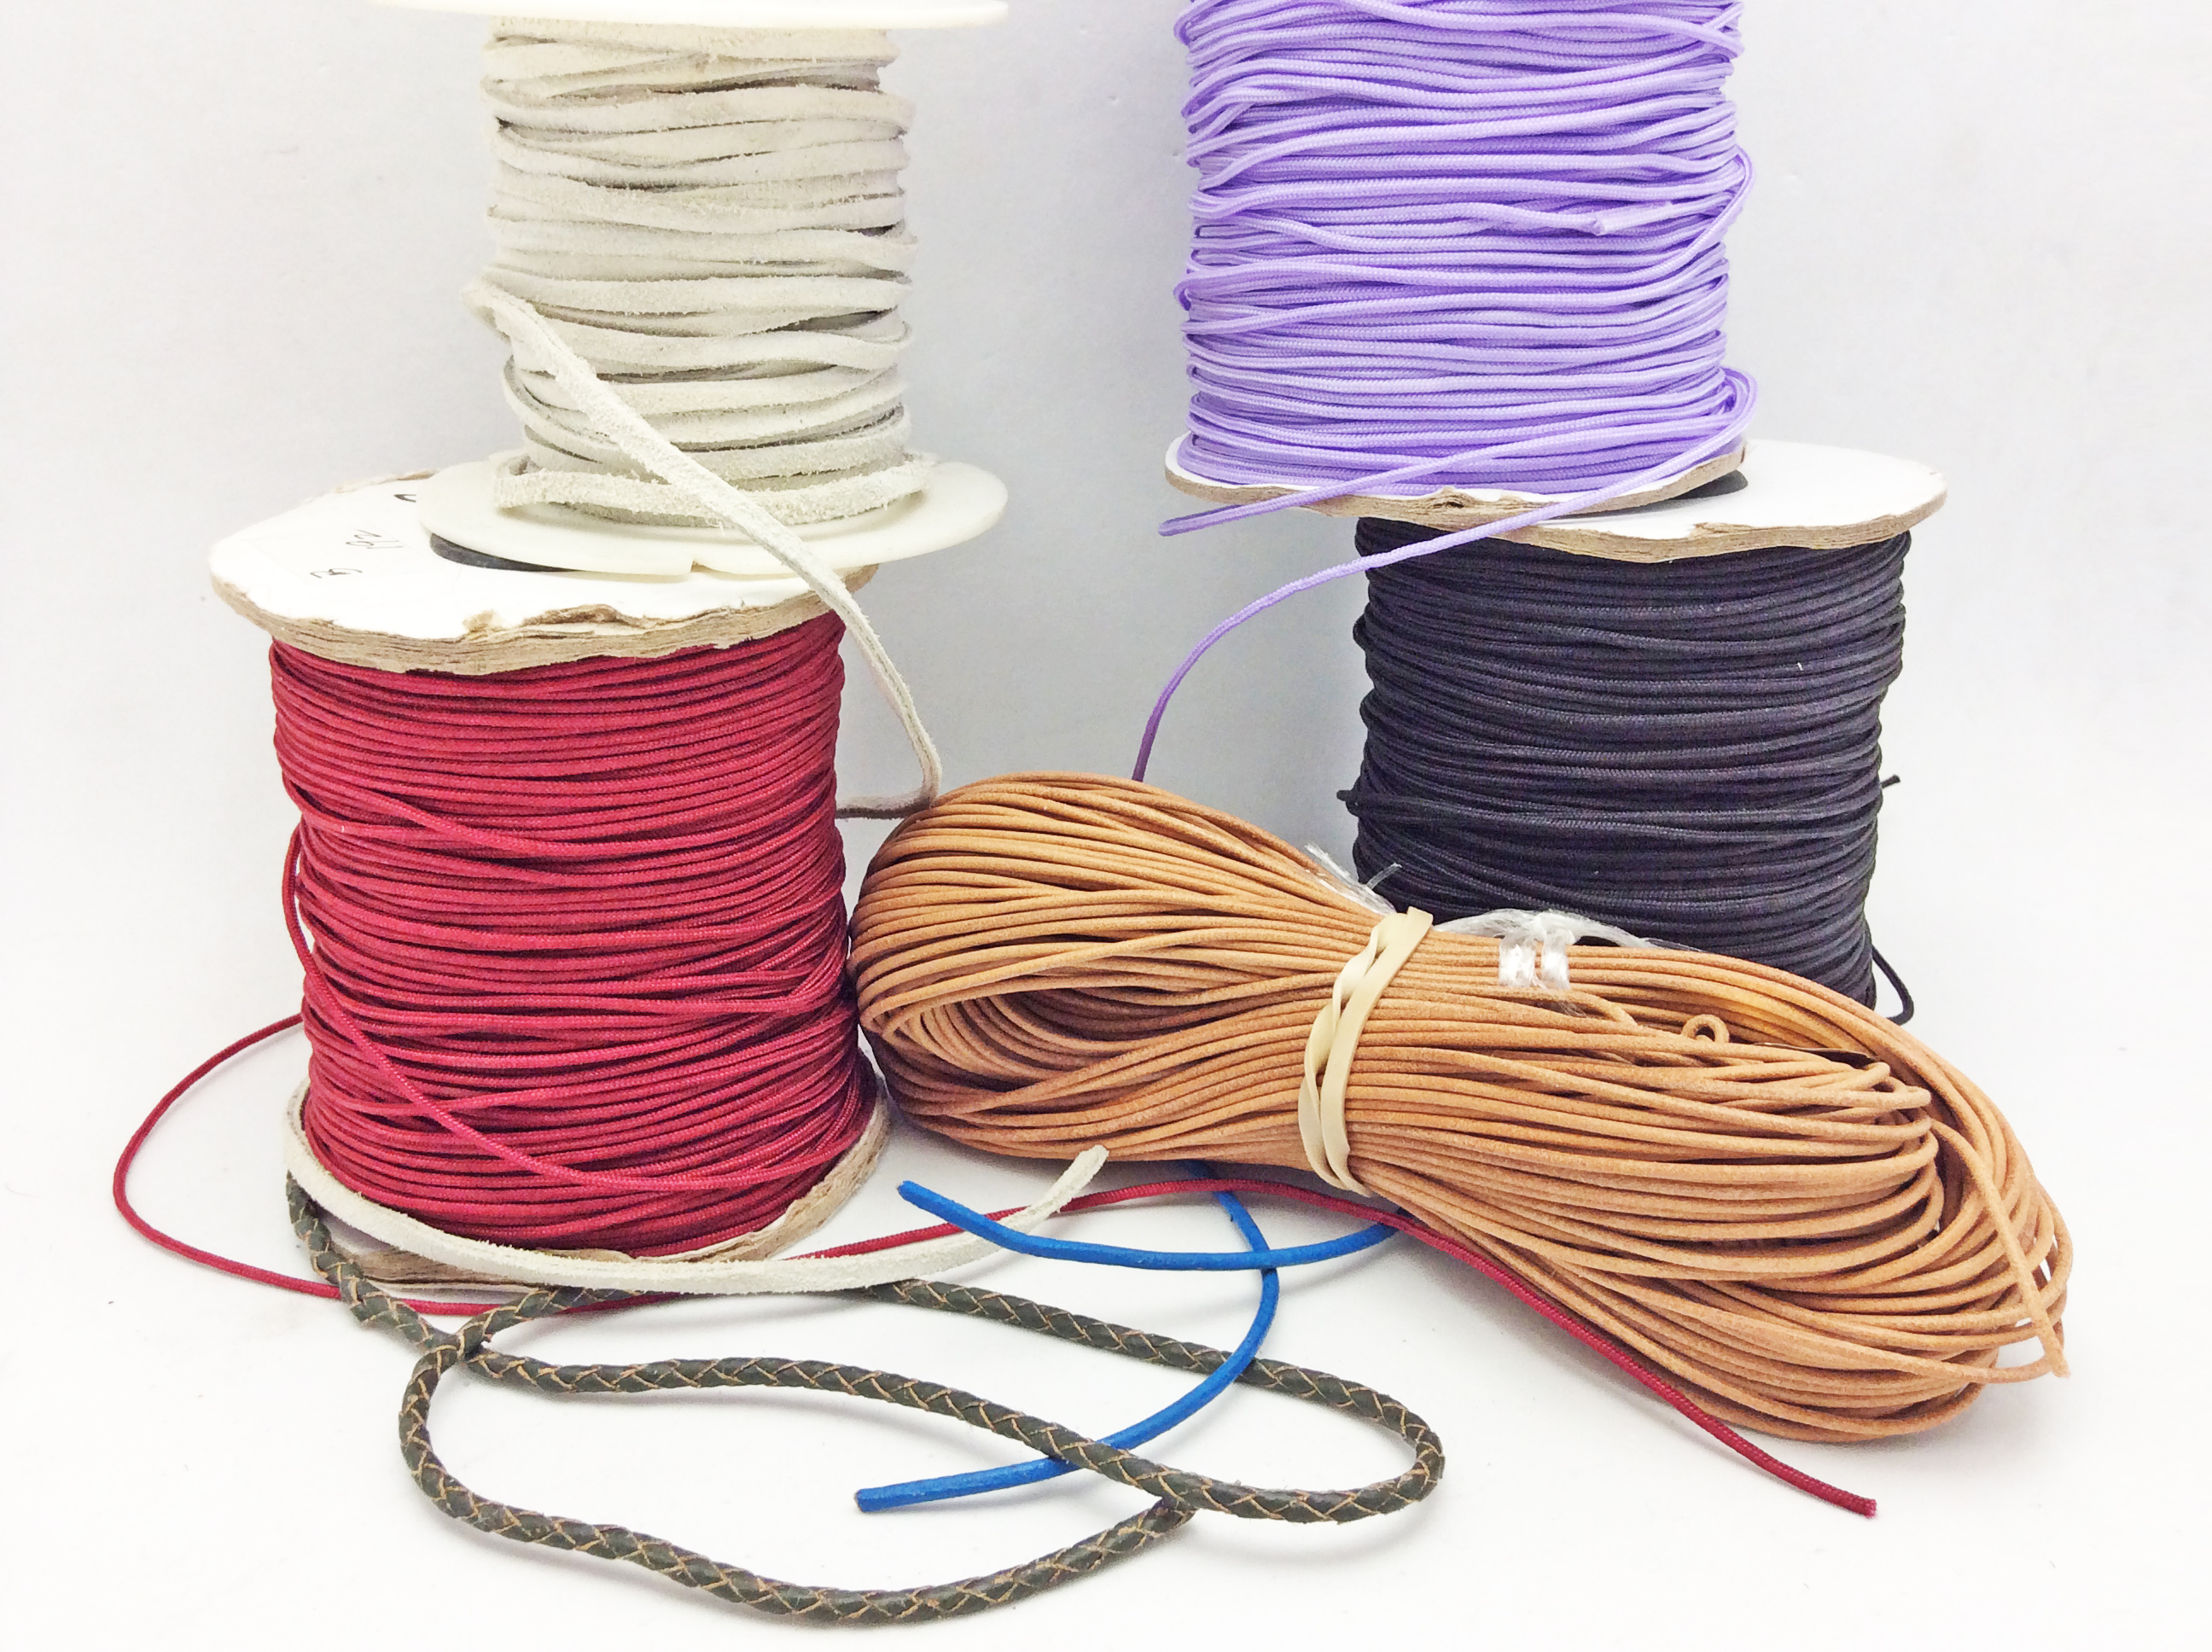
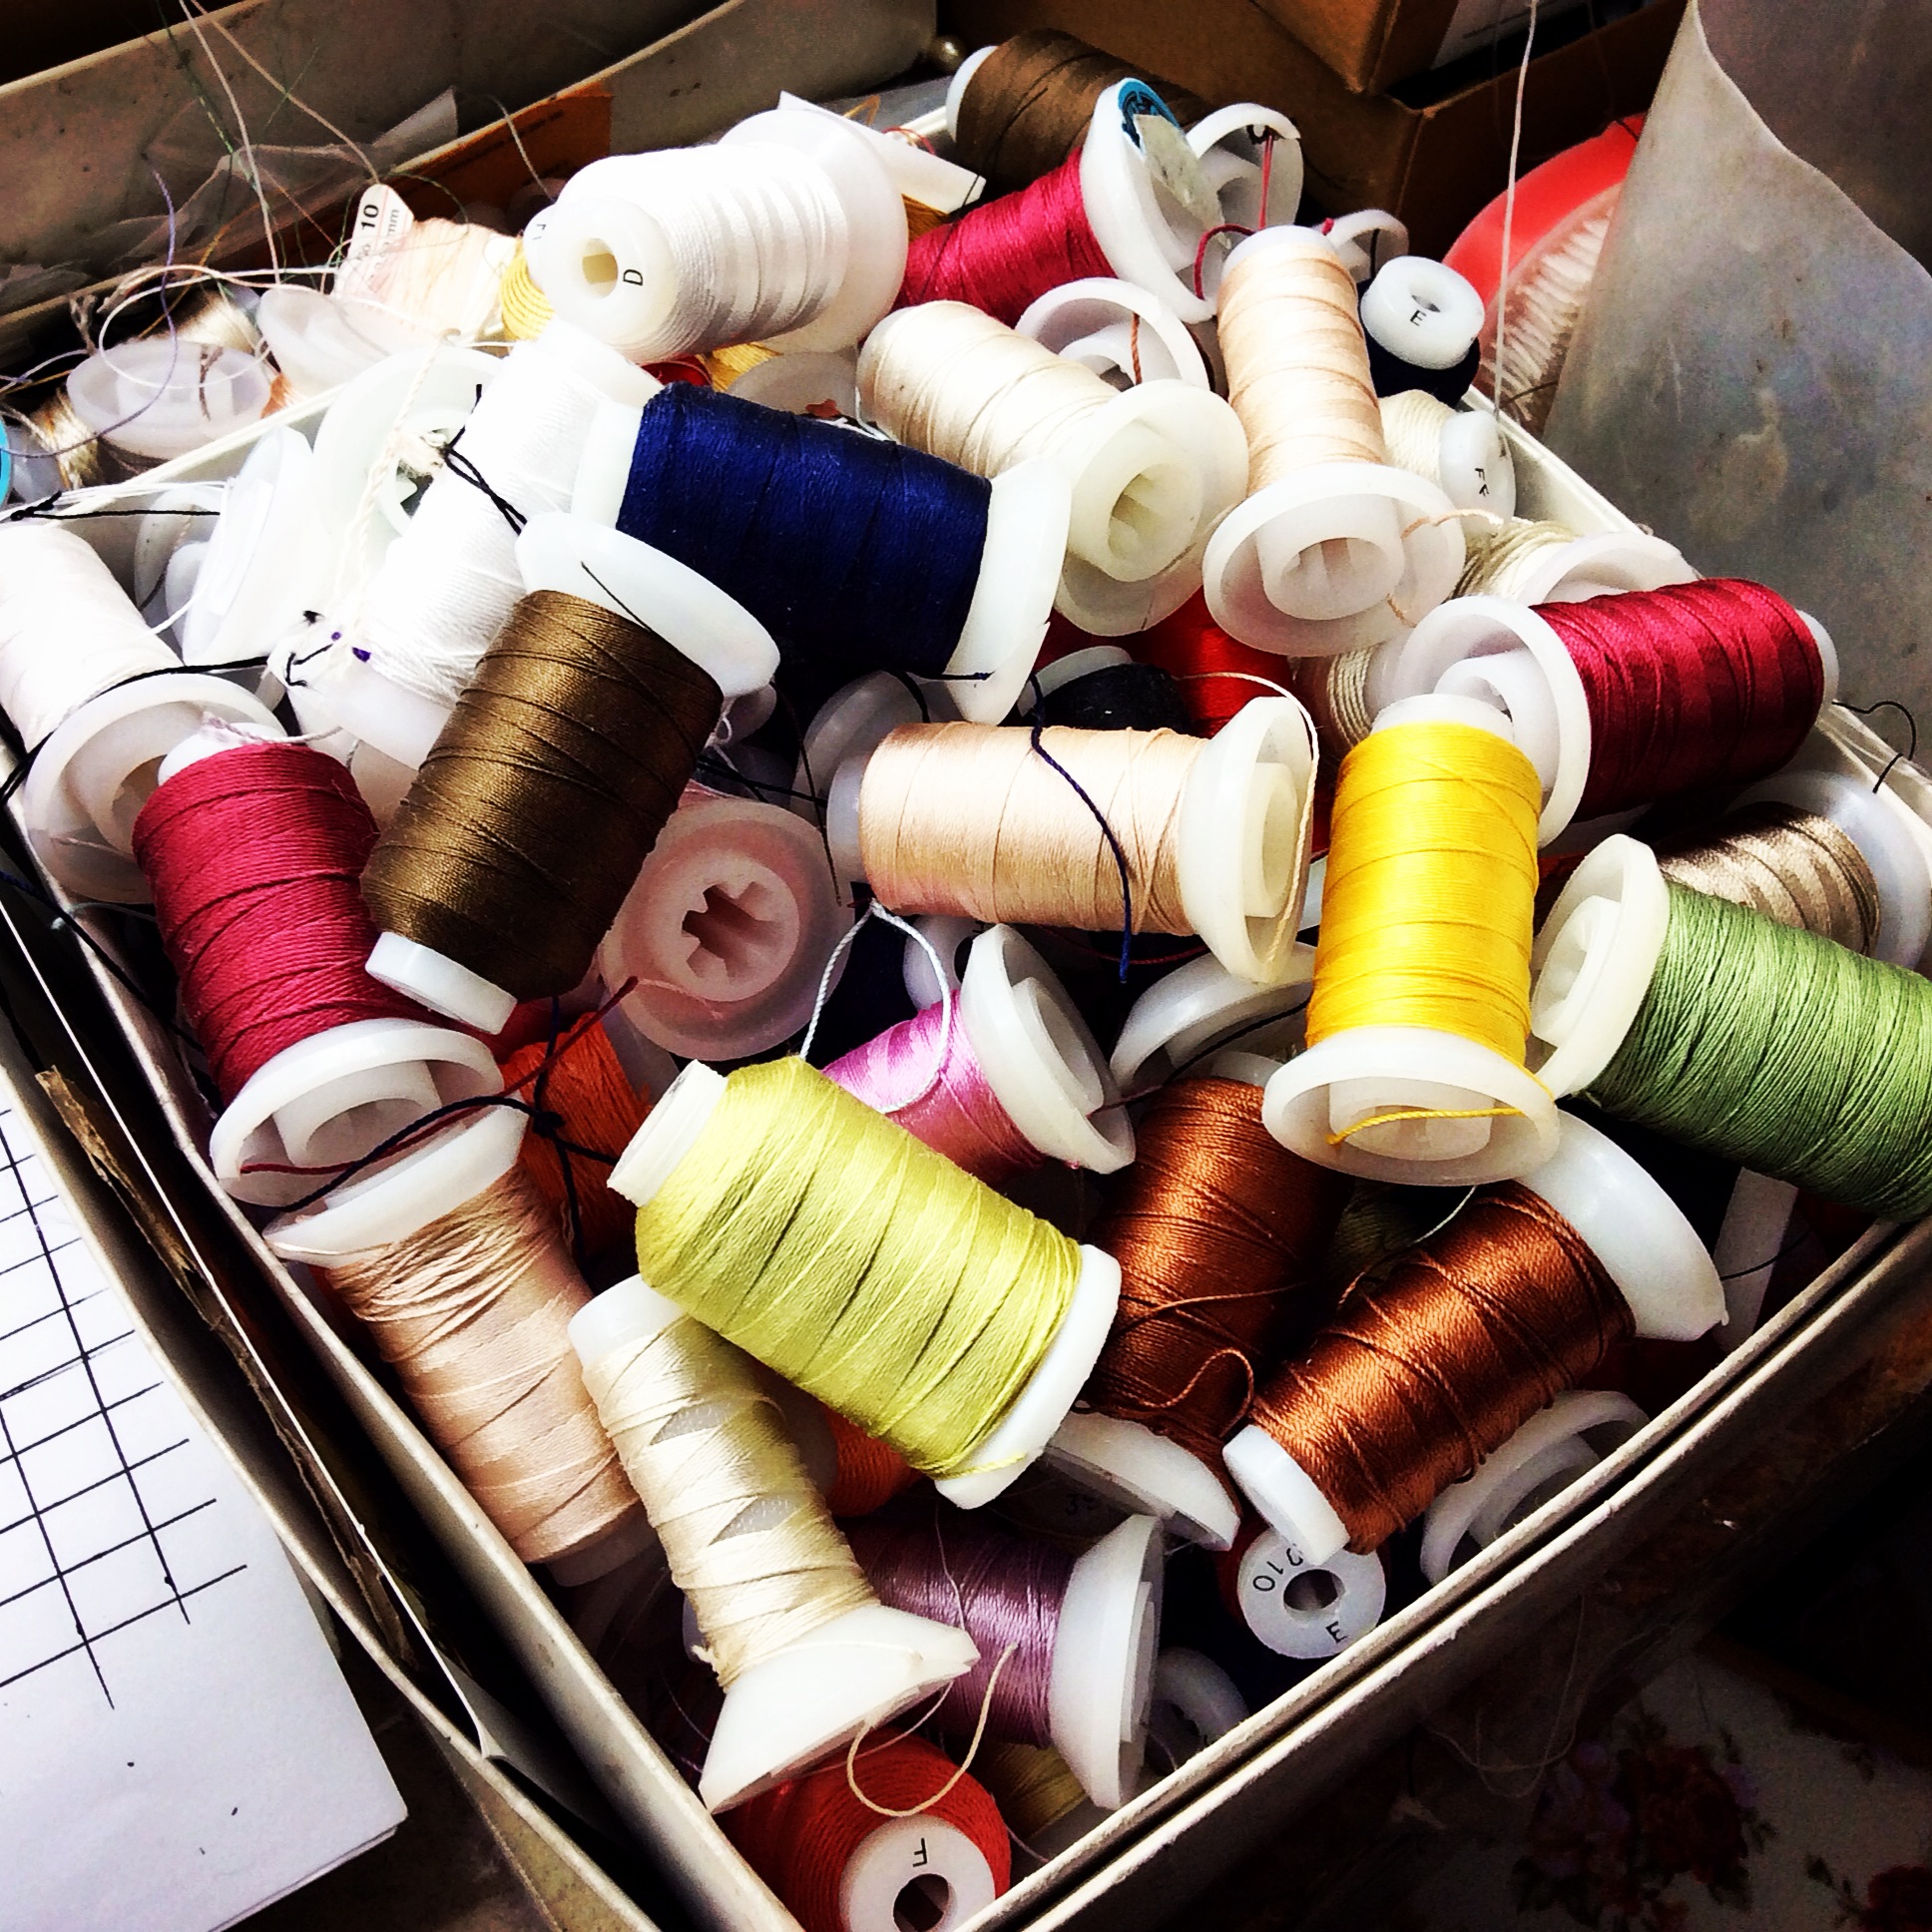
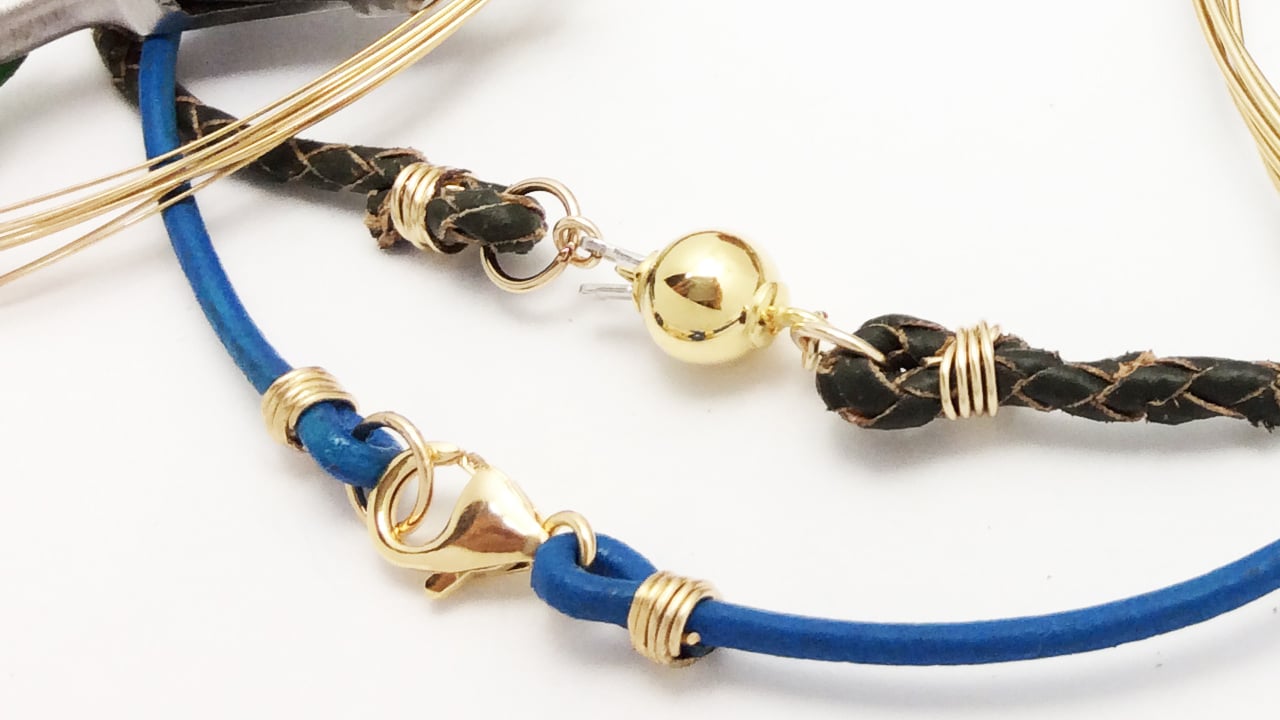
The types of beads and parts you get depend on what you use to hold everything together. If you are a novice jewelry maker, stringing on stainless steel wire like Softlex is a great way to make your first design. It requires the least amount of effort to start and end your piece, but there is less flexibility in the types of styles you can make. Many types of findings work best on thread, other parts work best with wire and leather. For example, bar clasps work best with thread because it is softer and more flexible than wire. If you are interested in wire wrapping designs, we have a few tutorials on how to choose the right wire for you, and you can read more here.
https://www.gempacked.com/blog/wire-wrapping-101-choosing-wire-material-and-metal-color/
https://www.gempacked.com/blog/wire-wrapping-101-what-gauge-wire-should-i-use/
https://www.gempacked.com/blog/wire-wrapping-101-should-i-use-soft-half-hard-or-hard-wire/
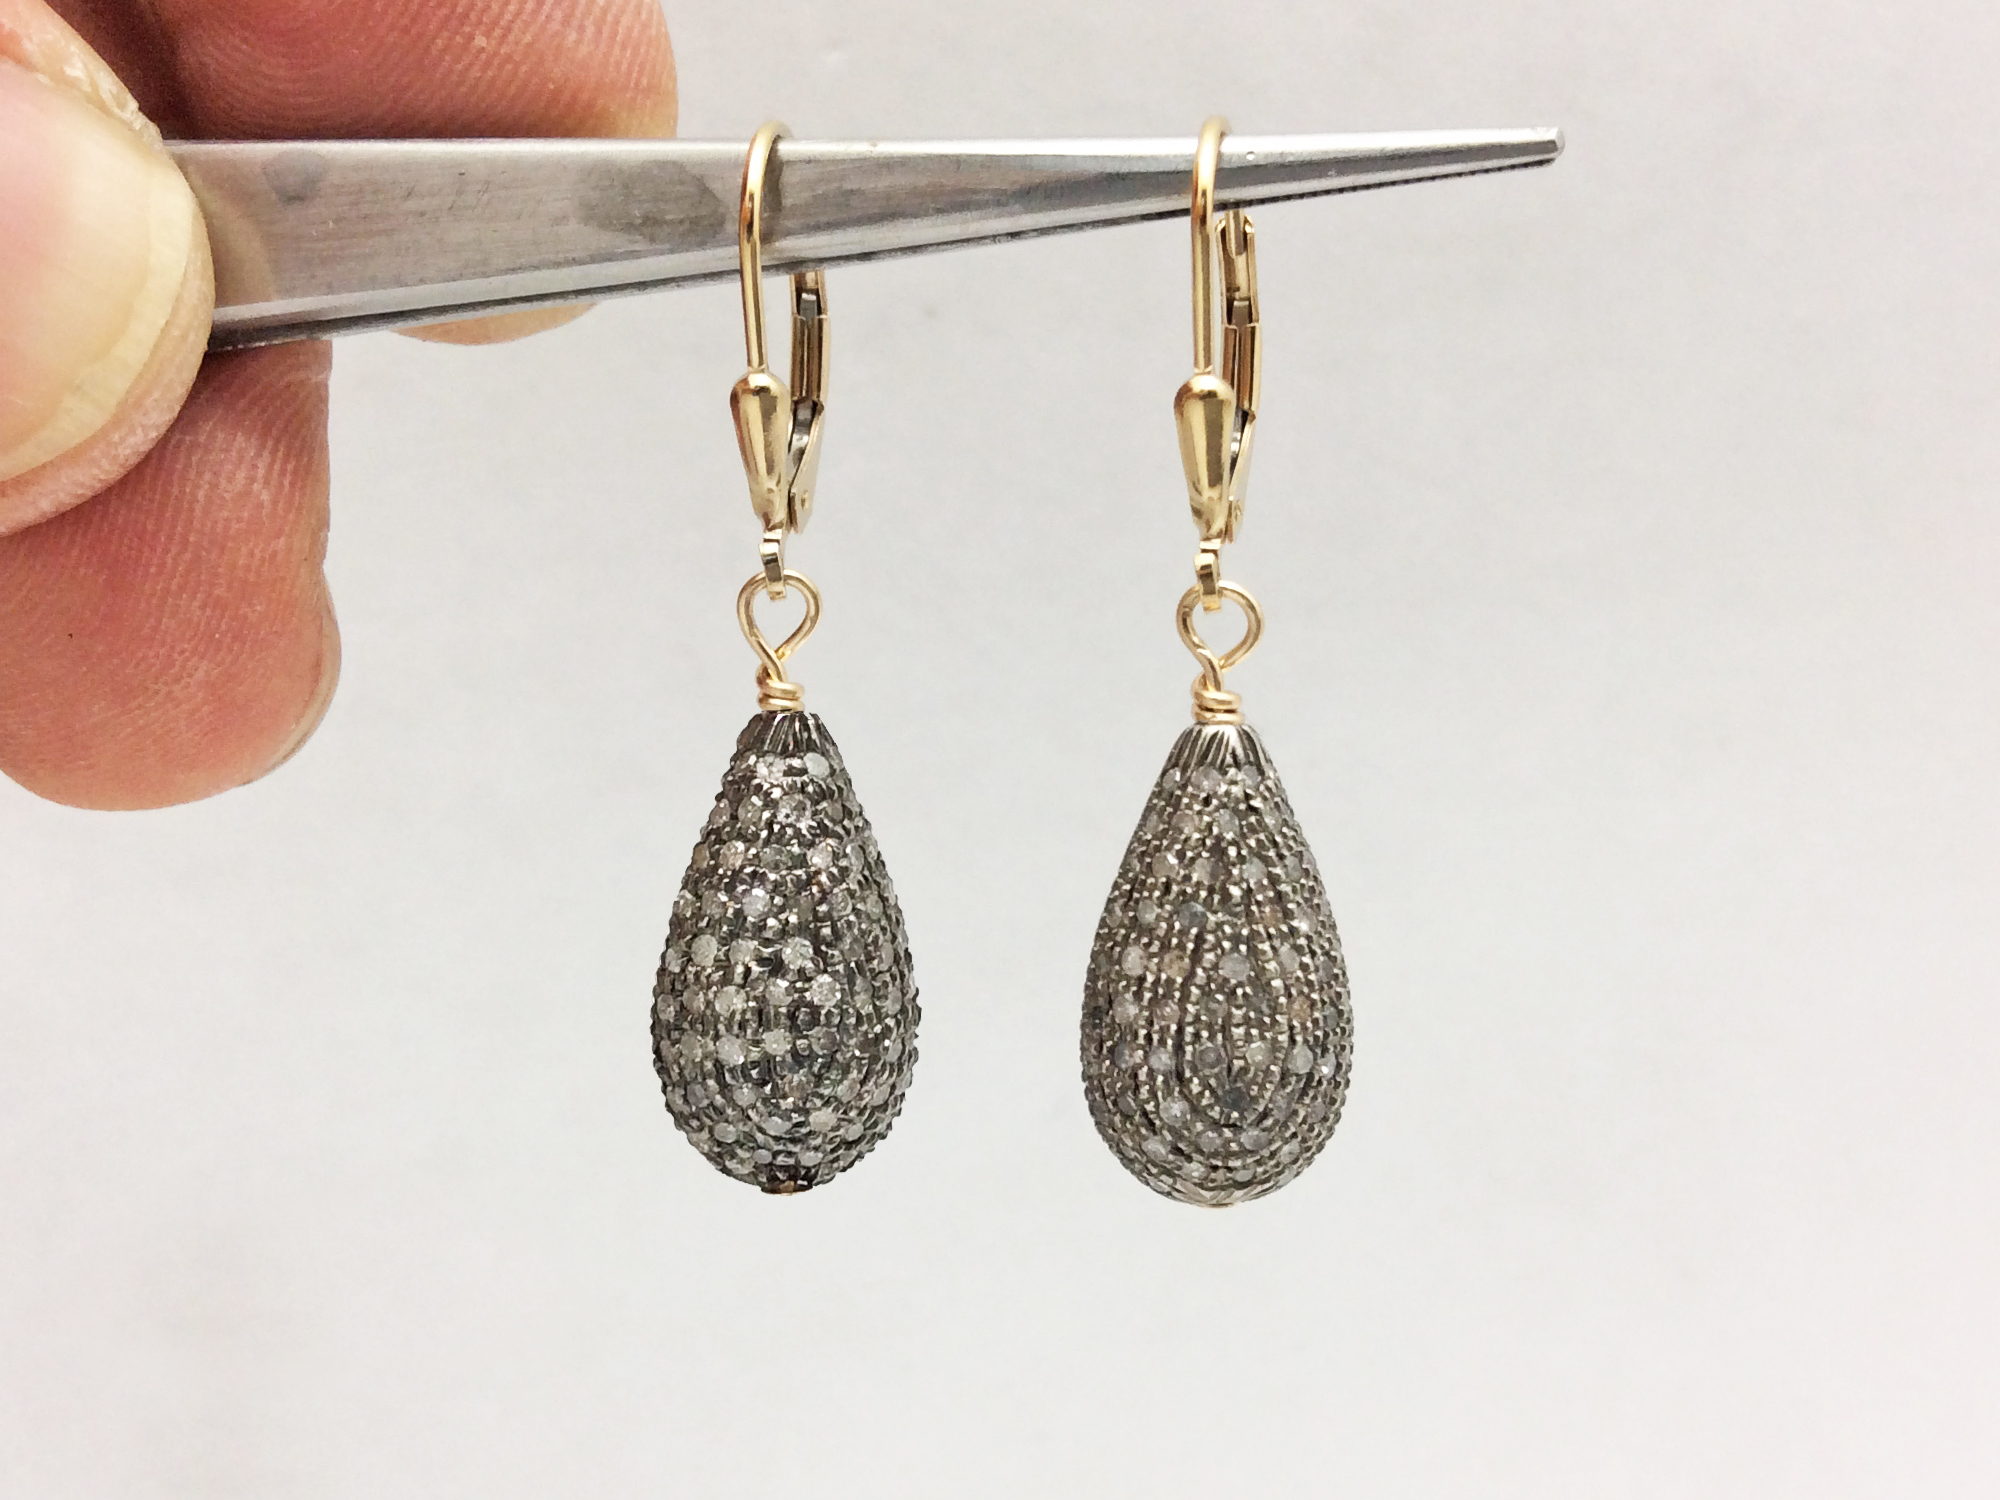
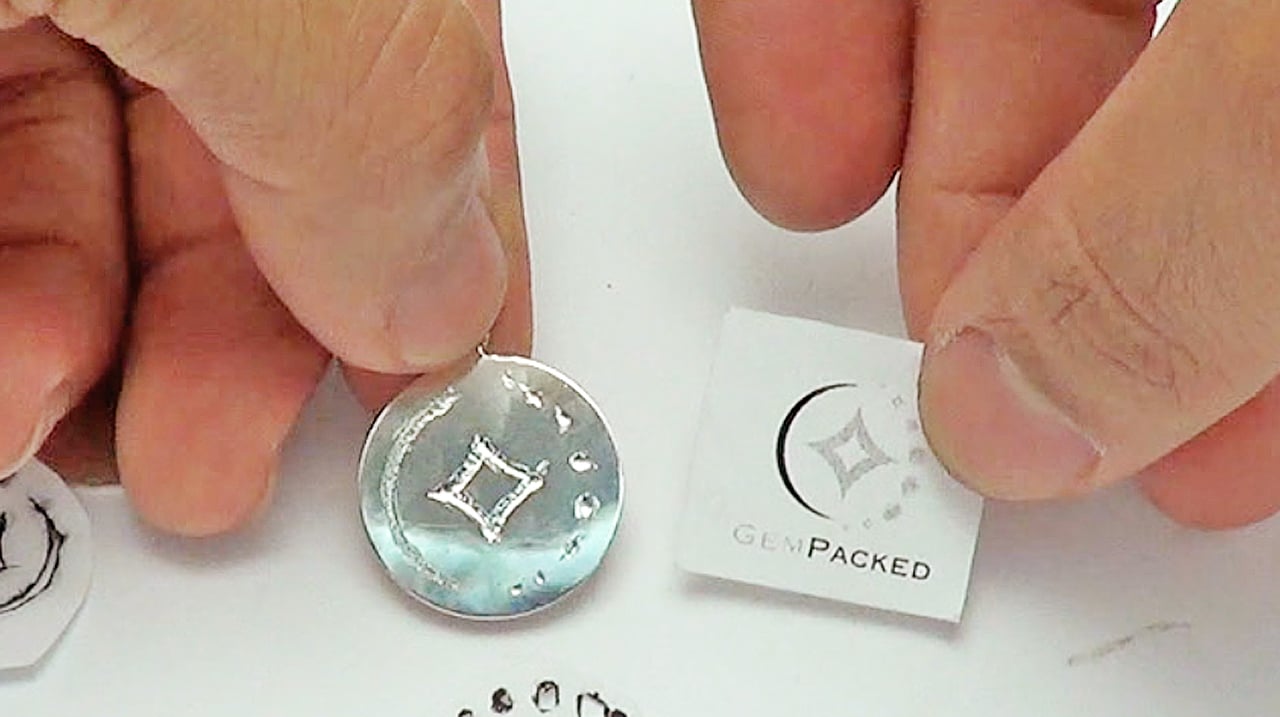
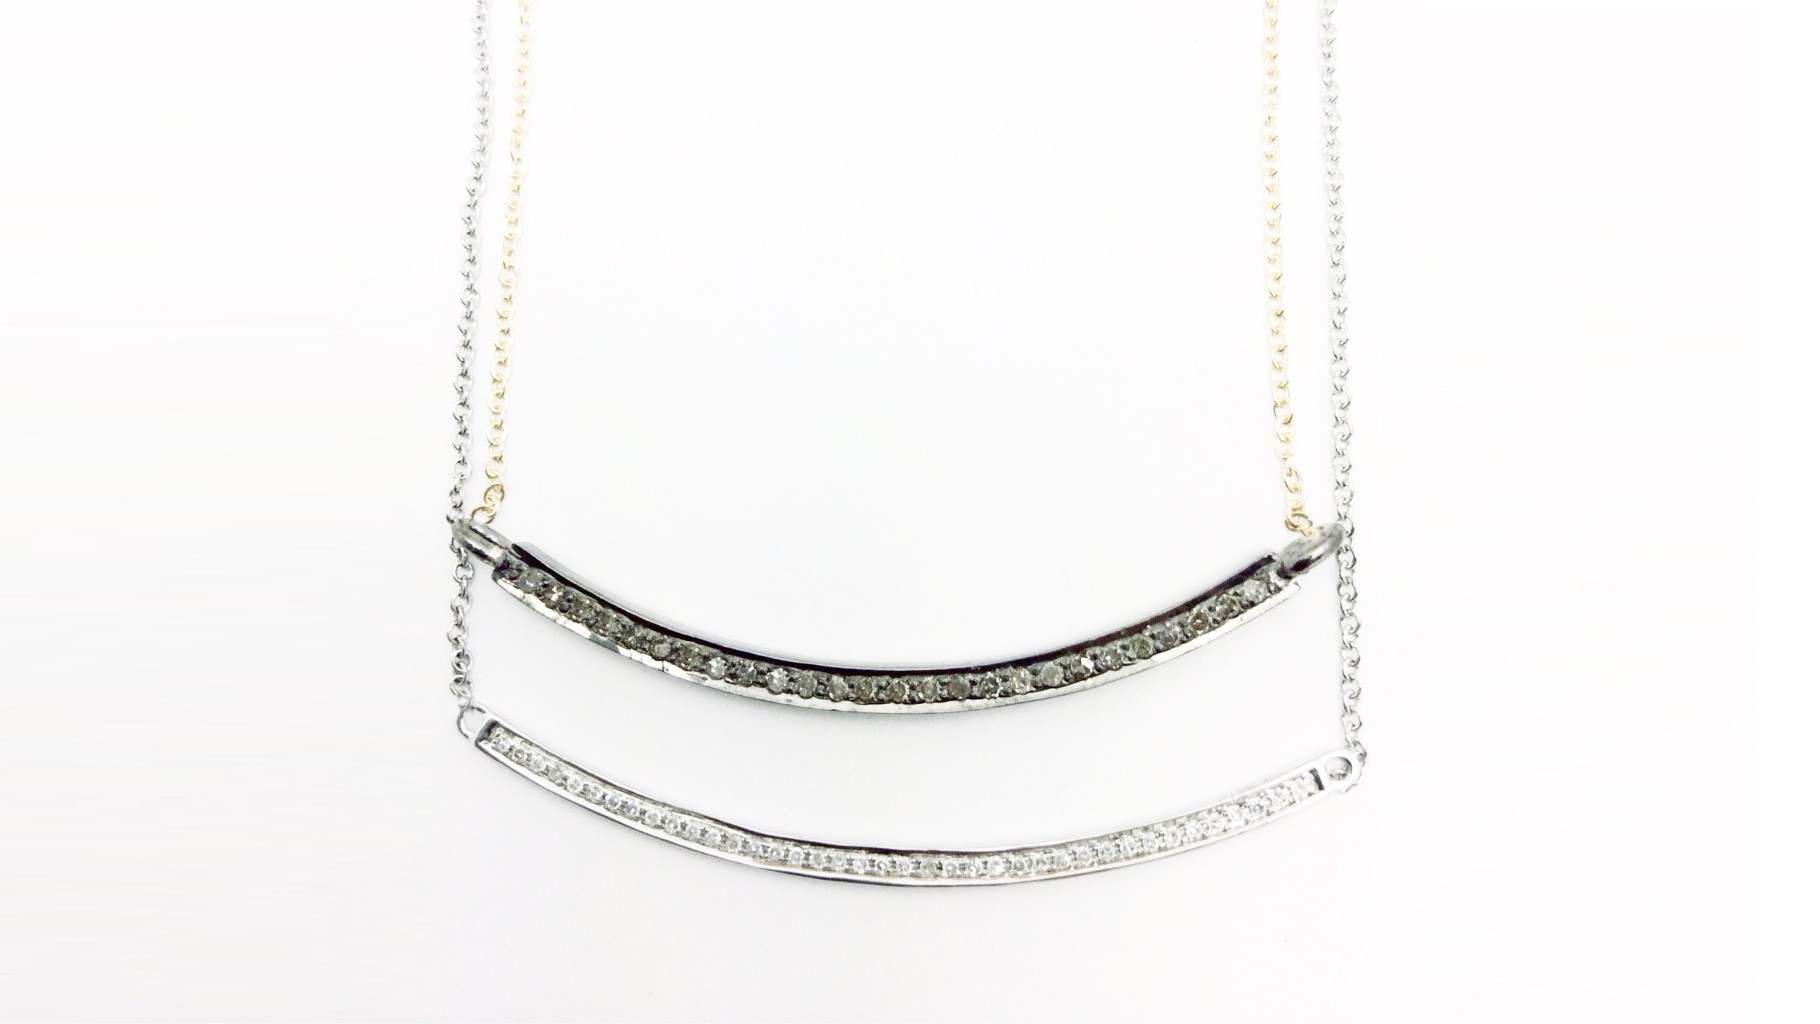
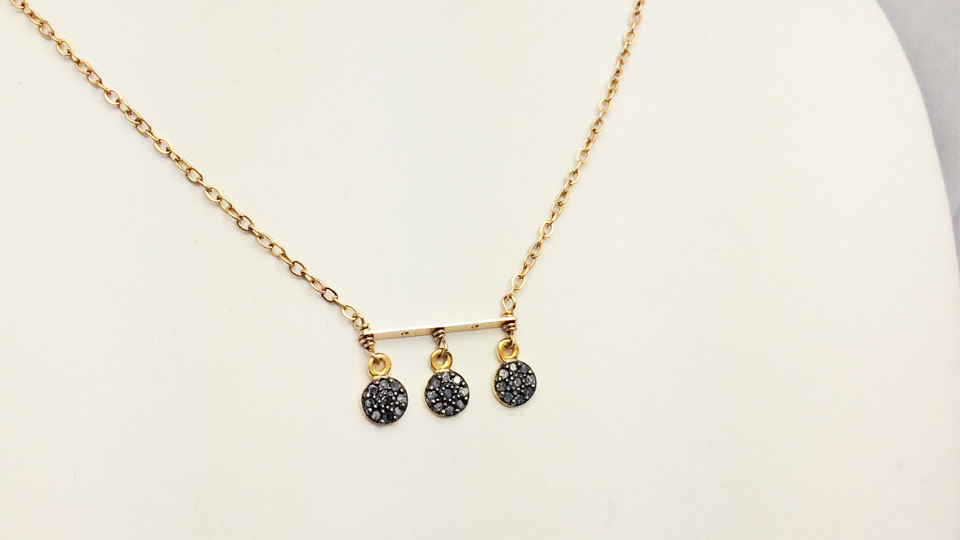
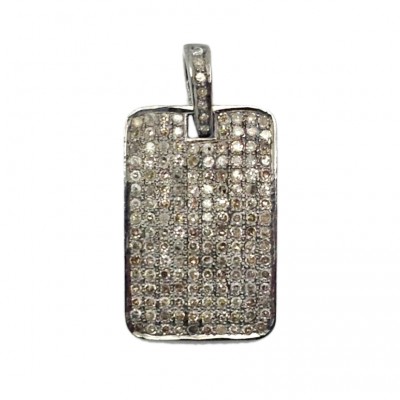
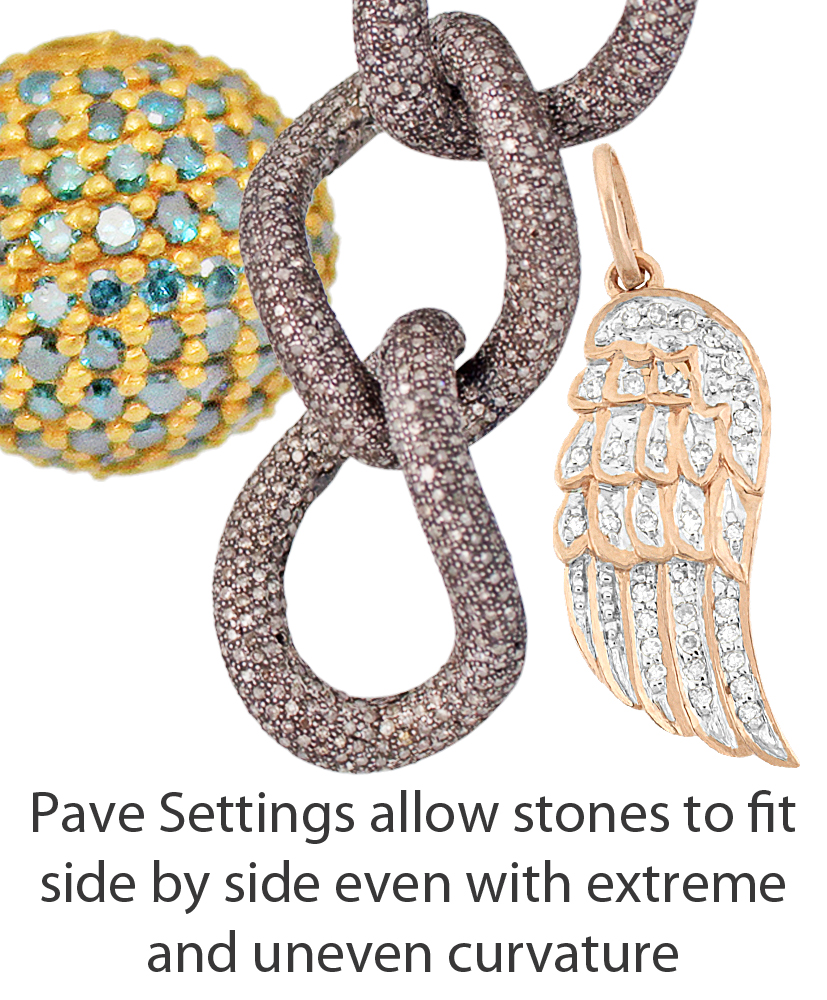
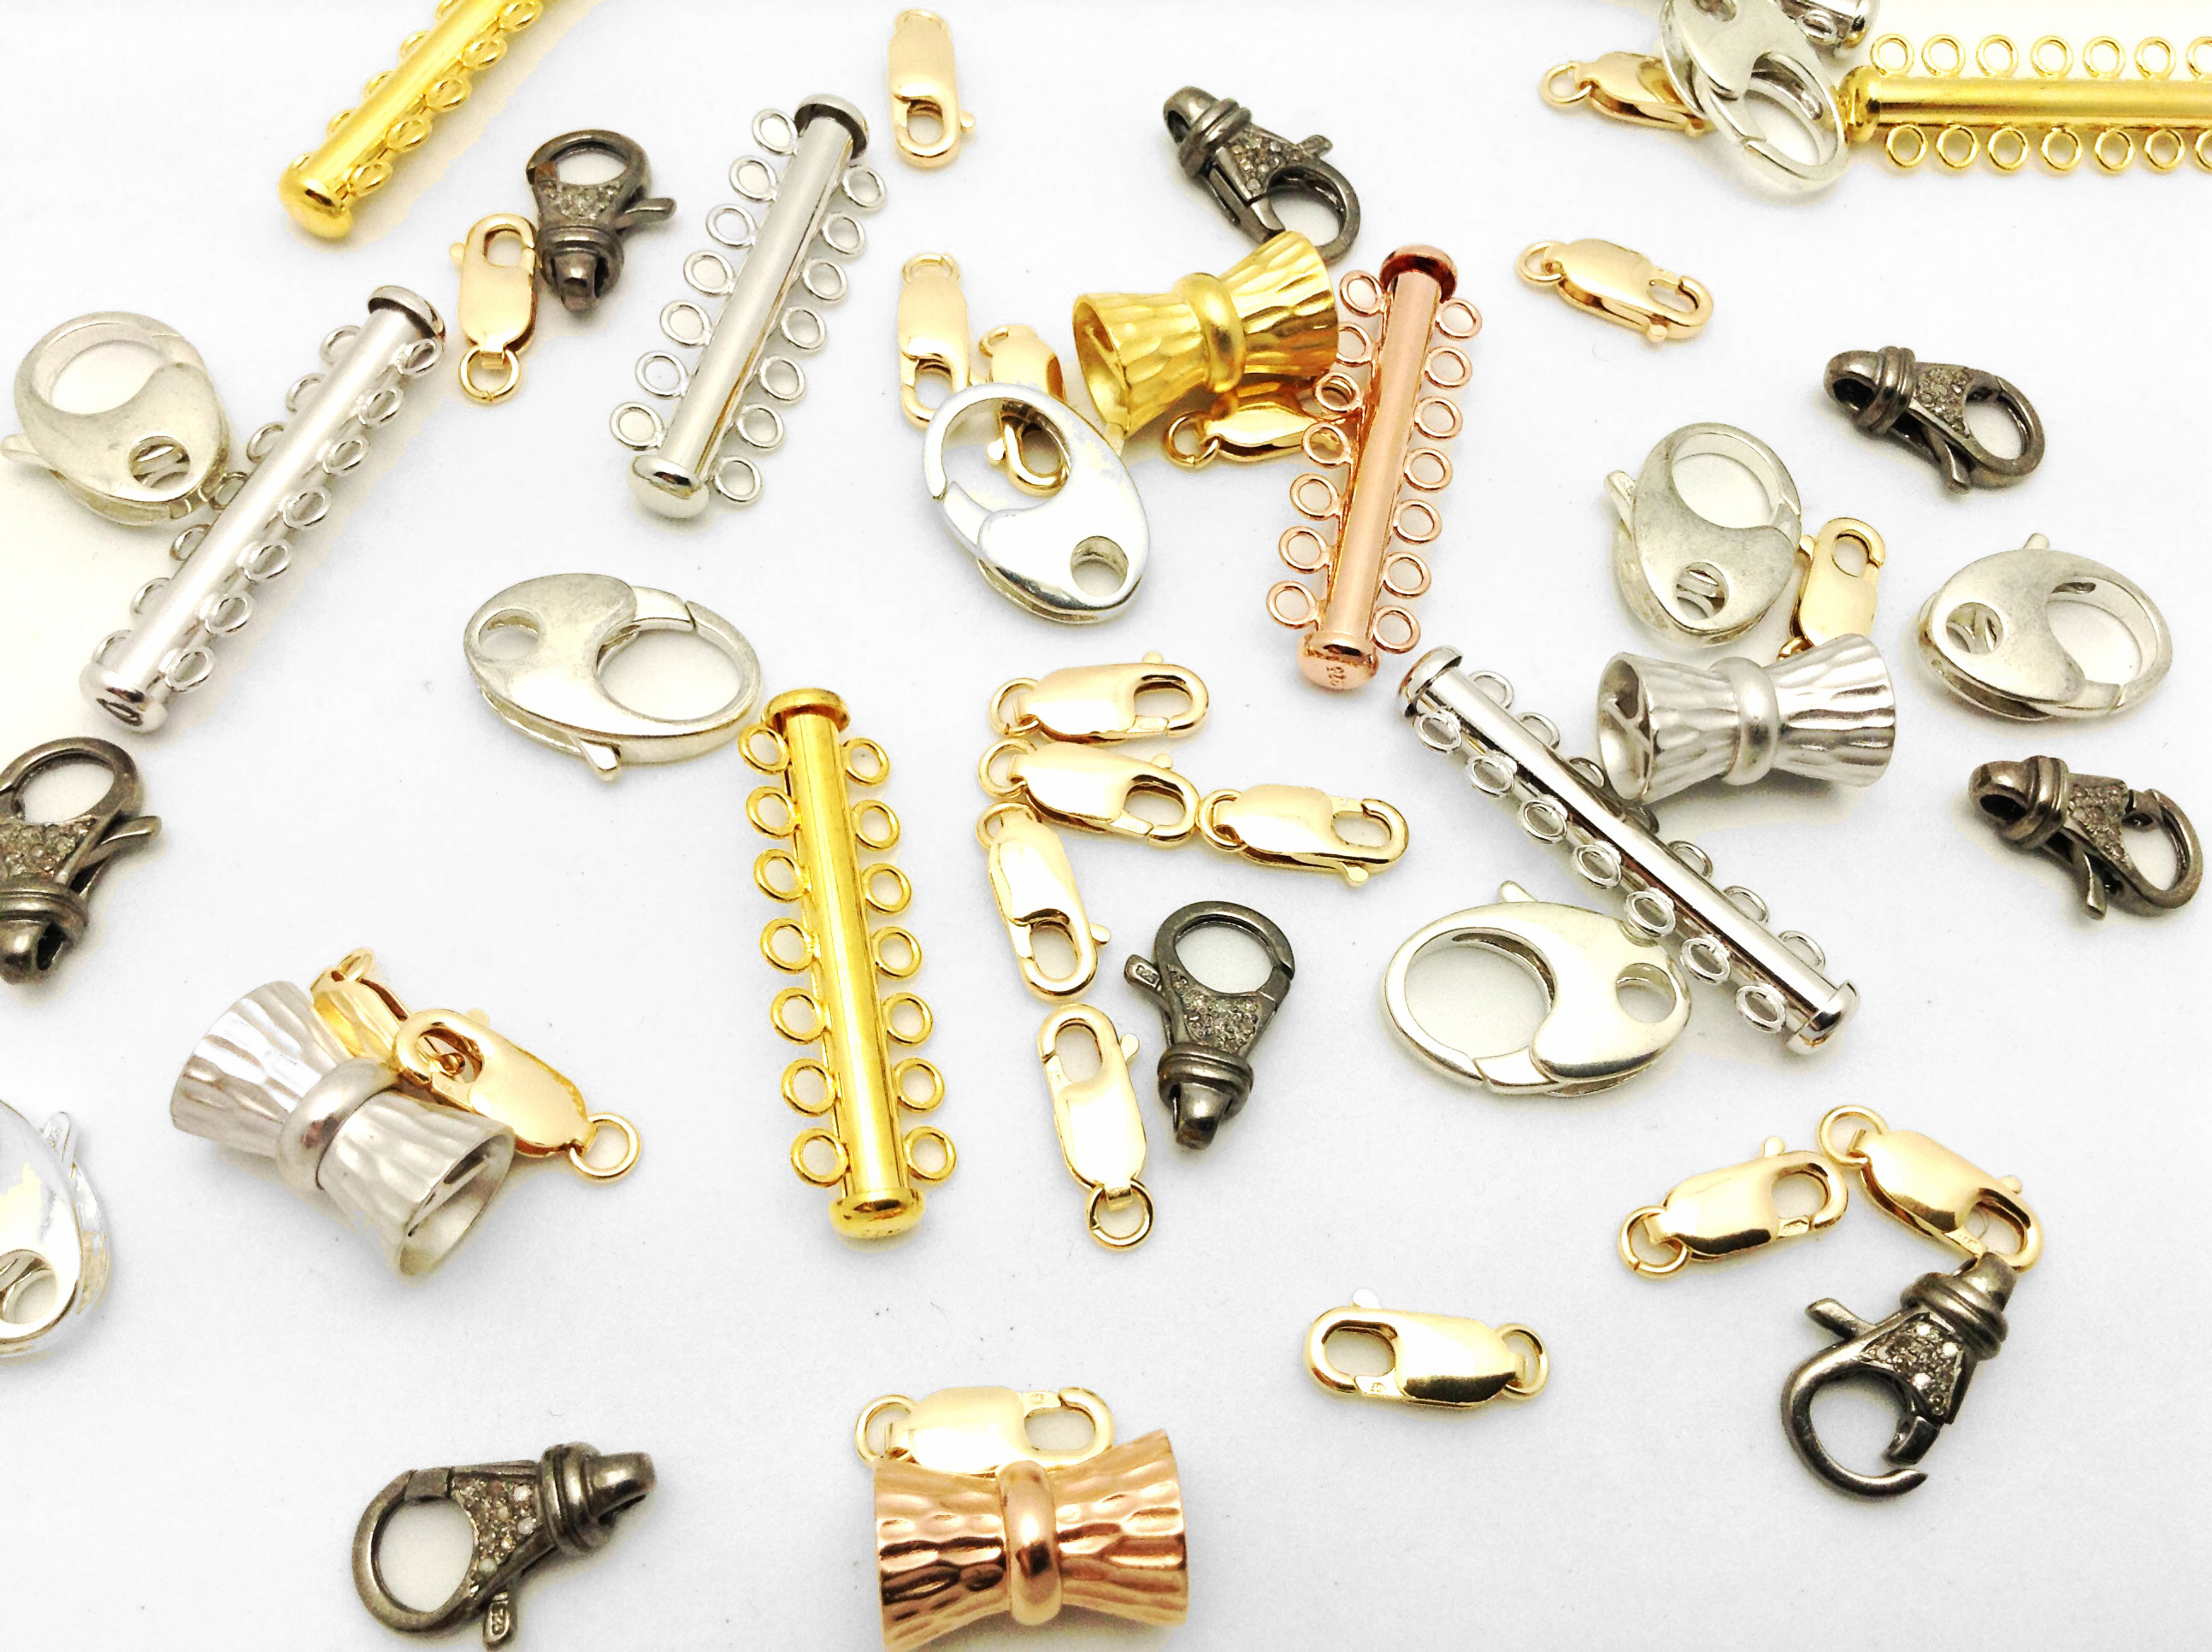
“Findings” is the term used to describe basically any of the parts that go into making your jewelry. This includes jewelry components, such as clasps, jump rings, or semi-finished items like chain by foot and plain earrings. Findings come in all shapes and sizes but you’ll find yourself using similar items when you are creating your jewelry line. Gempacked makes it easy to narrow down your options, even if you don’t know the exact name of what you are looking for. You can navigate to the type of item you want based on your design and narrow down the choices by size, shape, and metal type. Once you know the types of items you regularly work with, making the same items in the future will be much easier going forward.
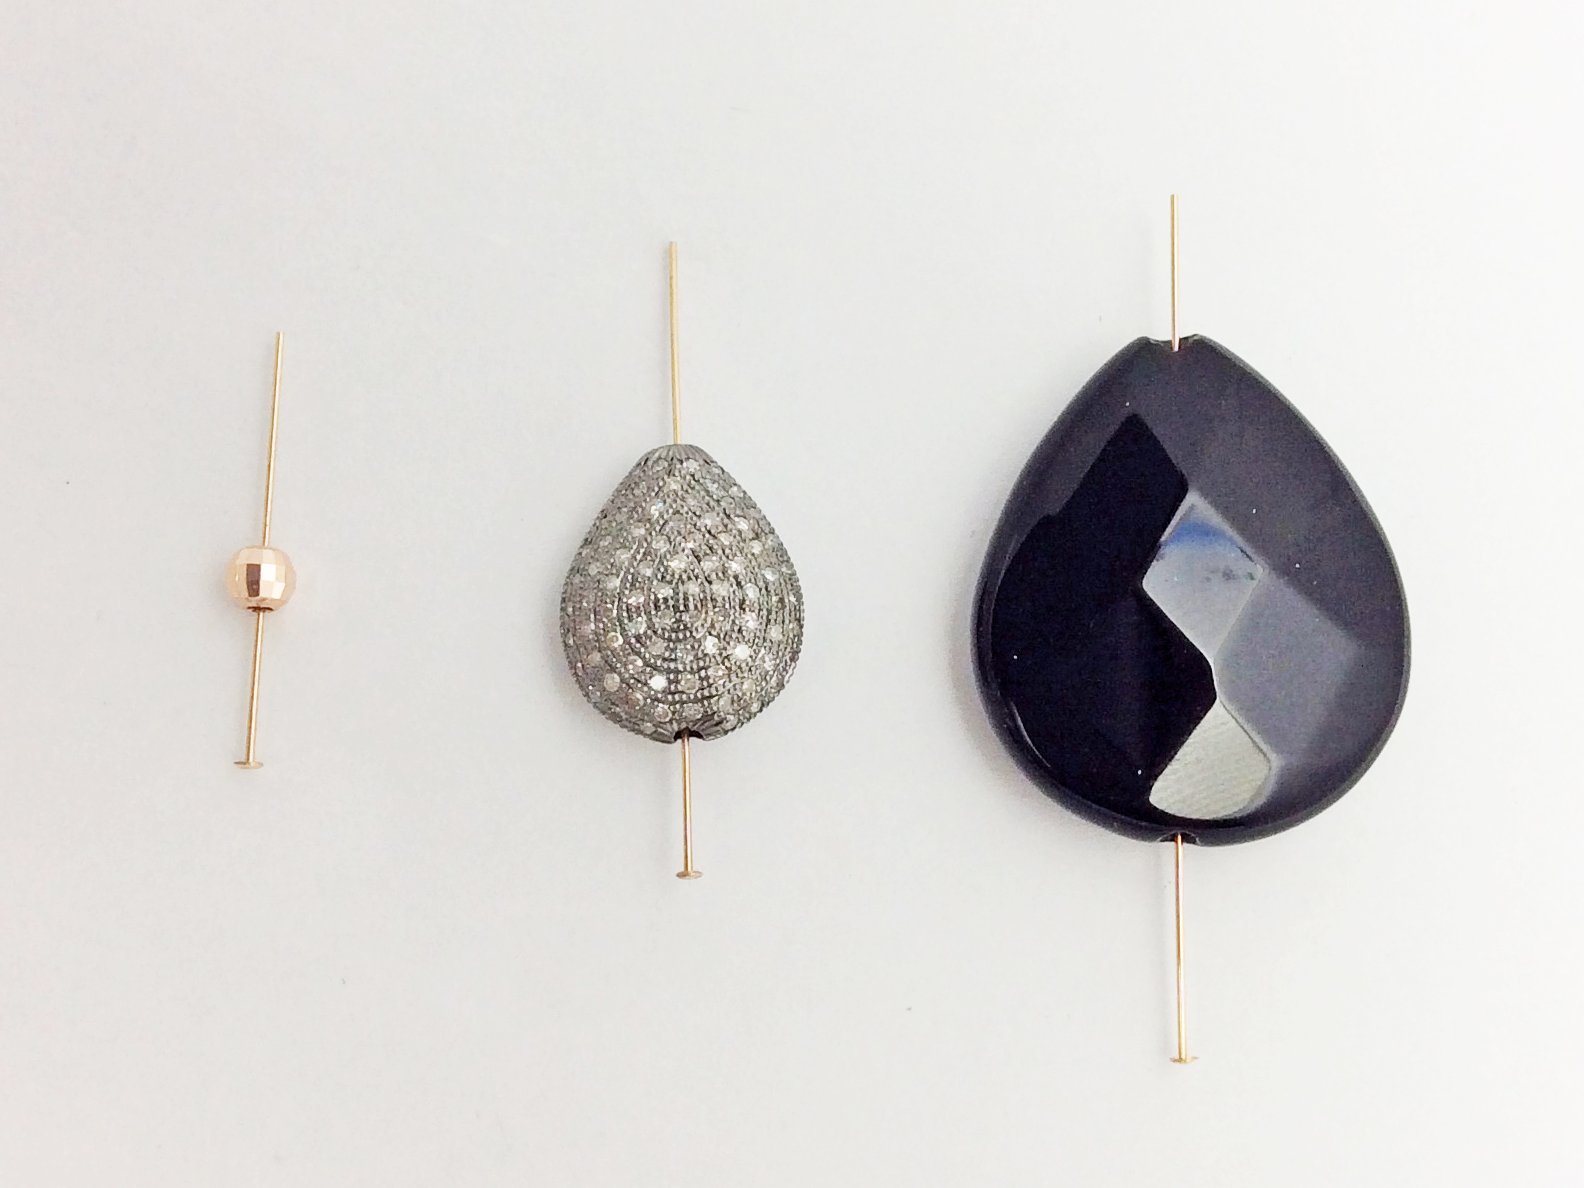
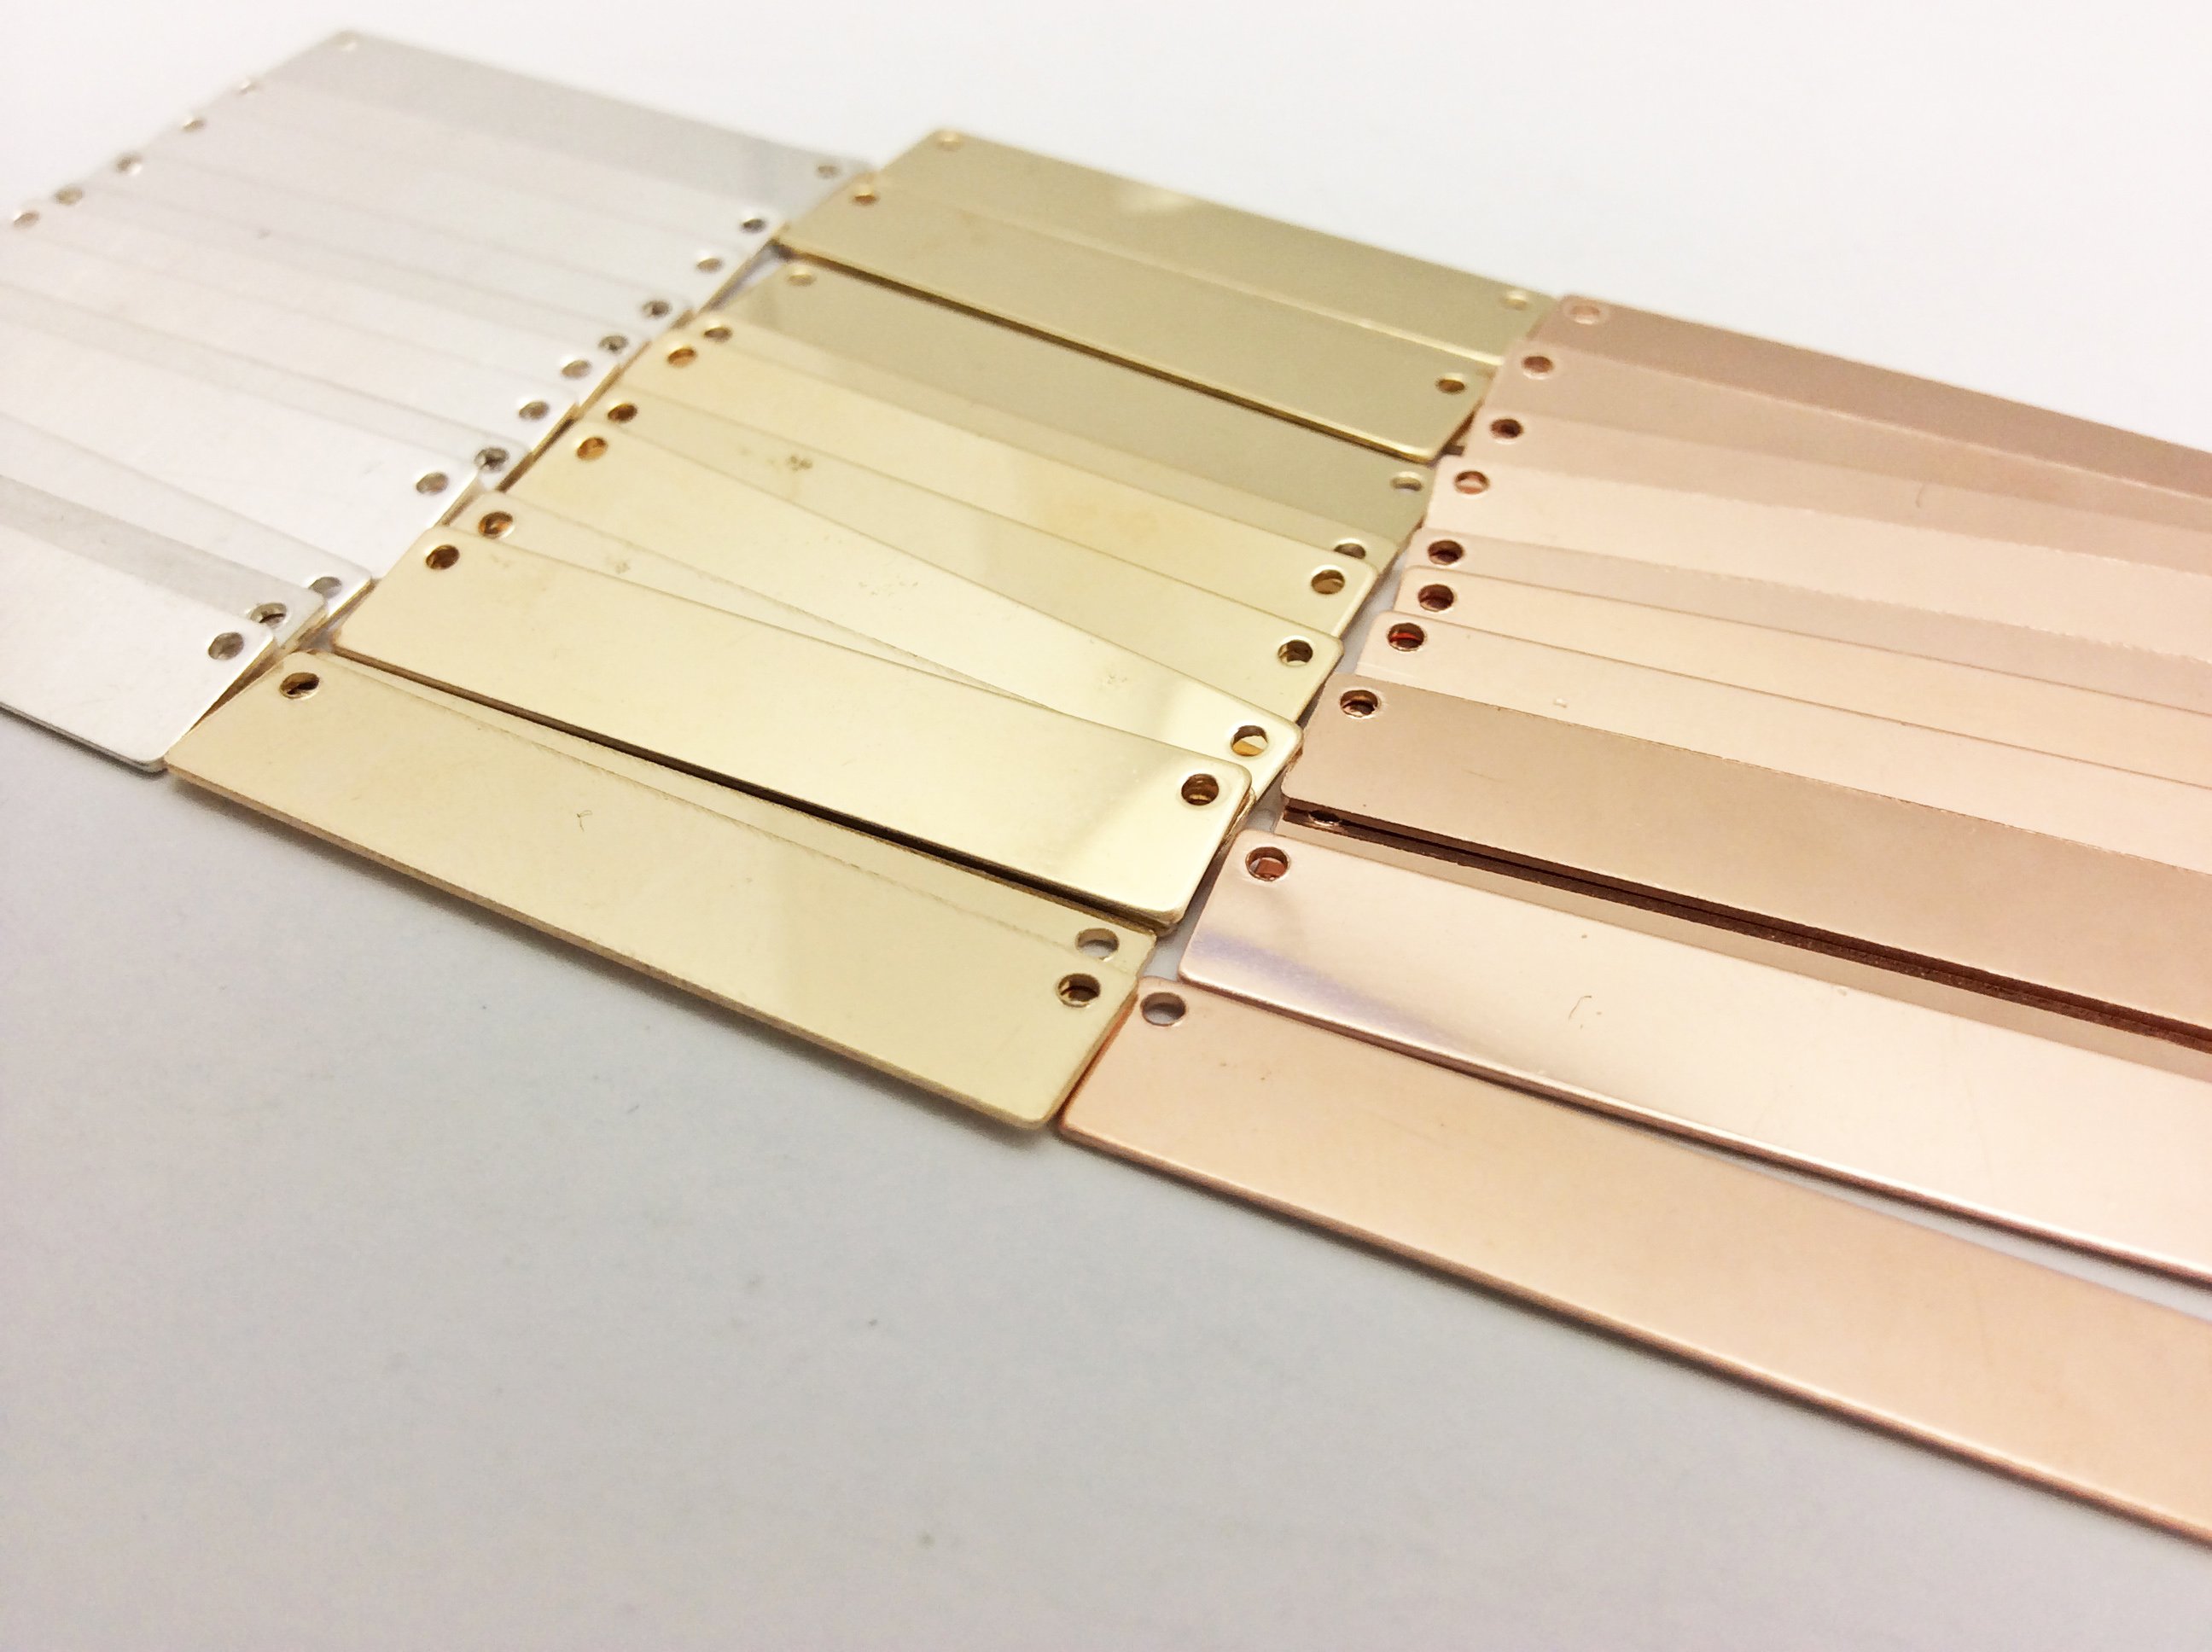
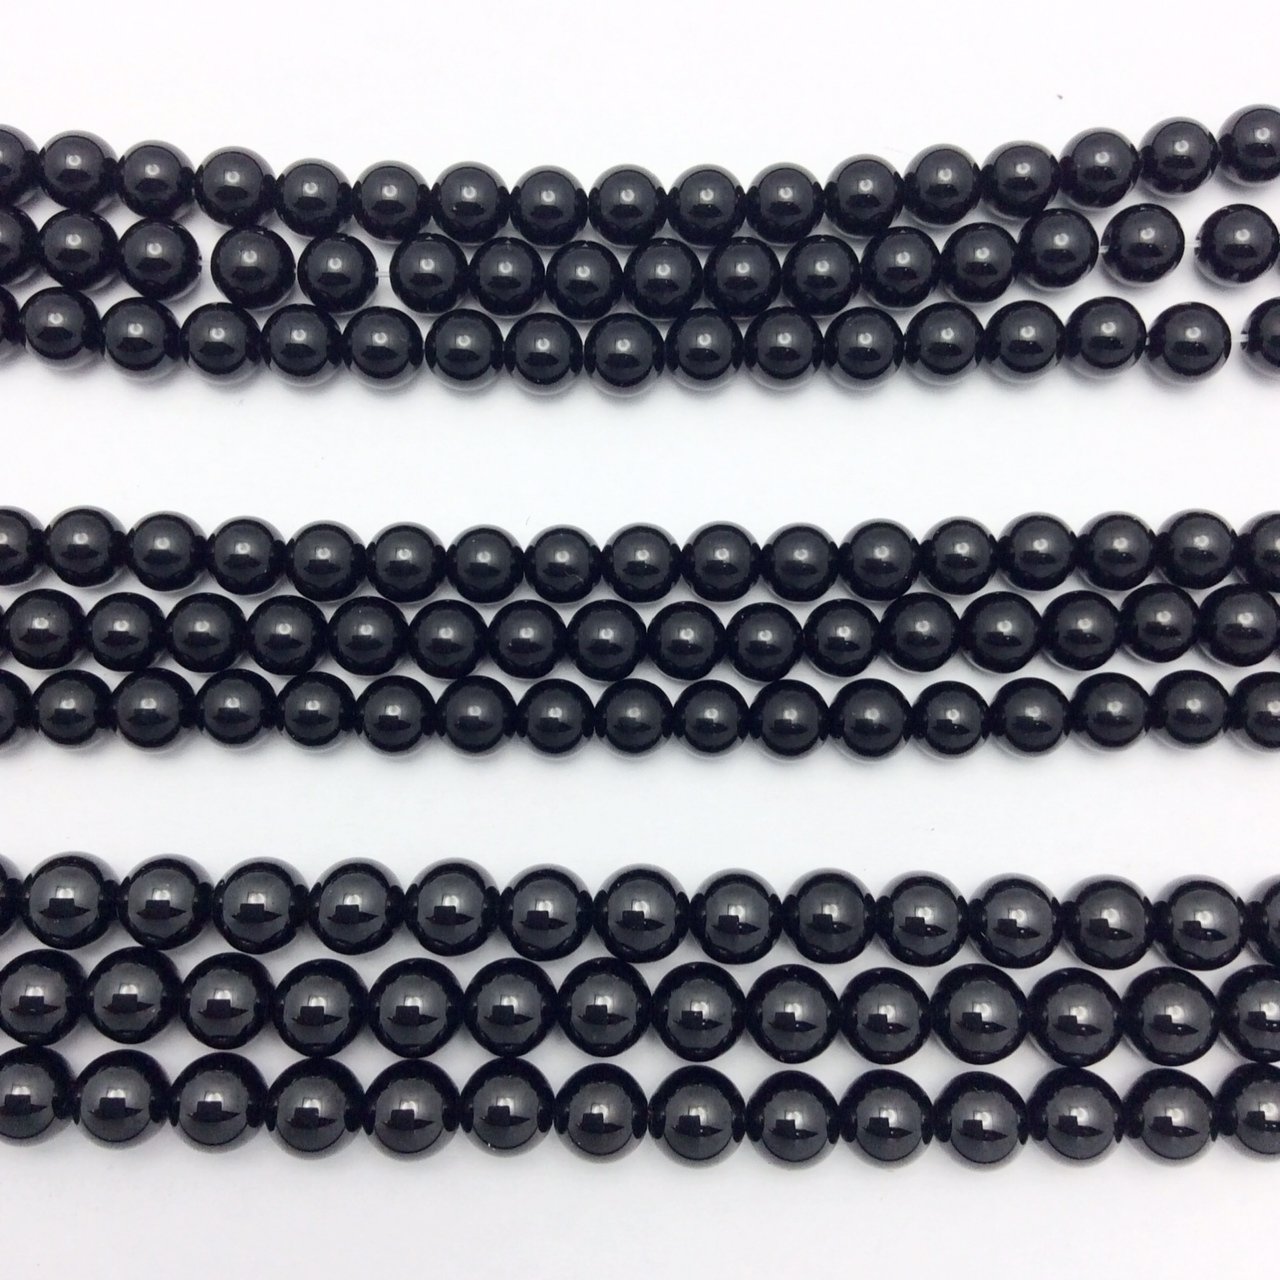
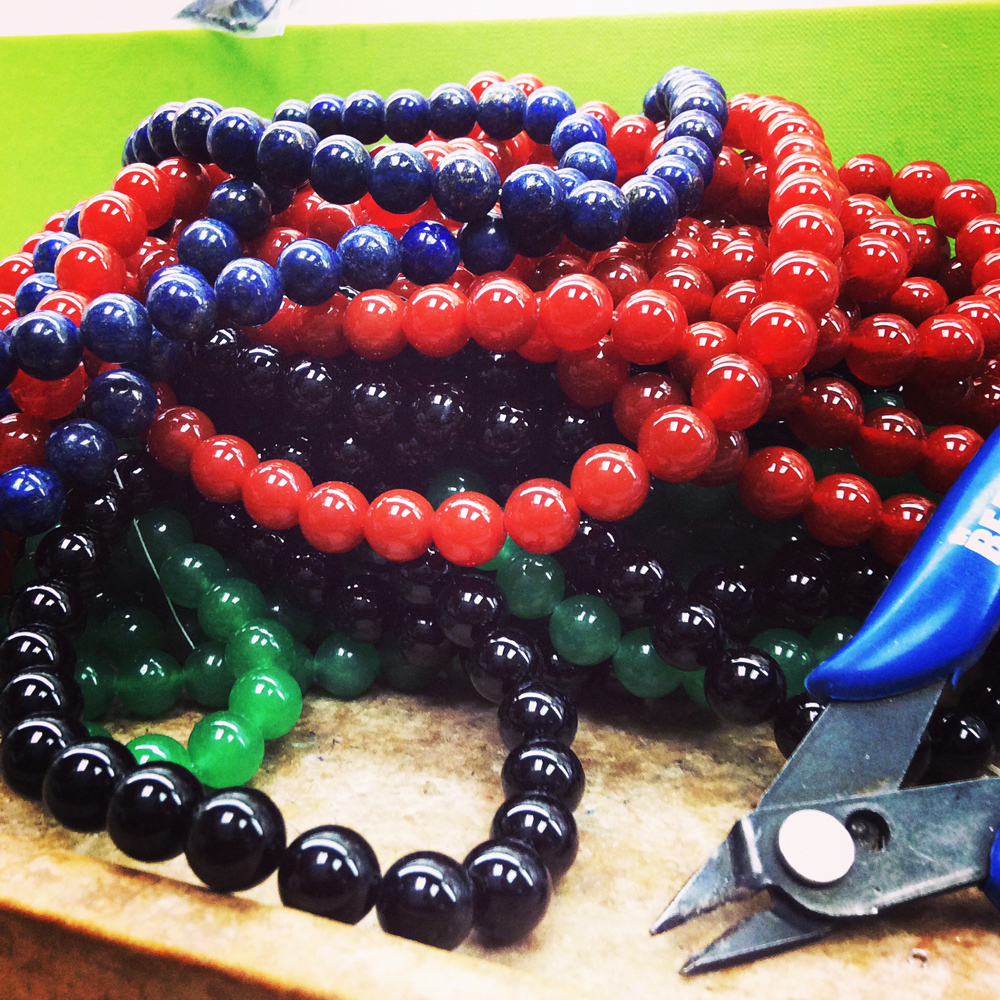
Beads come in all kinds of materials, shapes, and sizes. How you tie everything together comes down to how you envision your line as a whole. For example, smaller beads are great for making layered designs and large beads are best as centerpieces or to make a statement. Since there are so many choices, it is also best to narrow down based on a few criteria and go from there.
It is also important to not neglect the space where you will be doing all of your work. You will need to have a space where you can both design and assemble your pieces. They don’t necessarily have to be the same physical location–you can design anywhere inspiration hits you. Whether it’s in your studio or in a coffee shop, as long as you have a way to put your ideas on paper and come back to it later, that is a great way to start. As for the actual assembly space, the goal is to have an easy process for setting up and maintaining a lot of bits, bobbles, and tools. While a dedicated workstation is not necessary, you definitely want a place where you can leave your projects safely to finish later if you cannot finish in one sitting. This means that you need to organize all your tools, and parts in easy to maintain containers. We like using small clear plastic boxes, and paper labels that you can write on with pencil or ball point pens.
Sparking your imagination is the biggest and most important challenge when you are designing your jewelry line, but seeing different parts and beads is a great way to start.Have a look at our instagram page, as well as any other fashion bloggers that catch your interest.A large part of the creative process is compiling all the things you’ve seen with the techniques you have mastered or continue to develop. If you see design elements in different contexts like social media or magazines, you can put your own spin on and express them in ways that uniquely showcase your style. We do our best to display our products in many different ways to help your creative process along.
One of the worst things you can do when running any business is to cut corners on quality supplies. This is especially true when you are creating your jewelry line, as lower quality supplies will be harder to work with, and more difficult to get repeat customers. Gempacked has all the components used by name brands, high end department stores, and private boutique designers use, all at bulk pricing. Start your line off with quality you can trust at a price point that you can rely on. Contact GemPacked if you have any questions about jewelry making supplies or tools, and we’ll be glad to point you in the right direction.
-Cyrus Nemani,
]]>Here is what you will need:
What size Head Pins should I use?
Headpins and Ballpins are pieces of wire that are cut to specific lengths and end with a flat head or round ball on one side. Headpins have two main dimensions, length and thickness. The first thing to consider is the length you will need to complete your wire wrap. The length you need depends on the size of your bead and how comfortable you are with wire wrapping in general. If you are a beginner or not very confident with wire wrapping, I would suggest getting headpins that are on the longer side to make sure you have enough room to work.
Once we know the length that we are working with, we can select the gauge. Obviously, the headpin has to fit into the hole of the bead without falling through. If the head of the pin falls through the bead hole, you can use a bead cap to increase the width of the bottom.
If you need to choose between two sizes that both fit, it comes down to your design and personal preference for what works best. For example, if you are wire wrapping a pendant onto a very dainty chain, I would use a thinner gauge and vice-versa.
Now for the easy part, the actual wire wrapping.
Thread the headpin into the bead and use your round nose plier to make a loop a couple of millimeters above the bead hole. The trick to making your next wire wrap match is to remember the position of the wire on your plier. Remember that spot and the spacing you left above the bead hole, because that is how you will keep the loop sizes consistent.
When you have your loop, slip it onto the piece you want to attach the bead to. Now you have an idea of how it will hang when its done. If you want to make adjustments, now is the time to go back and do them. If you like the way it looks, then we can go ahead and finish the wrap. Grab the loop with your flat nose and the end of the wire with your round nose, then coil the wire neatly around twice or three times. Either is fine, it mostly depends on what you think looks better. In general though, the thinner the wire, the more I recommend going with three coils. I am going to end my coil where the next one would have begun so it fits nicely, and cut the end with my wire cutter.
I mentioned this trick in my other tutorials, but it is very useful and is worth repeating. To get a nice and clean cut, use your cutter to just pinch where you want to cut, then bend it back and forth until it comes off. That way you get a more precise ending and your cutter does less work.
Now we have one side done!
I am going to quickly repeat all these steps to show you how to match this wrap for earrings but also just to review. I mentioned earlier that the trick to making two wire headpin wraps match is to remember the spacing above the bead and the position of the wire on the plier when you made your first loop. Try to make your loop as close to how you did it the first time around.
Looks pretty good right? This kind of technique all comes down to a few simple tricks. Once you have a method to keep everything even, matching your wraps becomes much easier, and if you practice at it, it will become automatic.
-Cyrus Nemani, Gempacked
]]>Do you love the way Oxidized Silver looks, but have a hard time doing it yourself? No worries! This tutorial will show you a few great tips that will make Oxidizing Silver much easier and look way better using common household items you probably have laying around the house already! More importantly, we are going to show you how to do everything safely because the oxidation process requires some potentially dangerous chemicals.
Required Materials:
Now that we have all the essentials, we can get to the fun part!
Tip #1: Dilute the oxidizing solution and keep it in a separate container.
Why water down the solution? Undiluted oxidizing solution is very strong—too strong for almost all of the Silver you would normally be using. Most people prefer a lightly oxidized, shiny black finish for the final product but it is very hard to control the level of darkness if you use the solution straight from the bottle. Unless the Silver you are using has rhodium plating or some anti-tarnish treatment, undiluted oxidizing solution will turn your silver a very dull, dark black before you can say “tarnish” three times fast!
A mixture of one part Silver Black with one or two parts water is ideal for most projects and will allow you to stop the reaction before the silver becomes too dark. It is always better to go slowly than darken the silver too fast and have to polish it off. You can store the watered down solution in a separate glass or plastic container with a lid and reuse it until it becomes too weak.
Tip #2: Resealable Plastic Bag
There are a few reasons why using a resealable plastic bag can be one of the biggest time and money savers for oxidizing silver. You can pour the diluted solution into the bag, do what you need to do, and pour it back without lowering the strength of your original bottle. Over time, the plastic bag saves a lot of solution because it is easy to drain, causes less spills, and allows you to use the same liquid until the oxidizing power is exhausted. Another important point is that doing your oxidation in a sealed off bag contains the nasty fumes and unpleasant odors the reaction generates.
Tip #3: Stainless Steel Paper Clips or Staples
If you are having problems getting Sterling Silver to oxidize, having a stainless steel paper clip or staple in the solution will make the process go faster. Why? Because Science, that’s why! Stainless steel is a catalyst for the oxidation reaction so having it near your Silver components while submerged in oxidizing solution will help the reaction along. I like using paper clips to control the darkness because when you poke around, the areas you touch will change color faster. You can also put the items directly onto the paper clip, dip into solution, and quickly remove it to easily get an even color on multiple items.
Another great use for stainless steel in combination with Oxidizing solution is for oxidizing rhodium plated items. It is very difficult to oxidize rhodium and it will not change color even in undiluted acid solution . However, if you add a paper clip to the mix, things will quickly change. The piece will not be as dark as naked Sterling Silver would be, but will end up a few shades darker and look very sleek.
Tip #4: Silver Cleaning Solution
Did you go too far? No problem, because there’s a way around it! If you feel like the silver has become too dark, you can reverse some of the damage by putting it in cleaning solution and shaking vigorously. Make sure that you use new silver cleaning solution for best results. It wont go back to the original color, but the metal will lighten a few shades which will give you another chance to get the color you originally wanted.
Tip #5: Cotton Swabs
Cotton Swabs are great for the times that you don’t need to oxidize the entire piece. When you need a small touch up or want to avoid getting acid on delicate stones, dip the cotton swab into undiluted solution, apply to the area you want to darken, reapply until you get the desired color, and then rinse… Which brings us to our last pro-tips!
Tip #6: Paper Towels
These are obviously good for drying your pieces after rinsing them off but that’s not all! Paper towels are great for removing areas of uneven color if you don’t have a polishing cloth laying around. Just gently scrub the parts which are darker and it should gradually become lighter until the color blends in with the surrounding areas. Keep in mind that rough paper towels will work better than soft ones for scrubbing, but both will work if you try long enough.
Tip #7: Hair Dryer
Another way to get rid of residual moisture is with a hair dryer. Some pieces, especially small silver beads, can trap water. Water isn’t normally a problem for jewelry making, but there may be enough traces of acid left in the moisture that can discolor or weaken thread. To remove the excess moisture, place a paper towel into a container, put your oxidized silver pieces on top, and gently blow dry. The paper towel will catch most of the water, and the rest will evaporate away.
To Sum Things Up…
This tutorial went over 7 easy ways to help you get the perfect Sterling Silver Oxidization job done on your own using common household items. Hopefully it also gives you an important lesson that you don’t always need fancy jeweler tools to save you time, money and hassle! Jewelry making is about being creative with problem solving as much as it is about being creative with your designs. Use these tips and look for your own time savers around the house that are waiting to be used in your jewelry making!
-Cyrus Nemani, Gempacked
]]>Ever wanted to make jewelry with leather cord or thick cord but couldn’t figure out a way to put the clasp you wanted on it? Well I’ve got a great trick that will allow you to use any type clasp that you want. That’s right—any type of clasp! Almost… Except for mystery clasps. But other than that, Every type of clasp! Give me a break, come on.
So here’s what you need;
You will obviously need the wire, your cord, and a clasp. I have a few sizes of wire from size 20G to 26G to compare with the cord to see which one looks best. You are also going to need a couple of tools. A wire cutter, a sharp one if you have one, and two pliers. It’s better if one of them is a long flat nose which will be useful to grab the wire and touch up the coil at the end, but it doesn’t really matter as long as you get a good grip on it. The last thing you need is some super glue to hold the wire to the cord so it doesn’t move after we’re finished.
For this kind of job, make sure you use soft wire instead of half hard because you need it to bend—you need it to be flexible. If you use thinner wire, then you will have to do more coils, more loops around the cord. If you use thicker wire, then you don’t have to use as many loops, but it is harder to bend.
If you have your cord ready and can compare it a few different sizes of wire, you will get a better idea of what will work best, but it is a judgement call. I ended up choosing the 22 Gauge wire with this blue leather cord because I feel like it has the best proportion to the leather cord. So let’s get started!
The first thing you want to do is make sure that the cord will fit into the clasp. But if it doesn’t you can always just get a jump ring and then attach the jump ring to the clasp later. But we are going to do both ends, so it doesn’t really matter for now.
So we put the jump ring through. Make sure that you have more cord than what you need because you can always cut off the end, but you can’t add to it later. Especially if this is your first time doing this, you want to make sure you have enough room. Same goes for the wire. You don’t want to take too little and be sorry later.
We are going to pinch it at the end and make a few neat coils. The number of coils that you need depends on the wire that you are using and the size of your cord. But for this I think that five is probably good. And we can’t just end it here, we need to make sure it will keep its shape. So with the end going off to the side, we are going to thread it right through the bottom here and actually make a knot out of this. This isn’t a wire wrap after all, this is a knot.
It’s a lot easier to thread it through if the wire is straight. The wire comes out of the top and we firmly pull both ends—this is where the pliers might come in handy. You can try pulling it with your hands first though. Now we have a knot and all we need to do is just tighten it.
You can go and tighten it a little bit more if you want by rotating each layer of the coil with your plier, one layer at a time. Each time you go around with your plier, there will be a little bit of slack that goes down to the next layer and once you get to the bottom, you can just pull that loose slack through. Now that it is tight, let’s just make sure it looks good from all sides. You can use the flat nose to make it a little bit neater.
So this is basically it. All we need to do now is just cut the ends off and make sure its nice and clean. Cut the ends off, getting as deep as you can so that the ends don’t show. To finish it off we just need to secure it a little bit with the super glue.
I’m going to do it right there where the end is. Just a drop, you don’t want to put too much or the leather gets brittle. And then on the short end of the leather, we are going to do the same thing. We are going to put a drop of super glue on that end only and cut carefully. You don’t want to nick the other when which we will be using. And then one last bit—one really really tiny drop of super glue right there. And then you have one half of it finished.
We will just repeat the steps above on the other side, the only difference second time around is that you need to measure the length of your necklace or bracelet with a ruler and adjust it while you can still make changes.
Now this takes a little bit of practice, but once you get the hang of it its a really useful skill to have because you don’t have to worry about not being able to use a clasp that you want. Try it out, practice it a couple of times and once you get the hang of it, things will get a lot easier really fast.
-Cyrus Nemani, Gempacked
]]>So lets get to making the loop! Start by putting the wire on the round nose and bending it into a circle. The size of the loop doesn’t have to be perfect on the first try, you can still adjust it at this point. Just make sure you leave around a quarter inch or half inch after the loop to complete the wrap.
After you make the loop the size you want, pull the chain into the loop like this and grab the loop end of the wire like this using your flat nose plier. Grab the short end of the loop using a flat nose or round nose plier and wrap it in a neat coil like this. You should only be bending the short end, the long end should stay straight. I am just going to show you what it looks like with a single coil now because after you do more than one coil, it becomes difficult to go back.
Anyways, this looks good so we will continue with one more coil to make sure it’s nice and strong. As I mentioned earlier, we are using 22G wire which is on the thicker side, so two coils is fine. For thinner gauges like 26G or 28G it’s probably better to do 2 or 3 coils depending on how much weight the wire wrap needs to bear. Thicker gauges may only require one or two coils to be safe. We are almost half way there. We can cut off this short end, just remember to wear safety glasses because you don’t want bits of wire flying in your face. Part of the wire is still sticking out and we will just flatten it with the flat nose.
After we do that, you can put the bead into the wire and we will basically repeat the steps from before. The only difference this time is when you are making your loop, you need to leave a little bit of space to allow for those two coils. Again, you don’t need to get it right on the first try—you can make your loop and adjust it afterwards before you make your coil.
Hold the loop with the flat nose just like the first time around and pull the loose end around. After we have those two loops I will just tighten it with the flat nose and cut it right where the third coil would have begun.
Bonus Tip: A little trick that I do is that I don’t actually cut this end of the wire because its hard to get in there. I just leave a small mark that is not enough to actually cut through and I kind of bend it back and forth until it breaks on the weak spot that I left. This way the wire that is left over at the end is shorter and easier to tuck in with the flat nose. It also wastes less wire so that we have more for our next wire wrap. So I will do that here and we are done!
To Sum things Up…
This tutorial ran a little bit long but when you get used to it, they will take a minute each or even less. As you do more of these, your wraps will be more even, you will become more comfortable with different gauges, and you will work much faster. This is really a case of practice makes perfect.
For all the jewelry components you see in this tutorial, visit https://www.gempacked.com
-Cyrus Nemani, Gempacked
]]>
We have these blank tags in Sterling Silver, Gold Filled, and 14K Gold for just that purpose and these are great. They are customizable, come in all sizes, shapes and colors, and best of all they look expensive but they are not. You can usually get a few pieces of the Silver and Gold Filled ones for under a dollar. Larger ones like dog tags are a couple dollars each, but they are pretty heavy.
People ask us all the time if we engrave them. We don’t do it in store but we will show you a really easy way to do it on your own without a jeweler. Keep in mind that we will be doing all of this engraving by hand, so if your logo is really complex or detailed then this method will probably not work for you. Also, you need to make sure that your logo works well in a single color. So with all that out of the way, lets get to it!
These are the things you need. You need the blank tags, a steel file, and a felt pen or permanent marker. A fine tip is usually best. You will also need a way to polish it once we are done. A motorized polish tool is best, but if all you have is a polishing cloth it will work. You will just need to work a little bit harder when you are finishing things up.
We are basically going to take our logo and imprint it directly onto the blank tag. The fastest way to do it is to get an ink stamp which saves a lot of time. If you don’t need to make a lot of these, you can also make a stencil and color in the blanks like we did here. I basically just printed out our logo and cut out the shapes with an exacto-knife. If you are a good artist, you can also draw it by hand.
Now that we have the design on the tag, we will take our file and just scratch it off. Where ever there is black ink, just scratch it, gradually making deeper and deeper grooves in the metal. Once the grooves are deep enough, we can polish the tag like you see here. If you slip once or twice, it shouldn’t be a problem because you can polish it out later with a cloth or motorized polisher. All those shallow grooves will get brushed away and we will just be left with the marks that we actually wanted.
And thats basically it!
We used really basic tools to do your own custom engraving. This method is not for everyone, but it can be a really useful work around if you are in a bind, if your engraver or jeweler charges a lot, or if you just want to try a new way to put your stamp on your jewelry designs.
-Cyrus Nemani, Gempacked
]]>September is when things start to happen in every level of the industry, and it usually happens fast from the very top. Prices of raw materials like Gold and Silver tend to fluctuate most towards the tail end of the year. Many manufacturers slow or even stop operations during summer months, but then dramatically ramp up production in the fall. It is also common to see manufacturers sit on new designs for the whole year and start pushing them out just in time for the peak season.
At the other end of the line, demand for jewelry is growing as well. Jewelry stores and retailers start to increase their inventory for the holidays as shoppers start rushing in. Many end users only purchase jewelry during the holidays. Others who buy jewelry for every season, often save their big ticket purchases for this time of year. To top it off, the online jewelry industry has also continued its streak of year over year growth heading into the most important sales period of the year.
Still miss summer?
September is the most exciting month of the year if you are making and selling jewelry but you need to stock up and be ready. Every year we spend most of the month trying to get our hands on as many components for hot trends as possible in addition to restocking our regular best selling products.We also use this time to try adding new, untested merchandise to our inventory while it has the best chance to catch on. We hope your orders start coming in fast and heavy!
This week I am in Hong Kong for the Gem and Jewellery Fair and I will be sharing some of the most interesting finds with you on our Instagram, Facebook, and Twitter accounts. We will be bringing back as much of the action as we can!
-Cyrus Nemani, Gempacked
Sources:
http://www.idexonline.com/portal_FullNews.asp?id=39555
http://www.internetretailer.com/
http://brandongaille.com/14-jewelry-industry-statistics-and-trends/
]]>Bar necklaces and pretty much all geometric pendants and jewelry have been really hot this season. There are so many different ways you can design them and they look great on just about anybody. The best thing is that they are easy to make in bulk, and they aren’t too difficult to make. We are going to show you a few different kinds of them, including different tricks and techniques you can use to make your designs stand out.
The Simple Bar necklace:
These are the standard plain bar necklaces which come in different sizes, metals, and colors. You would engrave a name or message on the smooth flat bar with no stones, but the diamond ones are pretty much ready to wear. These pretty much make the designs for themselves, but we can still add some tiny accents where the chain connects to the bar. You can do it by wire wrapping a small faceted bead, or just putting a bead directly on the chain and have it go down to the bottom.
Wire wrapped Bar Necklace
Another type of bar necklace is one where you take beads and wire wrap them together. What we do is basically take a wire and wrap it to chain, then add the beads and close it on the other side. Hard wire is better than soft wire in this case because it will hold its shape. This method gives you a little bit more room to create because there are so many different types of beads you can use. Whatever shape, size, material, or color bead, you name it. The bar also doesn’t need to be perfectly straight, you can also bend the wire into a little arch or even bend it hard to make angled shapes like triangles.
Divider Necklace
The last trick I have is using parts that are meant for other things but can be used in our design. A great example is dividers which are usually used to create spacing in multi-strand bracelets and necklaces. For bar necklaces, multi-strand dividers are great. They are already the shape we want them, they have holes, and no one that I know is using this method yet although maybe that will change after this post! For our bar necklaces, we will take dividers and just use headpins to create loops and connect to the chains. You can also drop pendants from them like this. So simple, but it looks great and why make things more difficult when you have all the parts in front of you already?
As always, jewelry design is all about coming up with different combinations of beads and findings that work well together. You can use some of the tricks we showed you in this video and adapt them to your own style. Share your designs with us on and we might feature you in future blogs with a link to your page! Have fun with this, till next time!
-Cyrus Nemani, Gempacked
]]>What is a Pave Setting?
Pave Settings give the appearance of a continuous surface of gemstones by placing many tiny stones side by side with as little metal separating the stones as possible. Pave settings are generally the preferred choice for tiny stones because it combines their reflective properties in a way that would not be possible on their own. This type of setting is most popular for stones under 2mm, which allows great freedom for incorporation into complex pieces with custom shapes and curvatures where larger stones would not fit. Though very labor intensive, the resulting piece combines separate bits and pieces into something truly special.
What metals are used in Pave Setting?
While pave settings can be made from any metal, designer jewelry normally features stones that are set into precious metals like 14K or 18K Gold, Platinum and Sterling Silver. Platinum is generally used with high quality white diamonds for custom pieces and wedding bands because of its white color and high material cost. Karat gold and Sterling Silver are arguably better suited for pave jewelry because they can be used in most of the same designs as .950 Platinum but are available in multiple colors and at cost much less.
Oxidized Silver Pave Diamond Jewelry
The explosion of jewelry featuring diamonds set in oxidized silver over the past few years is a great example of how versatile the pave setting can be. Oxidized Sterling Silver jewelry with diamonds usually does not use clear white diamonds common in traditional fine jewelry—they use brownish champagne color diamonds which contrast beautifully with the dark metal finish but would not work well in white or yellow metals. These champagne diamonds cost significantly less per carat than their clear white counterparts and it would not make sense to set these diamonds in materials like Platinum which can be well over 50 times the cost of Sterling Silver. The end result is that the designer does not need to break the bank to use real diamonds in their jewelry.
To sum things up…
Pave settings are a shining example of how settings have many purposes aside from just holding the gemstones in place. They display the maximum brilliance within a jewelry design by capturing and combining reflections from each stone. Pave setting allows for great versatility in designer jewelry, both with the styles they conform to and with budgeting the final piece. Whether you are adding small accents to a piece, or want to go all out with huge diamond bling, there will always be room to fit in a little bit more sparkle.
–Cyrus Nemani, Gempacked
Find tons of different styles of Pave Diamond Silver Beads, Lobster Clasps with Diamonds, 14K Gold Diamond Balls, and other Diamond Findings at Gempacked.com
]]>A good start is to feel the relative weights/ densities of the stones. All three of these samples are roughly the same size and look very similar in color. We can quickly tell that Spinel is much denser than tourmaline and agate when we hold it in our hand.
Tourmaline is only slightly more dense than Onyx, so it would be difficult to tell between the two just by feel. Adding to the difficulty is that they both register 6.5-7.5 on the Mohs Hardness Scale. They are obviously both black and opaque, so is this game over for us? Not at all.
Tourmaline has a much better luster when cut and polished than Onyx. Though black in color, it reflects light more brilliantly than the Agate family which Onyx is a part of.
To sum things up:
Though you would need gemological background to know the names of unknown gemstones, there are many different easy tricks we can use to distinguish between unknown gemstones.
-Cyrus Nemani, Gempacked
Find all colors of Gemstone beads like Agate, Tourmaline, and more at Gempacked.com.
]]>