
There’s a lot of things that separates designer jewelry from normal, run of the mill stuff. But the most basic thing to make it special, to make it yours and promote your brand is you need to put some kind of a logo on it.

We have these blank tags in Sterling Silver, Gold Filled, and 14K Gold for just that purpose and these are great. They are customizable, come in all sizes, shapes and colors, and best of all they look expensive but they are not. You can usually get a few pieces of the Silver and Gold Filled ones for under a dollar. Larger ones like dog tags are a couple dollars each, but they are pretty heavy.

People ask us all the time if we engrave them. We don’t do it in store but we will show you a really easy way to do it on your own without a jeweler. Keep in mind that we will be doing all of this engraving by hand, so if your logo is really complex or detailed then this method will probably not work for you. Also, you need to make sure that your logo works well in a single color. So with all that out of the way, lets get to it!

These are the things you need. You need the blank tags, a steel file, and a felt pen or permanent marker. A fine tip is usually best. You will also need a way to polish it once we are done. A motorized polish tool is best, but if all you have is a polishing cloth it will work. You will just need to work a little bit harder when you are finishing things up.
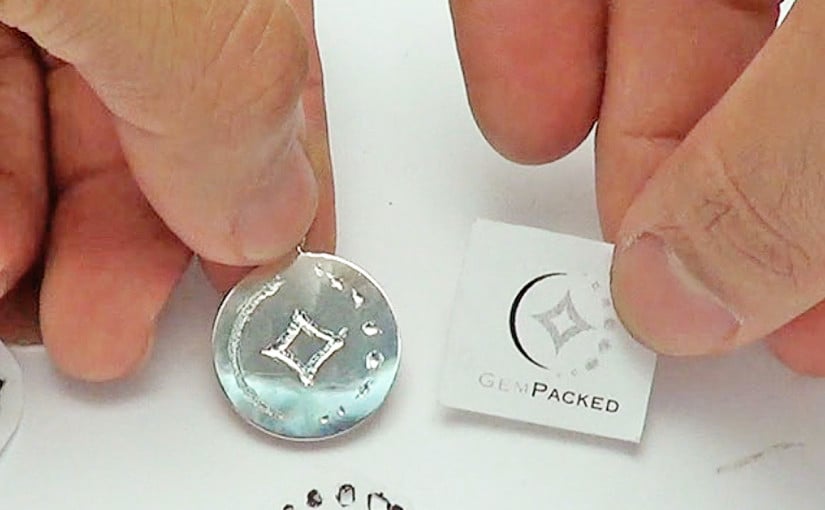
We are basically going to take our logo and imprint it directly onto the blank tag. The fastest way to do it is to get an ink stamp which saves a lot of time. If you don’t need to make a lot of these, you can also make a stencil and color in the blanks like we did here. I basically just printed out our logo and cut out the shapes with an exacto-knife. If you are a good artist, you can also draw it by hand.
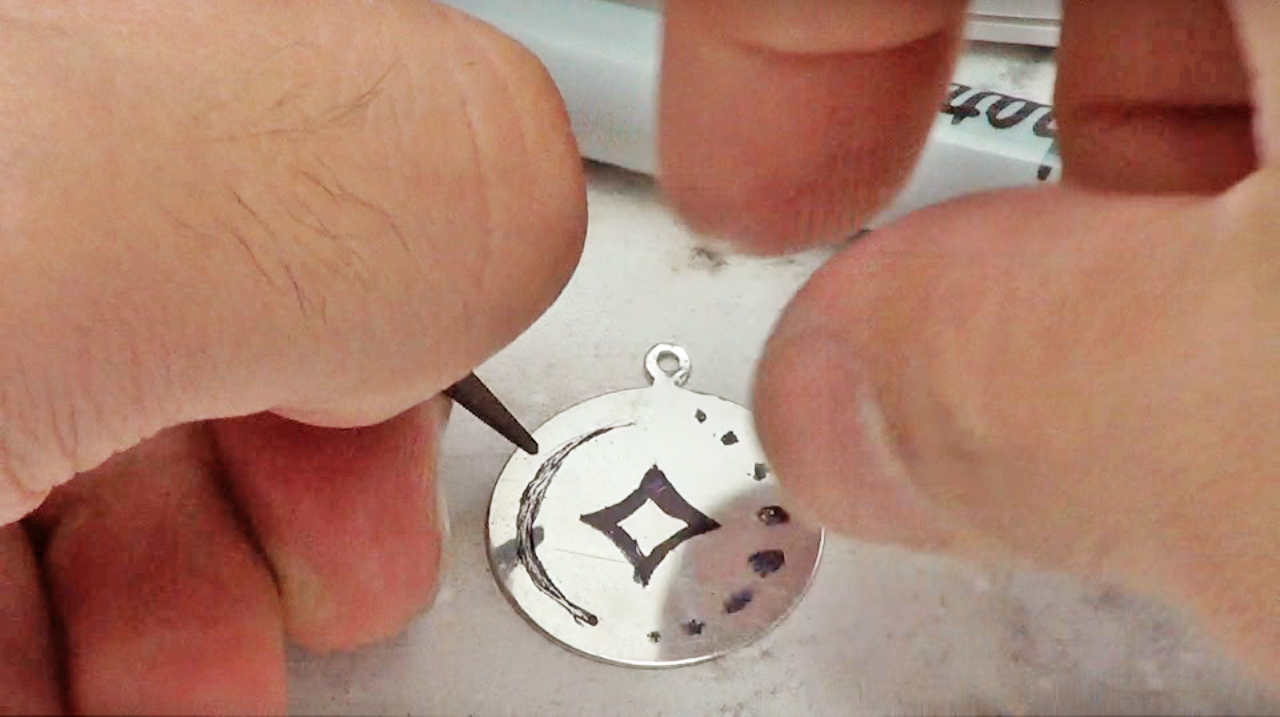
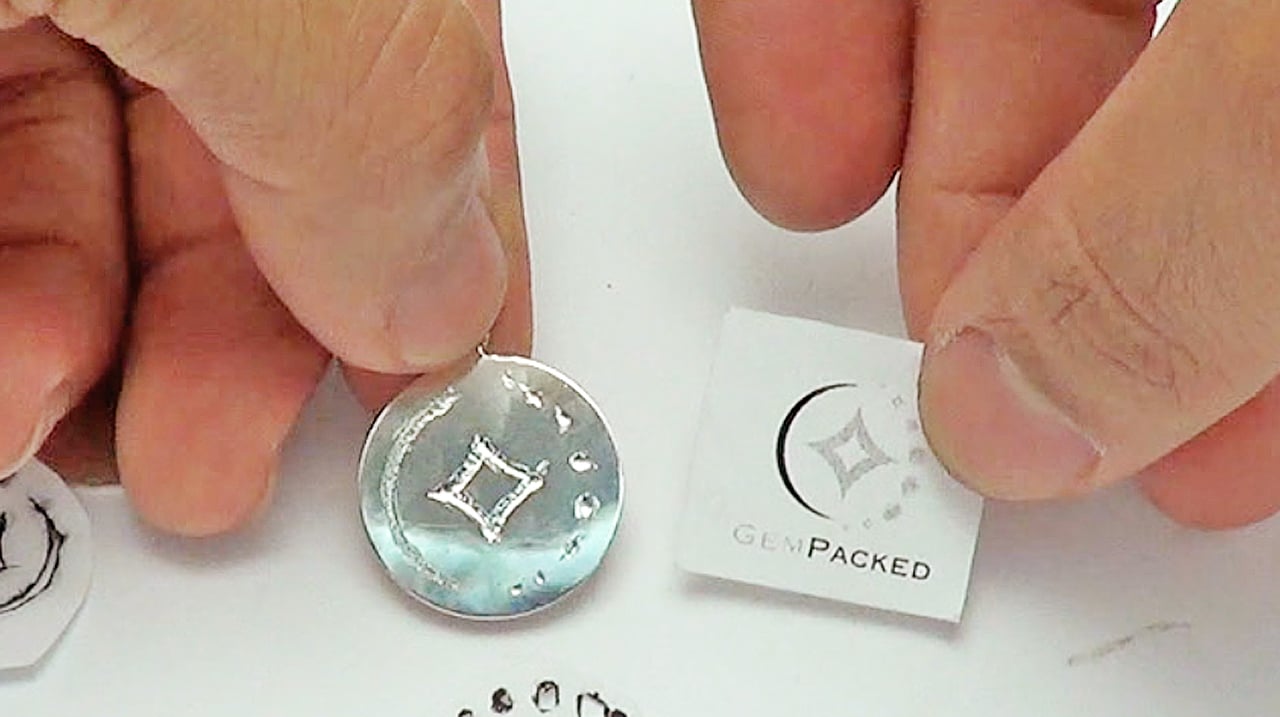
Now that we have the design on the tag, we will take our file and just scratch it off. Where ever there is black ink, just scratch it, gradually making deeper and deeper grooves in the metal. Once the grooves are deep enough, we can polish the tag like you see here. If you slip once or twice, it shouldn’t be a problem because you can polish it out later with a cloth or motorized polisher. All those shallow grooves will get brushed away and we will just be left with the marks that we actually wanted.

And thats basically it!
We used really basic tools to do your own custom engraving. This method is not for everyone, but it can be a really useful work around if you are in a bind, if your engraver or jeweler charges a lot, or if you just want to try a new way to put your stamp on your jewelry designs.
-Cyrus Nemani, Gempacked