
Ever wanted to make jewelry with leather cord or thick cord but couldn’t figure out a way to put the clasp you wanted on it? Well I’ve got a great trick that will allow you to use any type clasp that you want. That’s right—any type of clasp! Almost… Except for mystery clasps. But other than that, Every type of clasp! Give me a break, come on.
So here’s what you need;
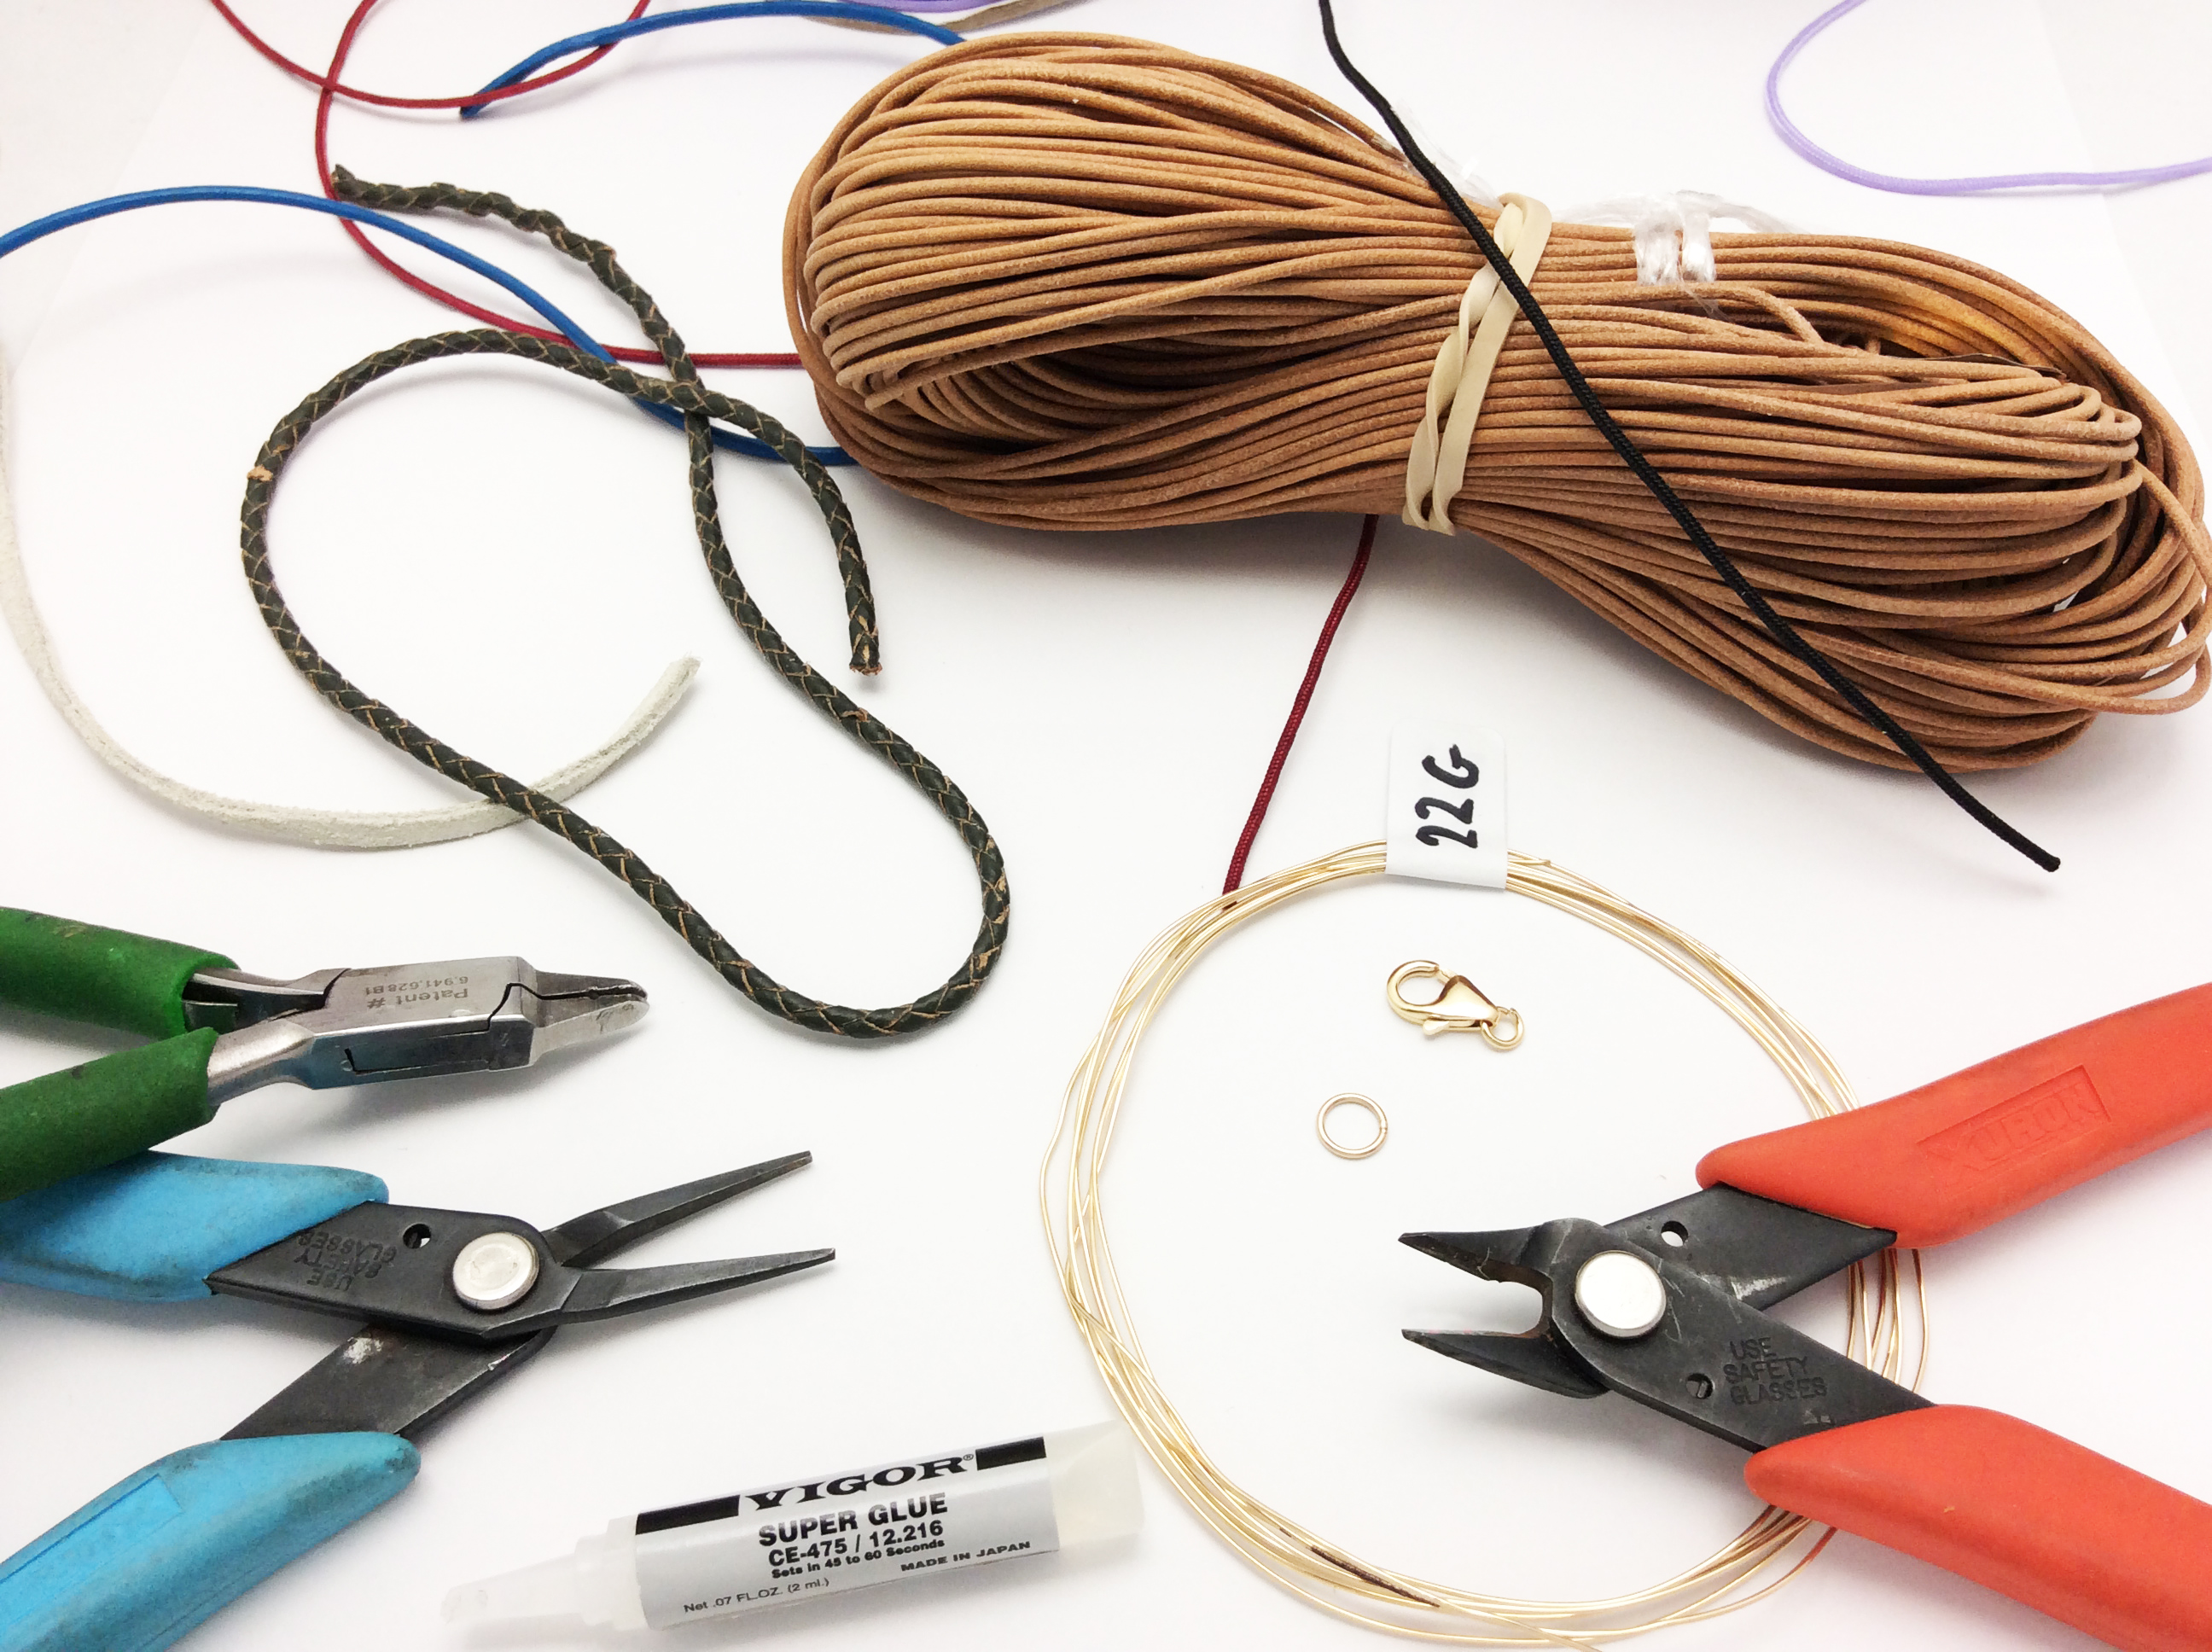
- Metal Wire, Soft Temper (not hard or half hard)
- Leather or Thick Cord
- A clasp with jump rings
- Two pliers, (make sure one of them is a flat nose)
- A wire cutter
- Super Glue
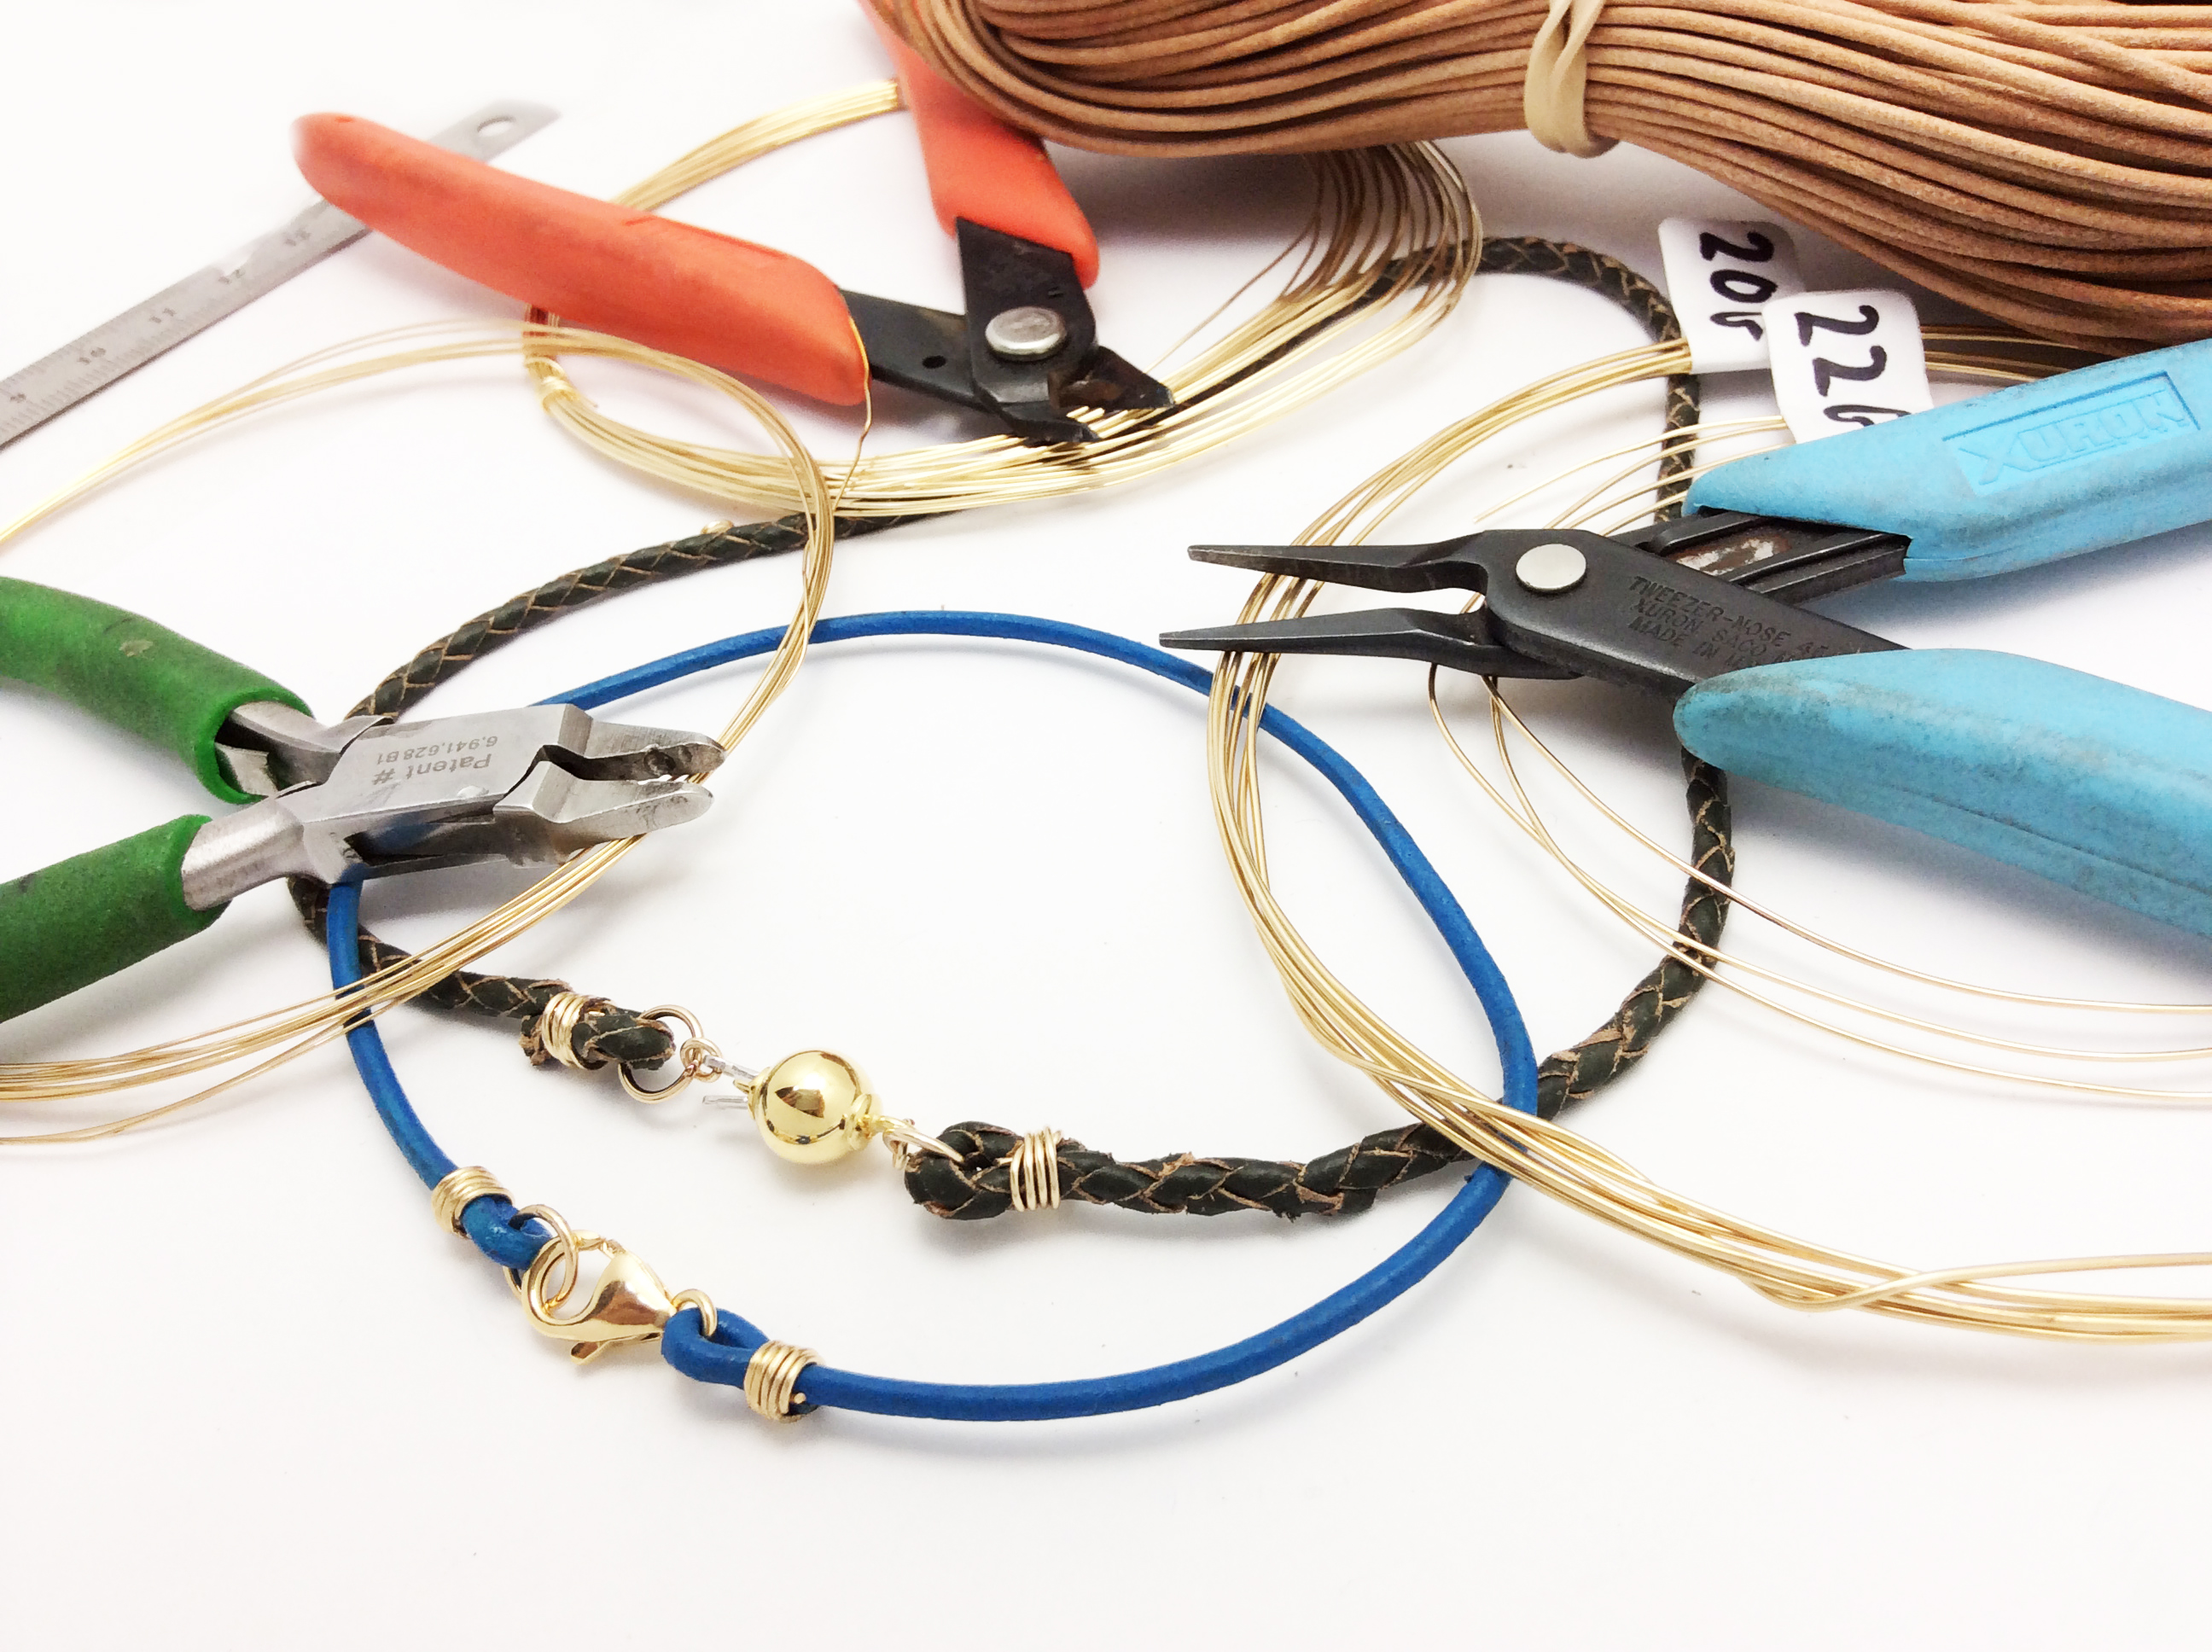
You will obviously need the wire, your cord, and a clasp. I have a few sizes of wire from size 20G to 26G to compare with the cord to see which one looks best. You are also going to need a couple of tools. A wire cutter, a sharp one if you have one, and two pliers. It’s better if one of them is a long flat nose which will be useful to grab the wire and touch up the coil at the end, but it doesn’t really matter as long as you get a good grip on it. The last thing you need is some super glue to hold the wire to the cord so it doesn’t move after we’re finished.
For this kind of job, make sure you use soft wire instead of half hard because you need it to bend—you need it to be flexible. If you use thinner wire, then you will have to do more coils, more loops around the cord. If you use thicker wire, then you don’t have to use as many loops, but it is harder to bend.

If you have your cord ready and can compare it a few different sizes of wire, you will get a better idea of what will work best, but it is a judgement call. I ended up choosing the 22 Gauge wire with this blue leather cord because I feel like it has the best proportion to the leather cord. So let’s get started!
The first thing you want to do is make sure that the cord will fit into the clasp. But if it doesn’t you can always just get a jump ring and then attach the jump ring to the clasp later. But we are going to do both ends, so it doesn’t really matter for now.
So we put the jump ring through. Make sure that you have more cord than what you need because you can always cut off the end, but you can’t add to it later. Especially if this is your first time doing this, you want to make sure you have enough room. Same goes for the wire. You don’t want to take too little and be sorry later.

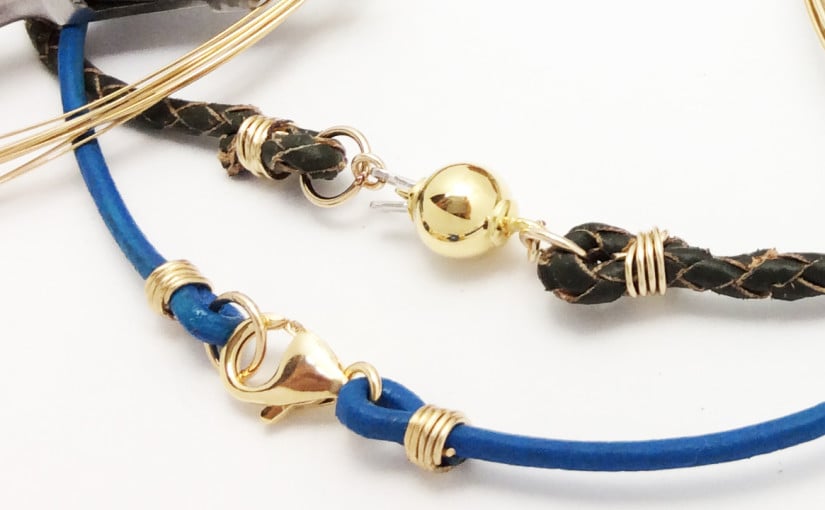
We are going to pinch it at the end and make a few neat coils. The number of coils that you need depends on the wire that you are using and the size of your cord. But for this I think that five is probably good. And we can’t just end it here, we need to make sure it will keep its shape. So with the end going off to the side, we are going to thread it right through the bottom here and actually make a knot out of this. This isn’t a wire wrap after all, this is a knot.

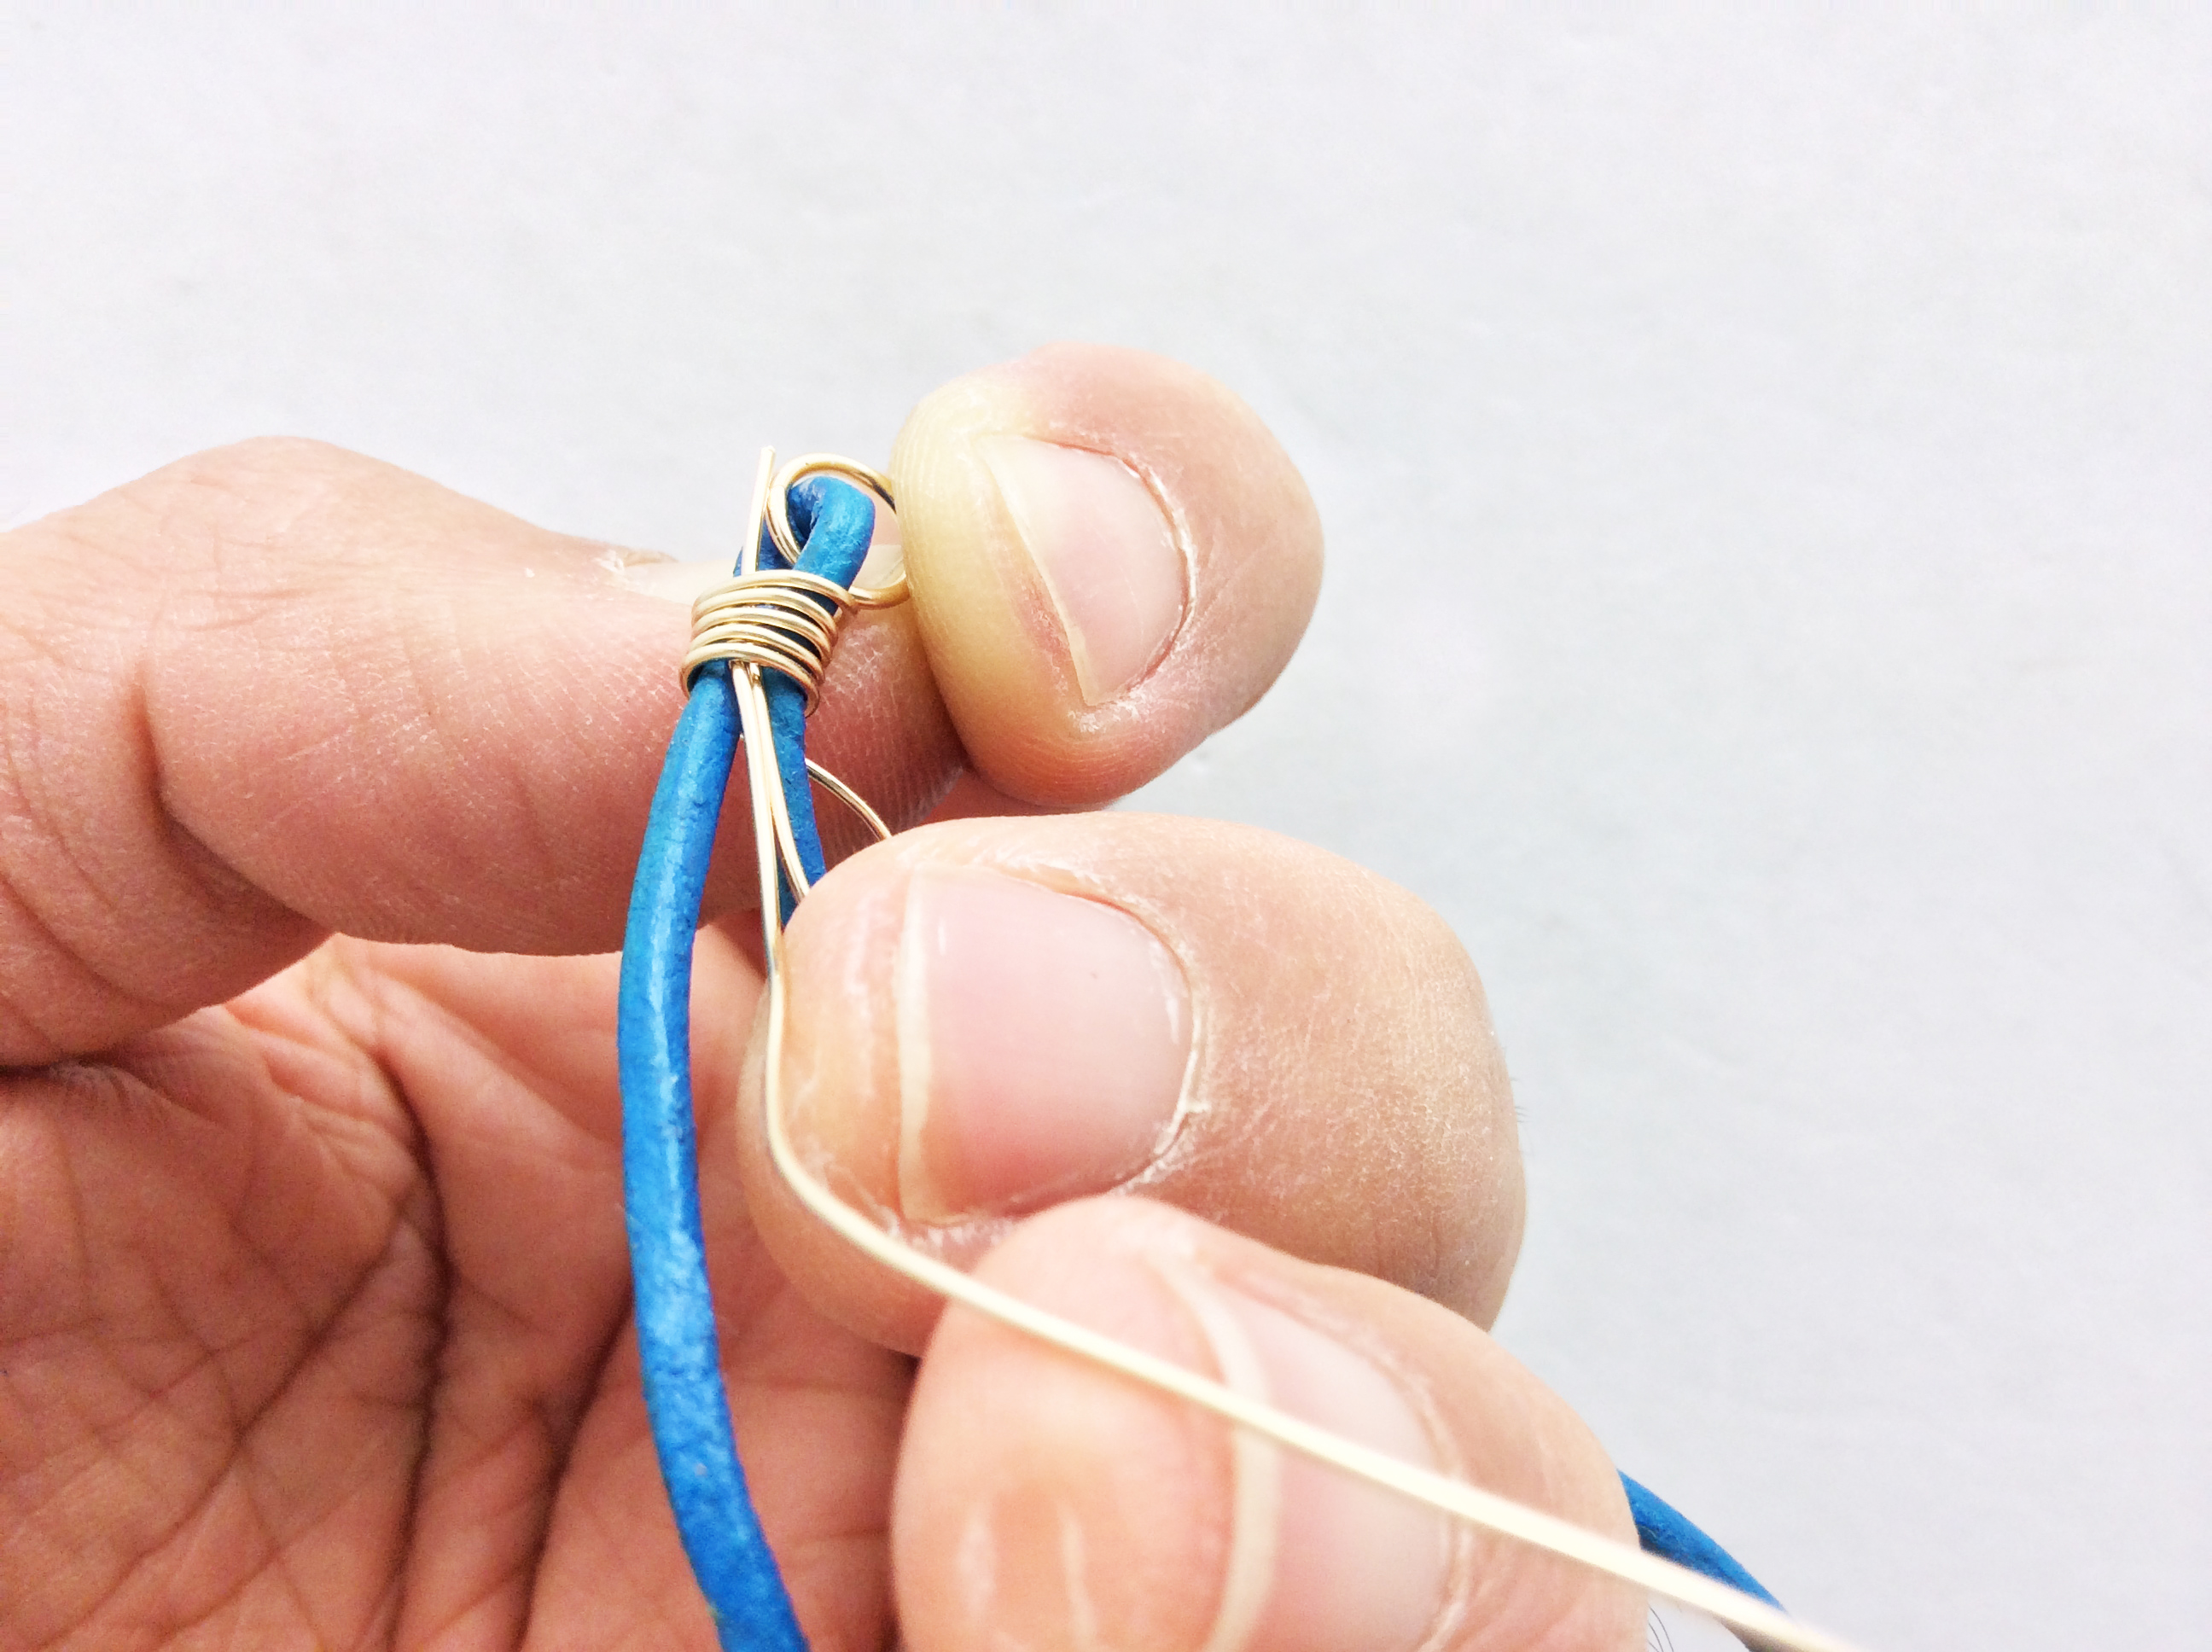
It’s a lot easier to thread it through if the wire is straight. The wire comes out of the top and we firmly pull both ends—this is where the pliers might come in handy. You can try pulling it with your hands first though. Now we have a knot and all we need to do is just tighten it.
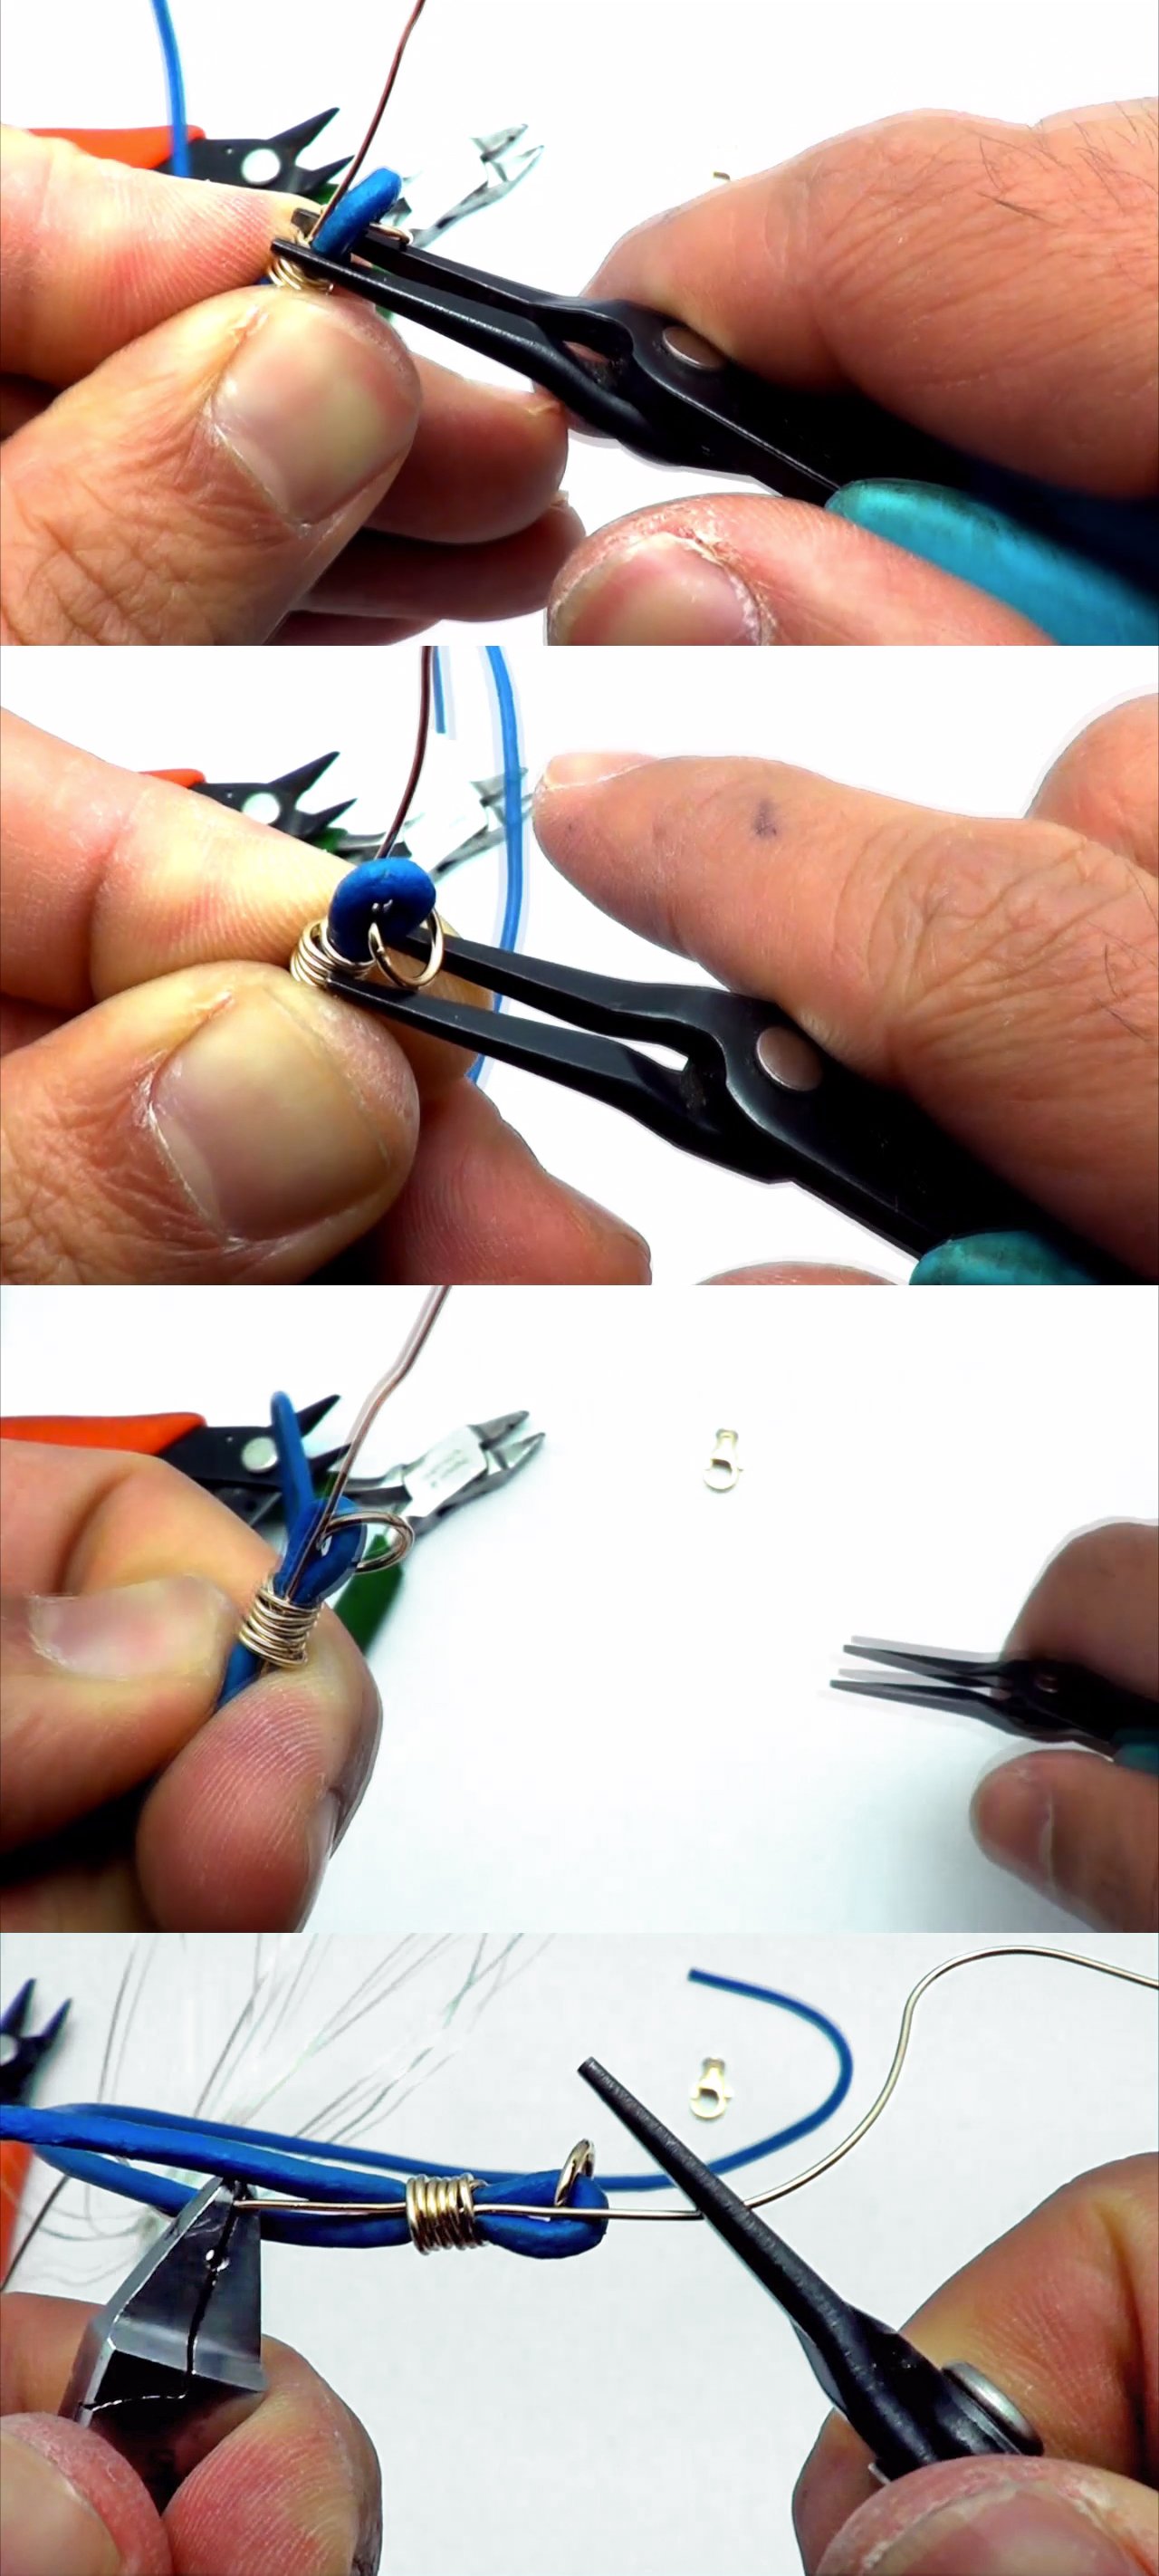
You can go and tighten it a little bit more if you want by rotating each layer of the coil with your plier, one layer at a time. Each time you go around with your plier, there will be a little bit of slack that goes down to the next layer and once you get to the bottom, you can just pull that loose slack through. Now that it is tight, let’s just make sure it looks good from all sides. You can use the flat nose to make it a little bit neater.
So this is basically it. All we need to do now is just cut the ends off and make sure its nice and clean. Cut the ends off, getting as deep as you can so that the ends don’t show. To finish it off we just need to secure it a little bit with the super glue.
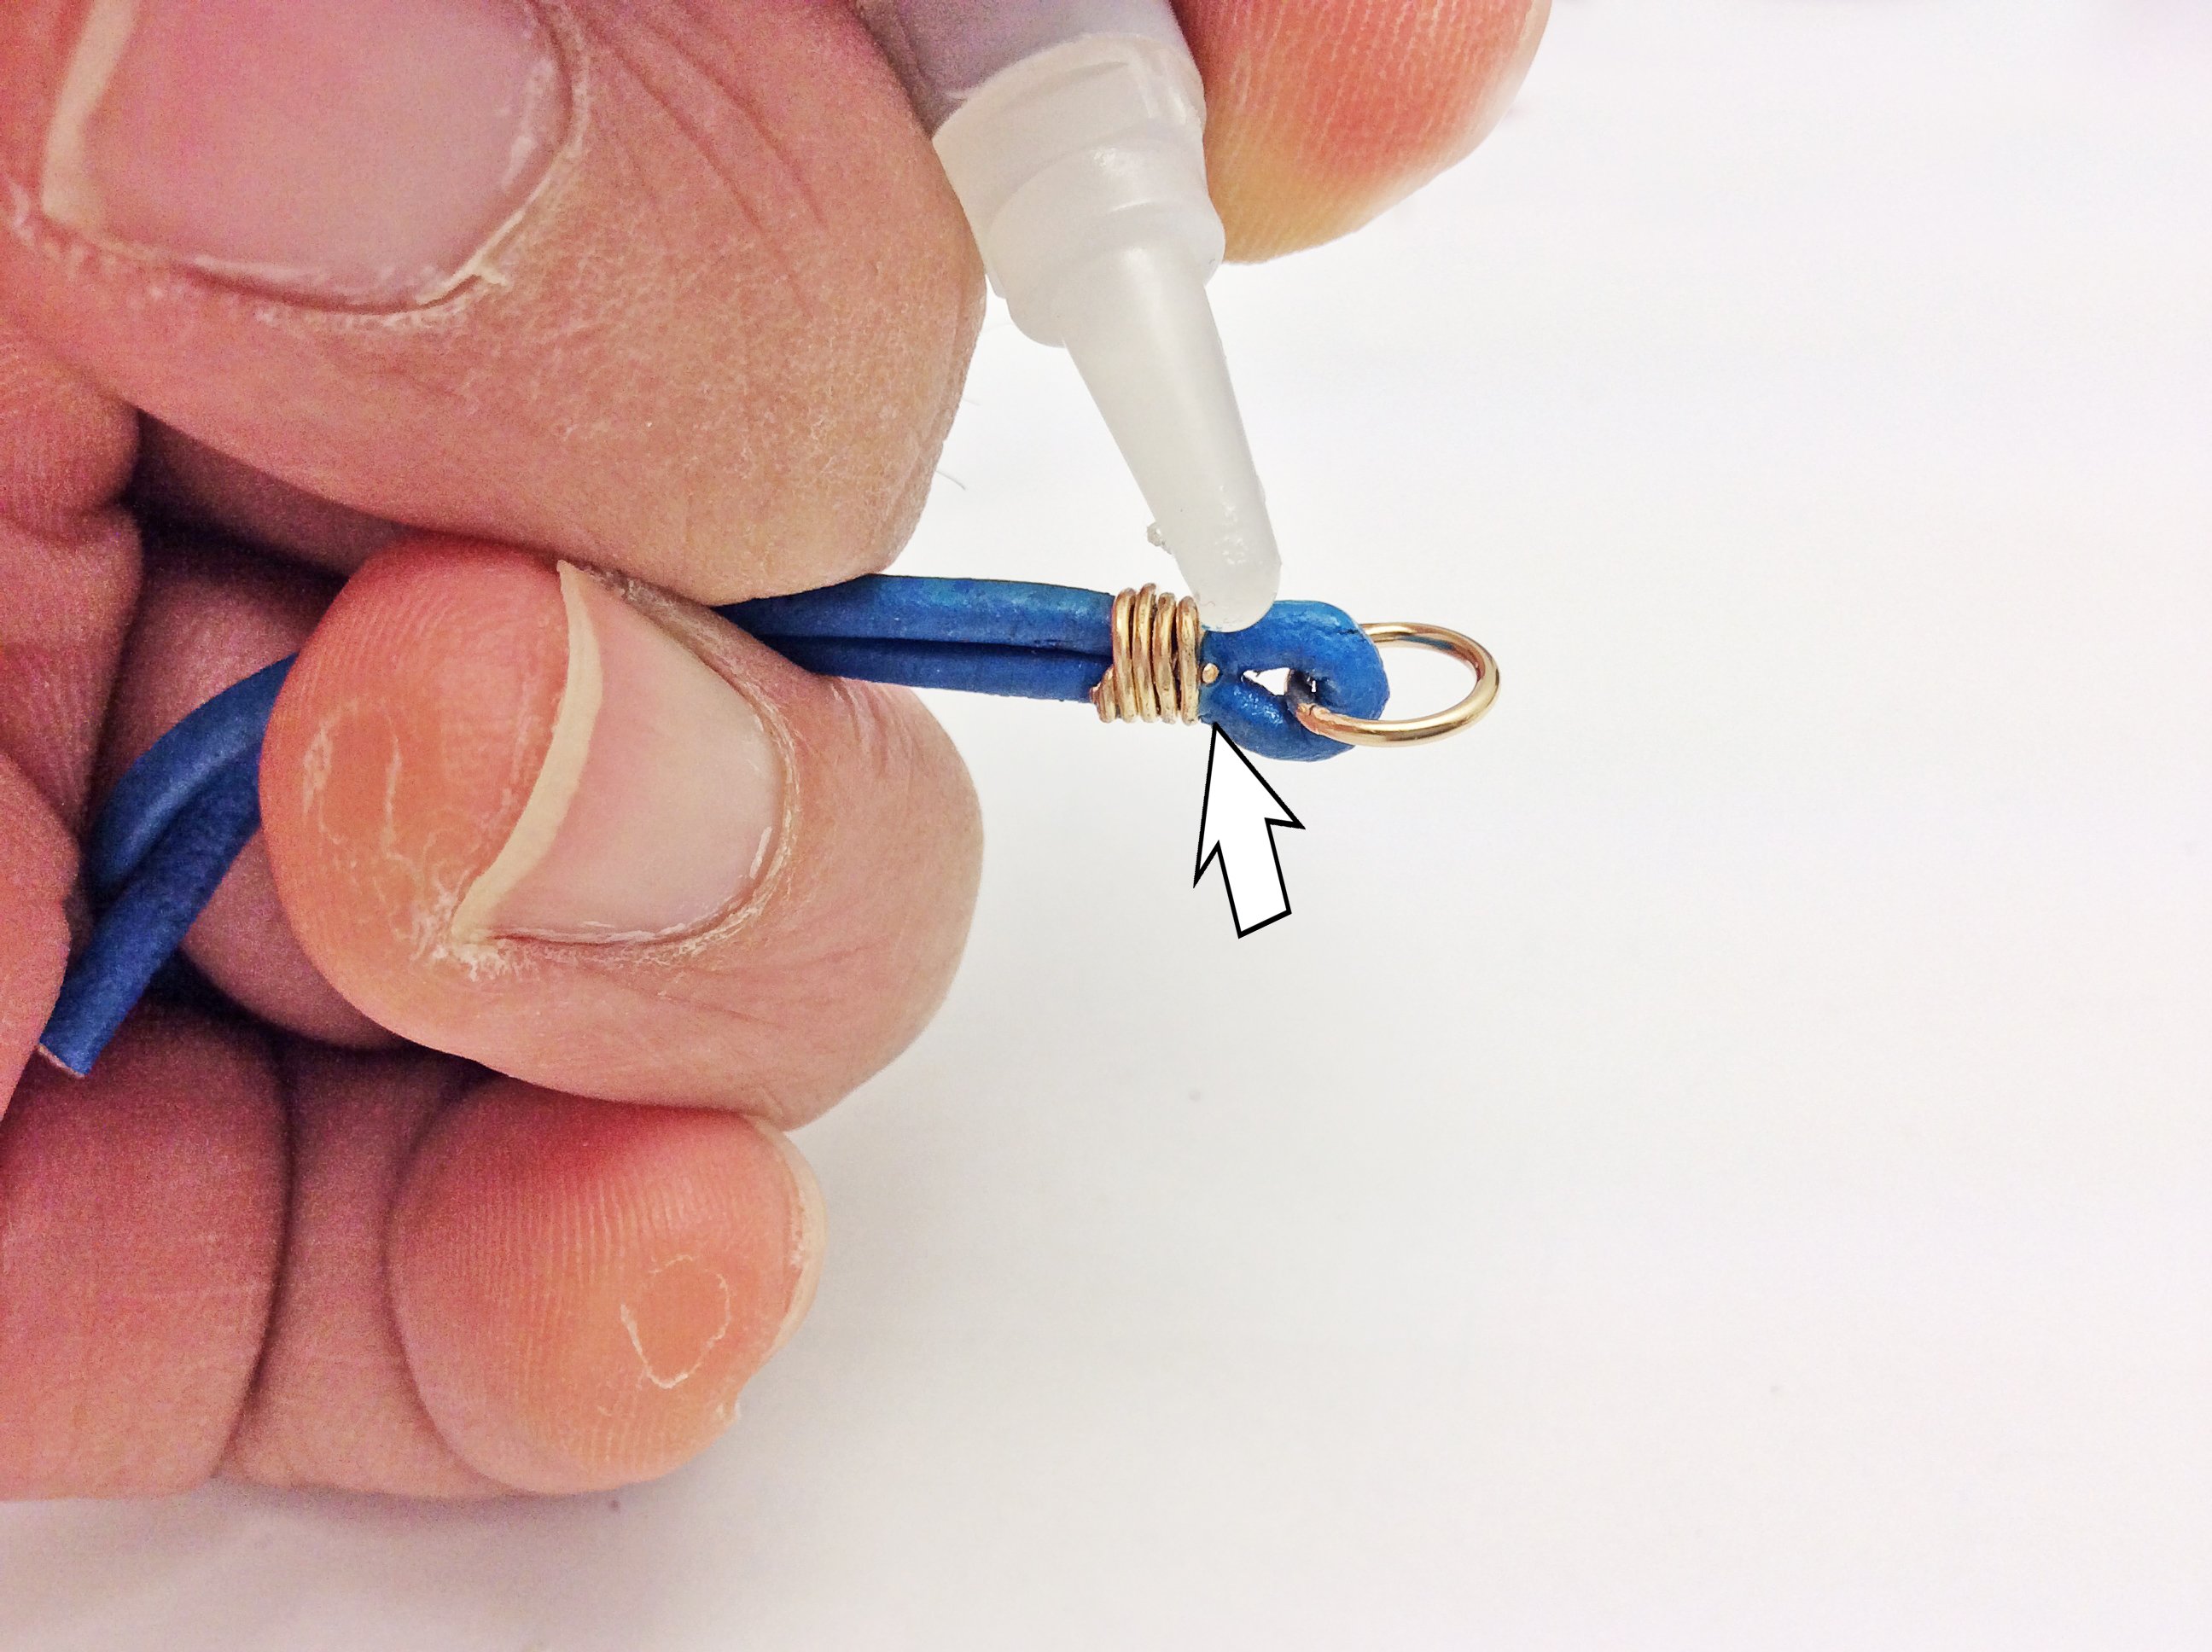
I’m going to do it right there where the end is. Just a drop, you don’t want to put too much or the leather gets brittle. And then on the short end of the leather, we are going to do the same thing. We are going to put a drop of super glue on that end only and cut carefully. You don’t want to nick the other when which we will be using. And then one last bit—one really really tiny drop of super glue right there. And then you have one half of it finished.
We will just repeat the steps above on the other side, the only difference second time around is that you need to measure the length of your necklace or bracelet with a ruler and adjust it while you can still make changes.
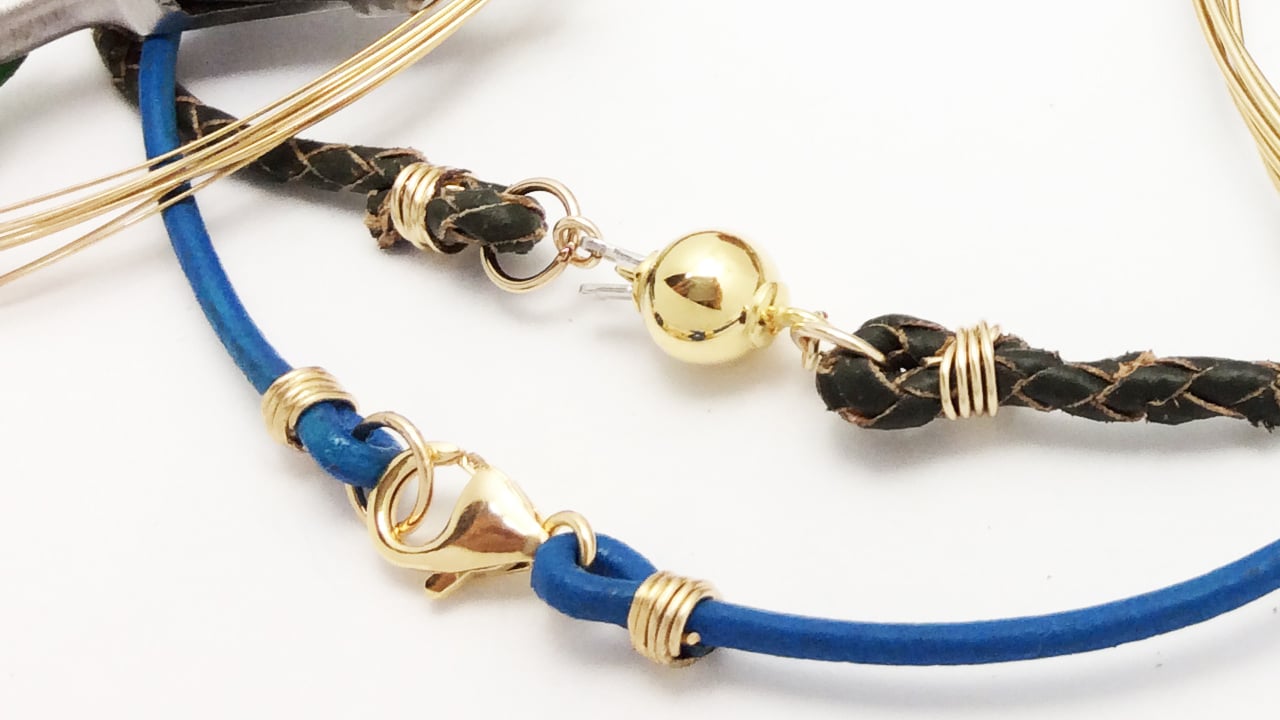
Now this takes a little bit of practice, but once you get the hang of it its a really useful skill to have because you don’t have to worry about not being able to use a clasp that you want. Try it out, practice it a couple of times and once you get the hang of it, things will get a lot easier really fast.
-Cyrus Nemani, Gempacked