
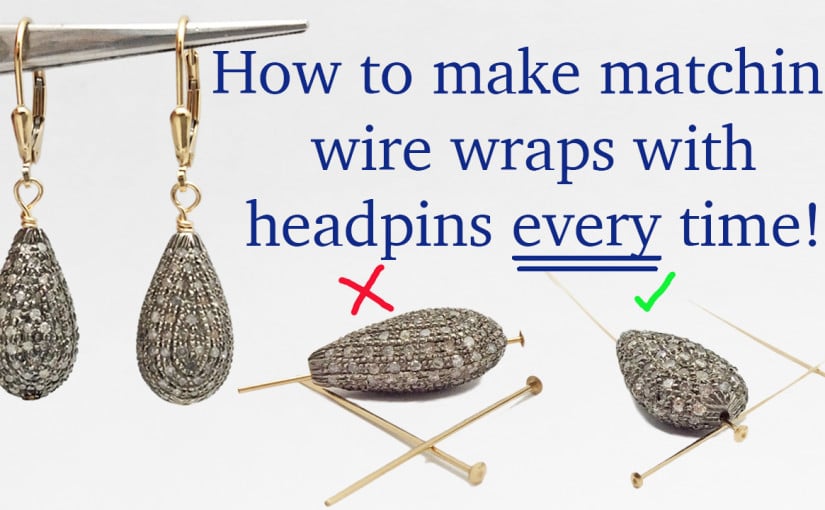
Making the perfect wire wrap is not just about the wrapping itself. It starts with your jewelry design and selecting the proper size headpins to go with your beads. This jewelry tutorial will show you how to choose the best headpins for your project as well as helpful tricks and proper technique for making matching, uniform wire wraps every time. It will just take a few steps to get to the finished product, so lets get to it!

Here is what you will need:
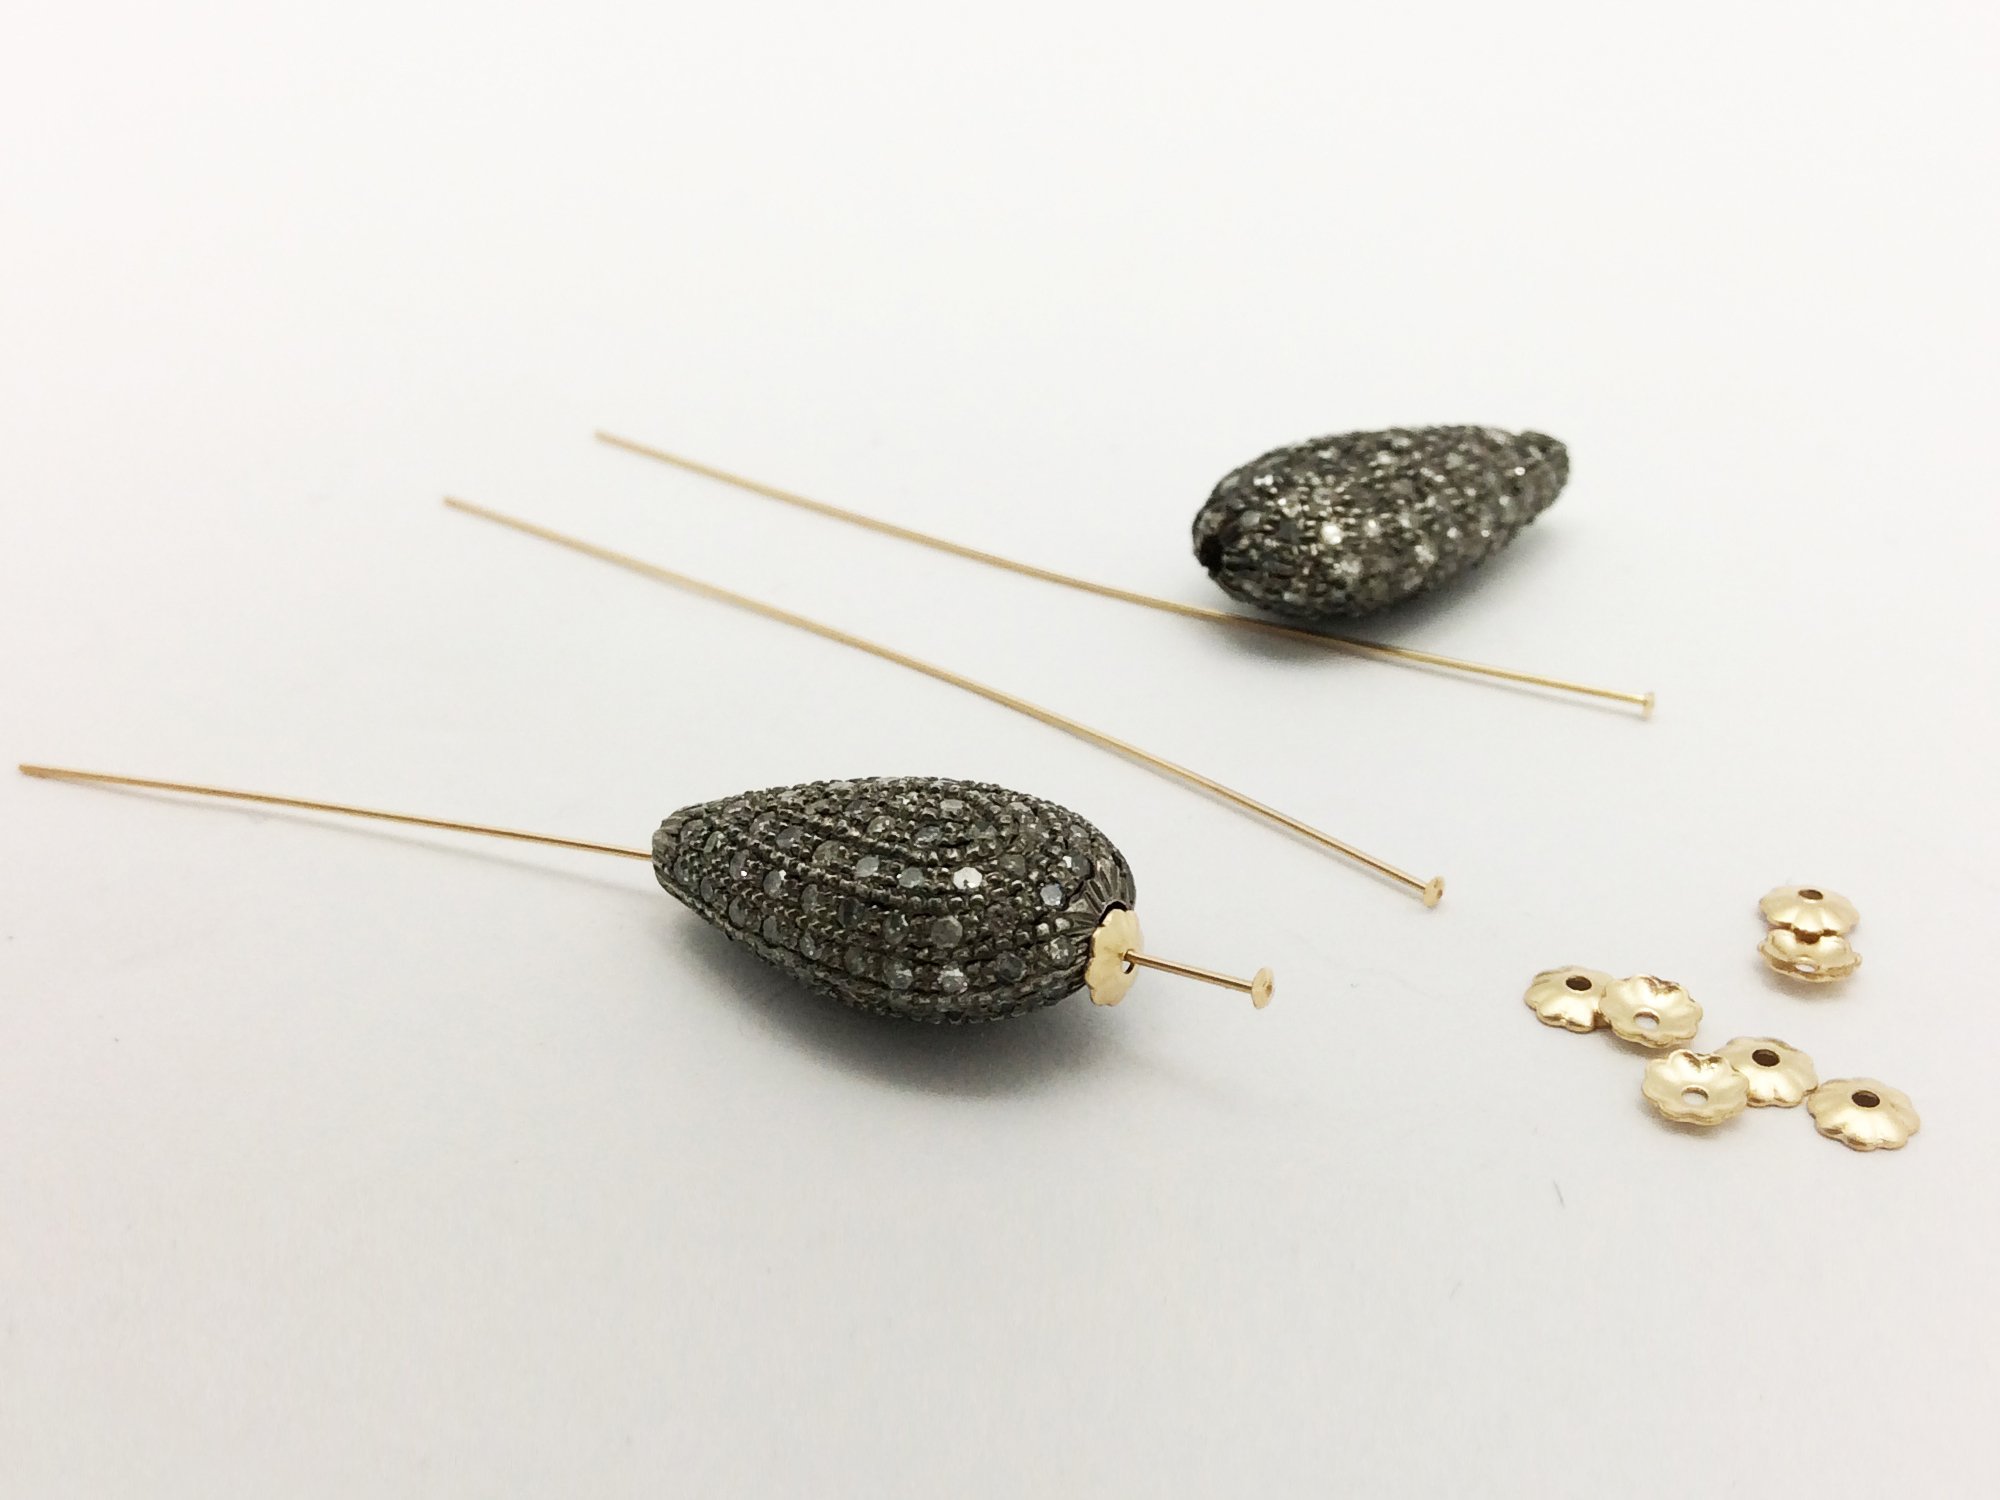
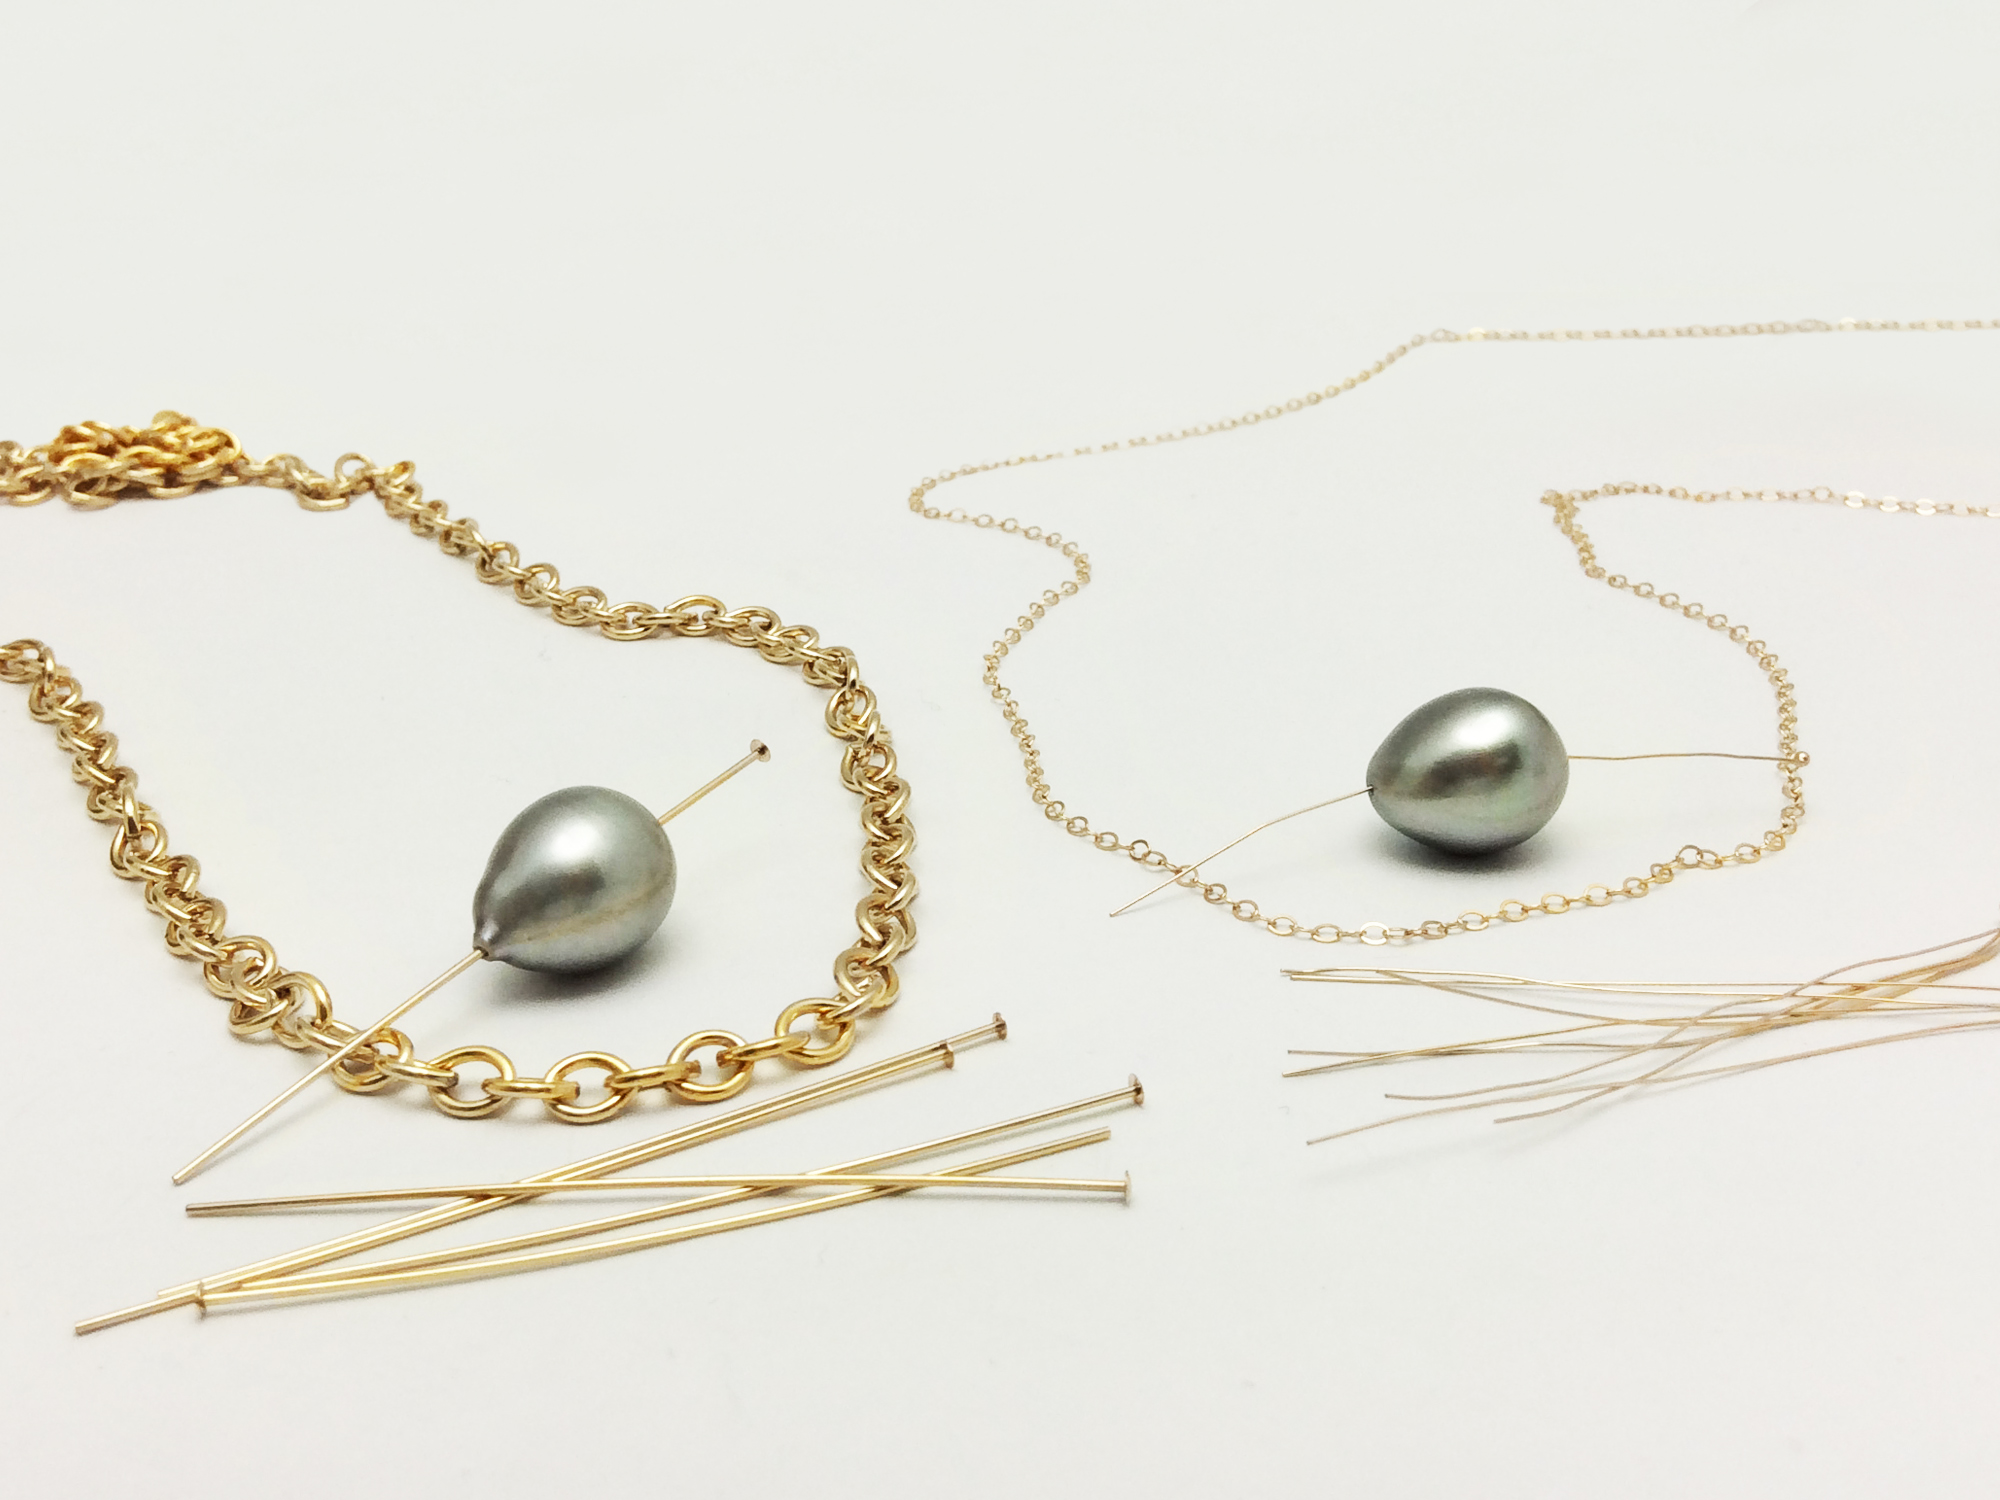
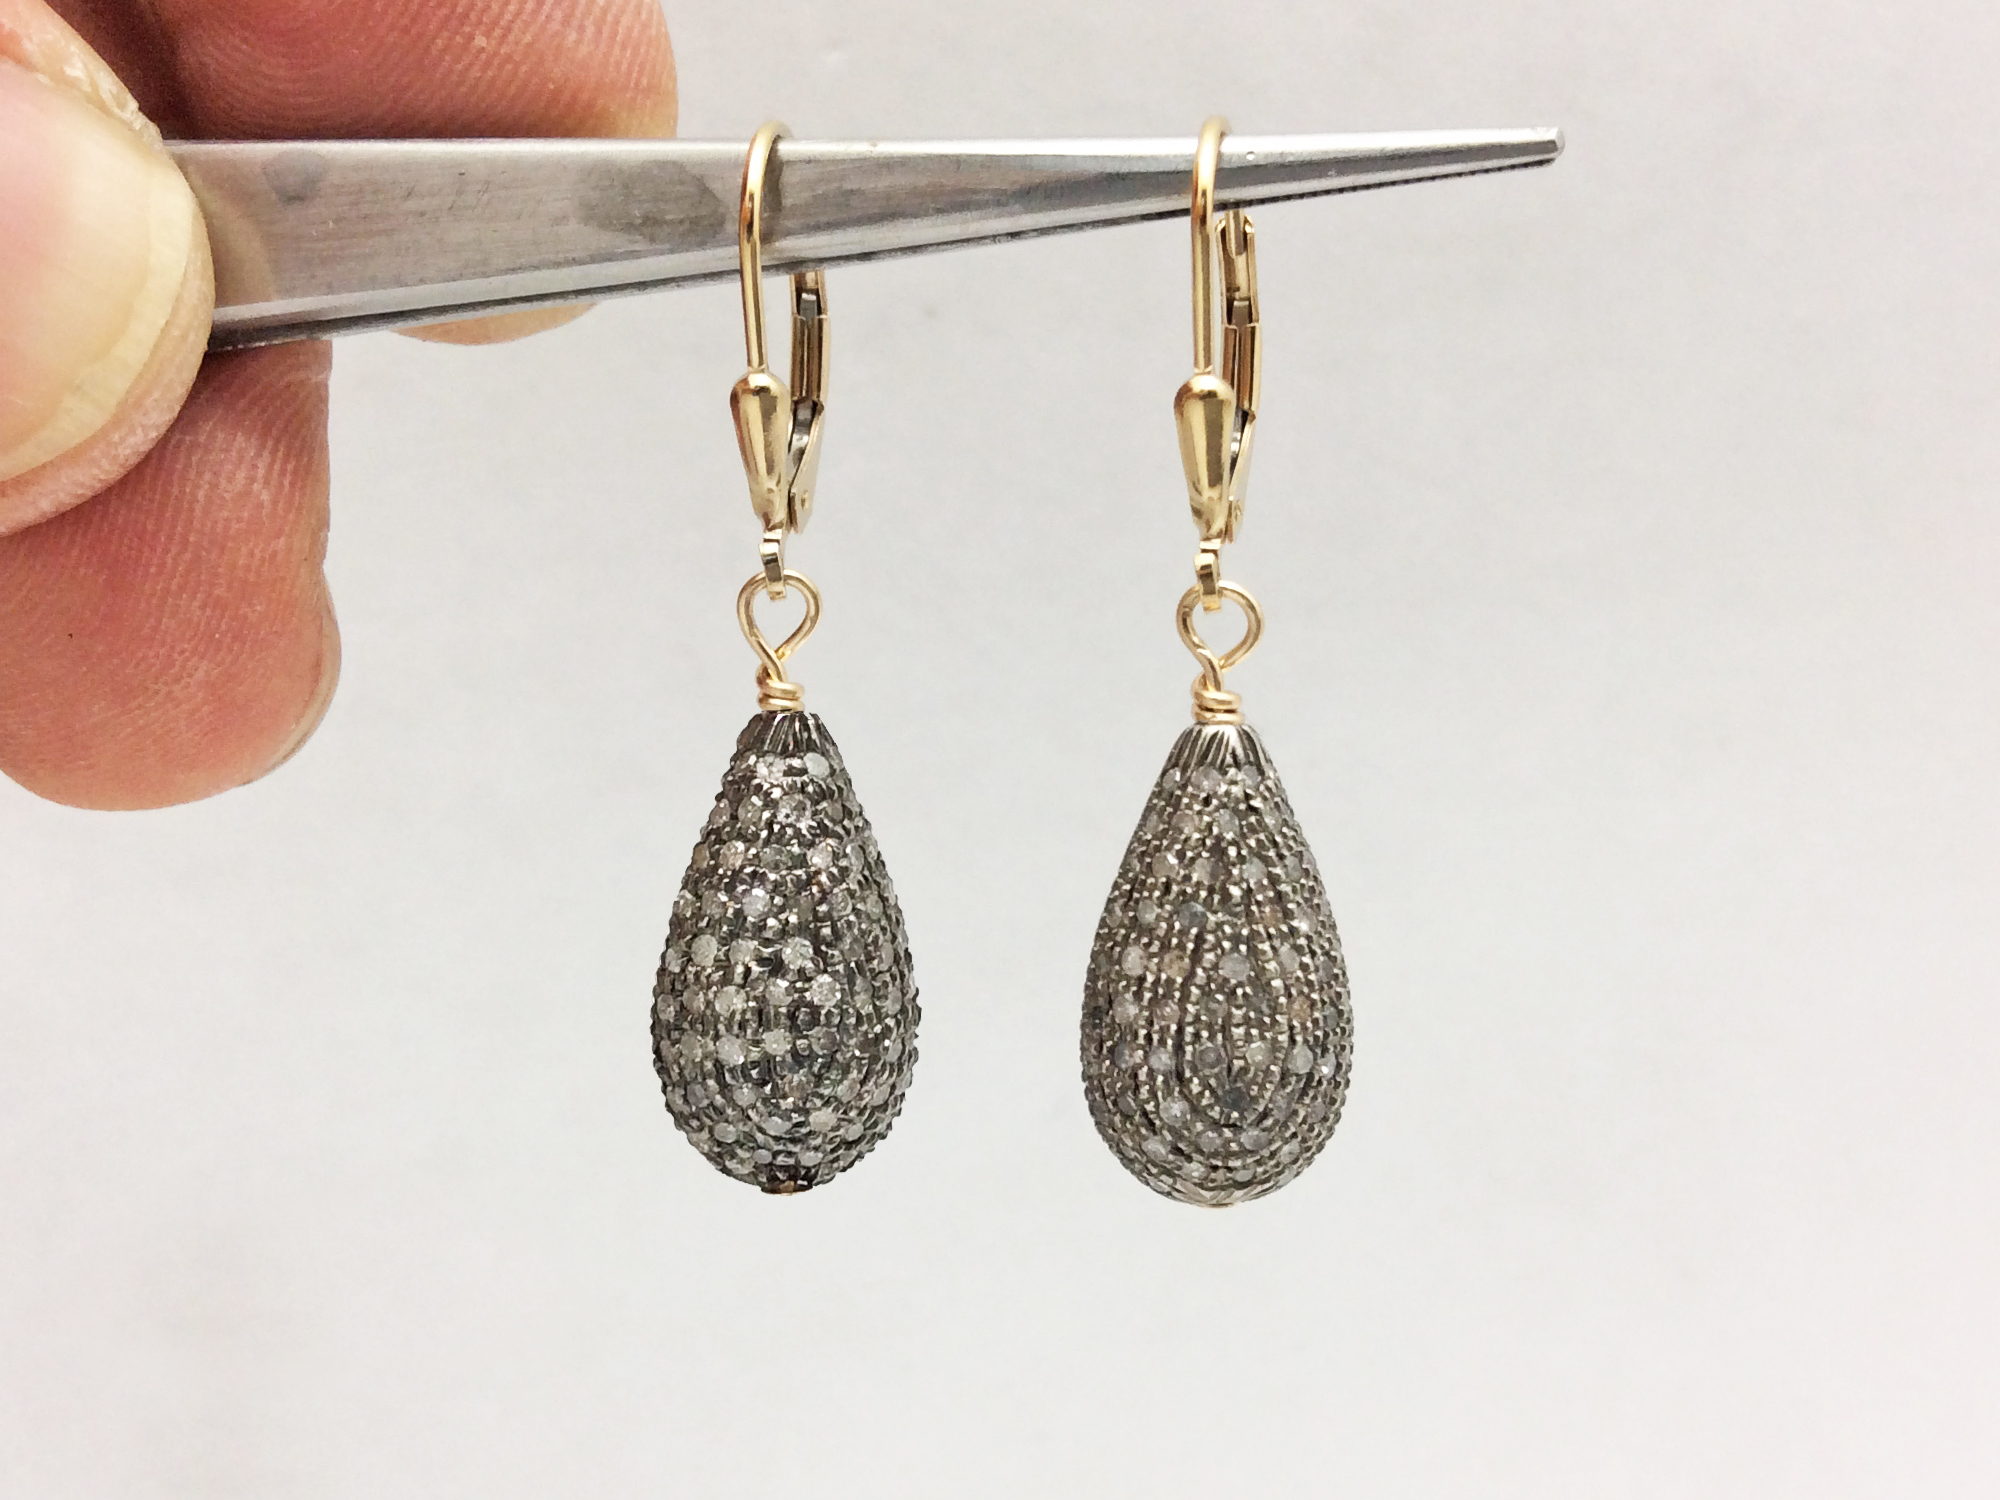
- Beads. The purpose of this technique is to bring out the best in your beads within a particular design. You need to have your design already in mind and your beads selected before we proceed. Will you be attaching the pendant to chains? To earrings? To jump rings? These are things you need you have in mind before we proceed. Also make sure the beads are drilled through from top to bottom. If your beads are drilled on the top, then check out our other tutorial on wire wrapping briolette and drop shape pendants.
- Headpins or ballpins, (obviously).
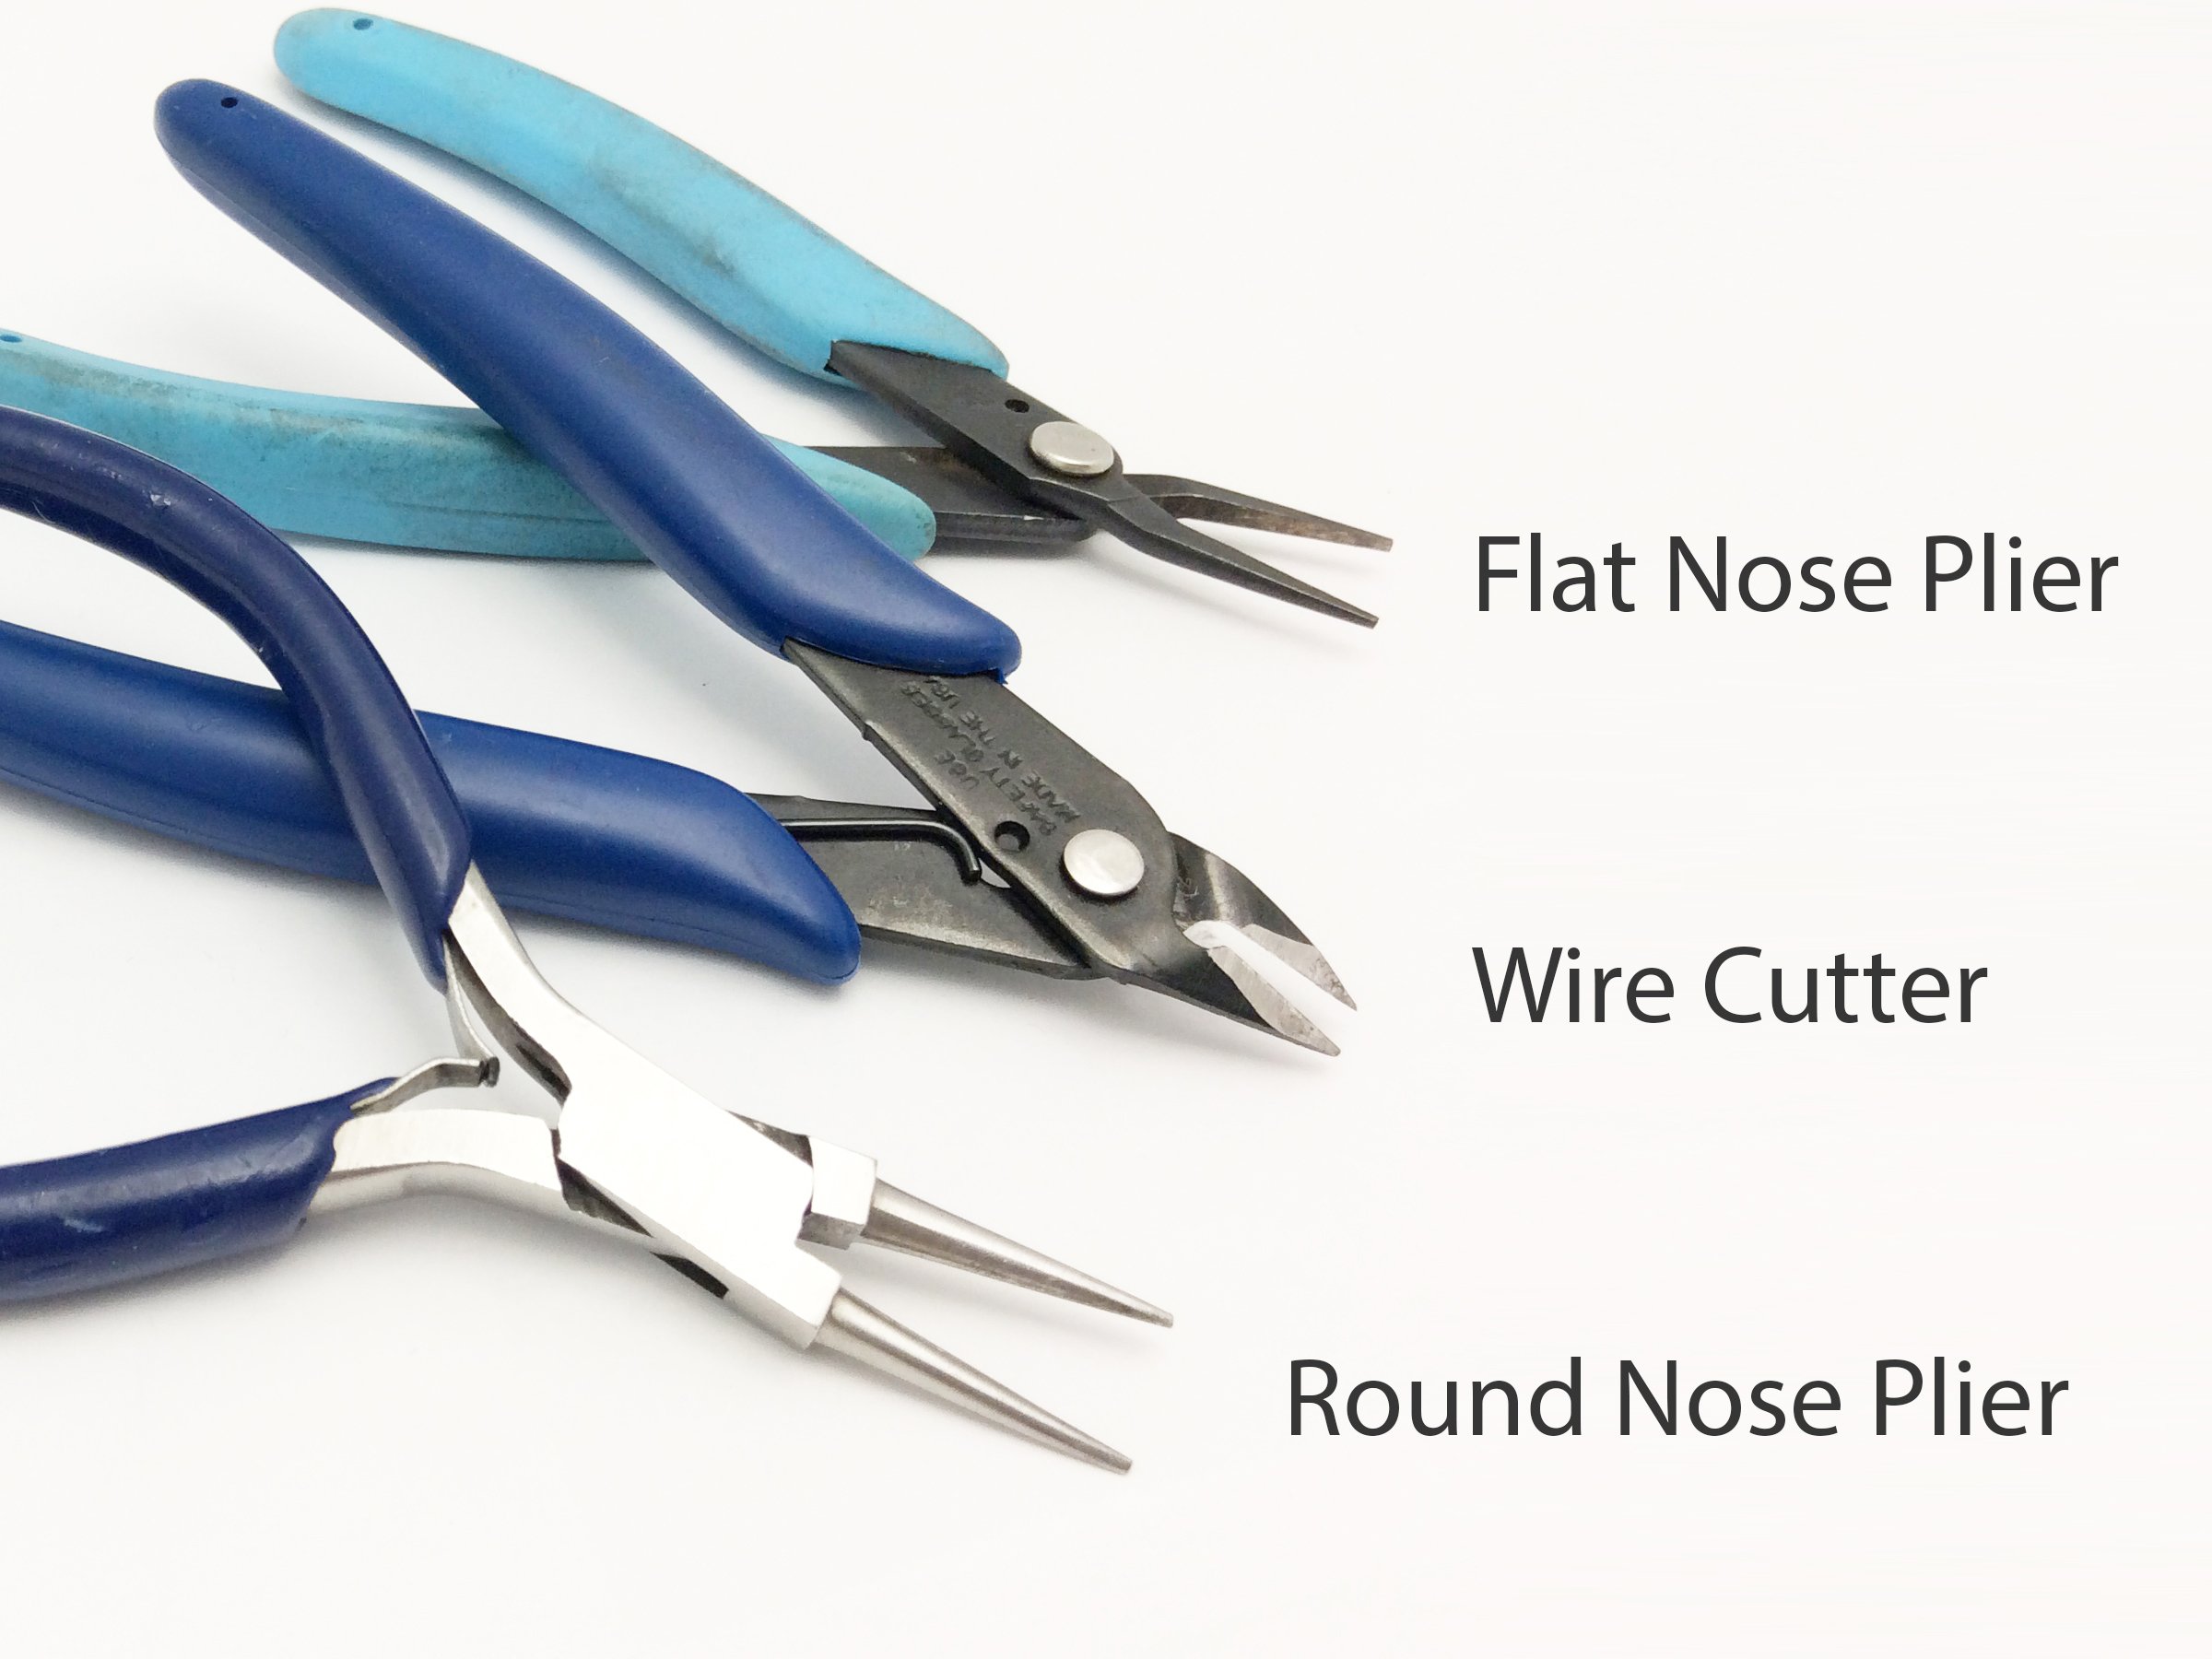
- Tools: 1 wire cutter, 1 round nose plier, and one flat nose plier.
- Bead caps (optional). If your beads have large holes, then these will be necessary.
What size Head Pins should I use?
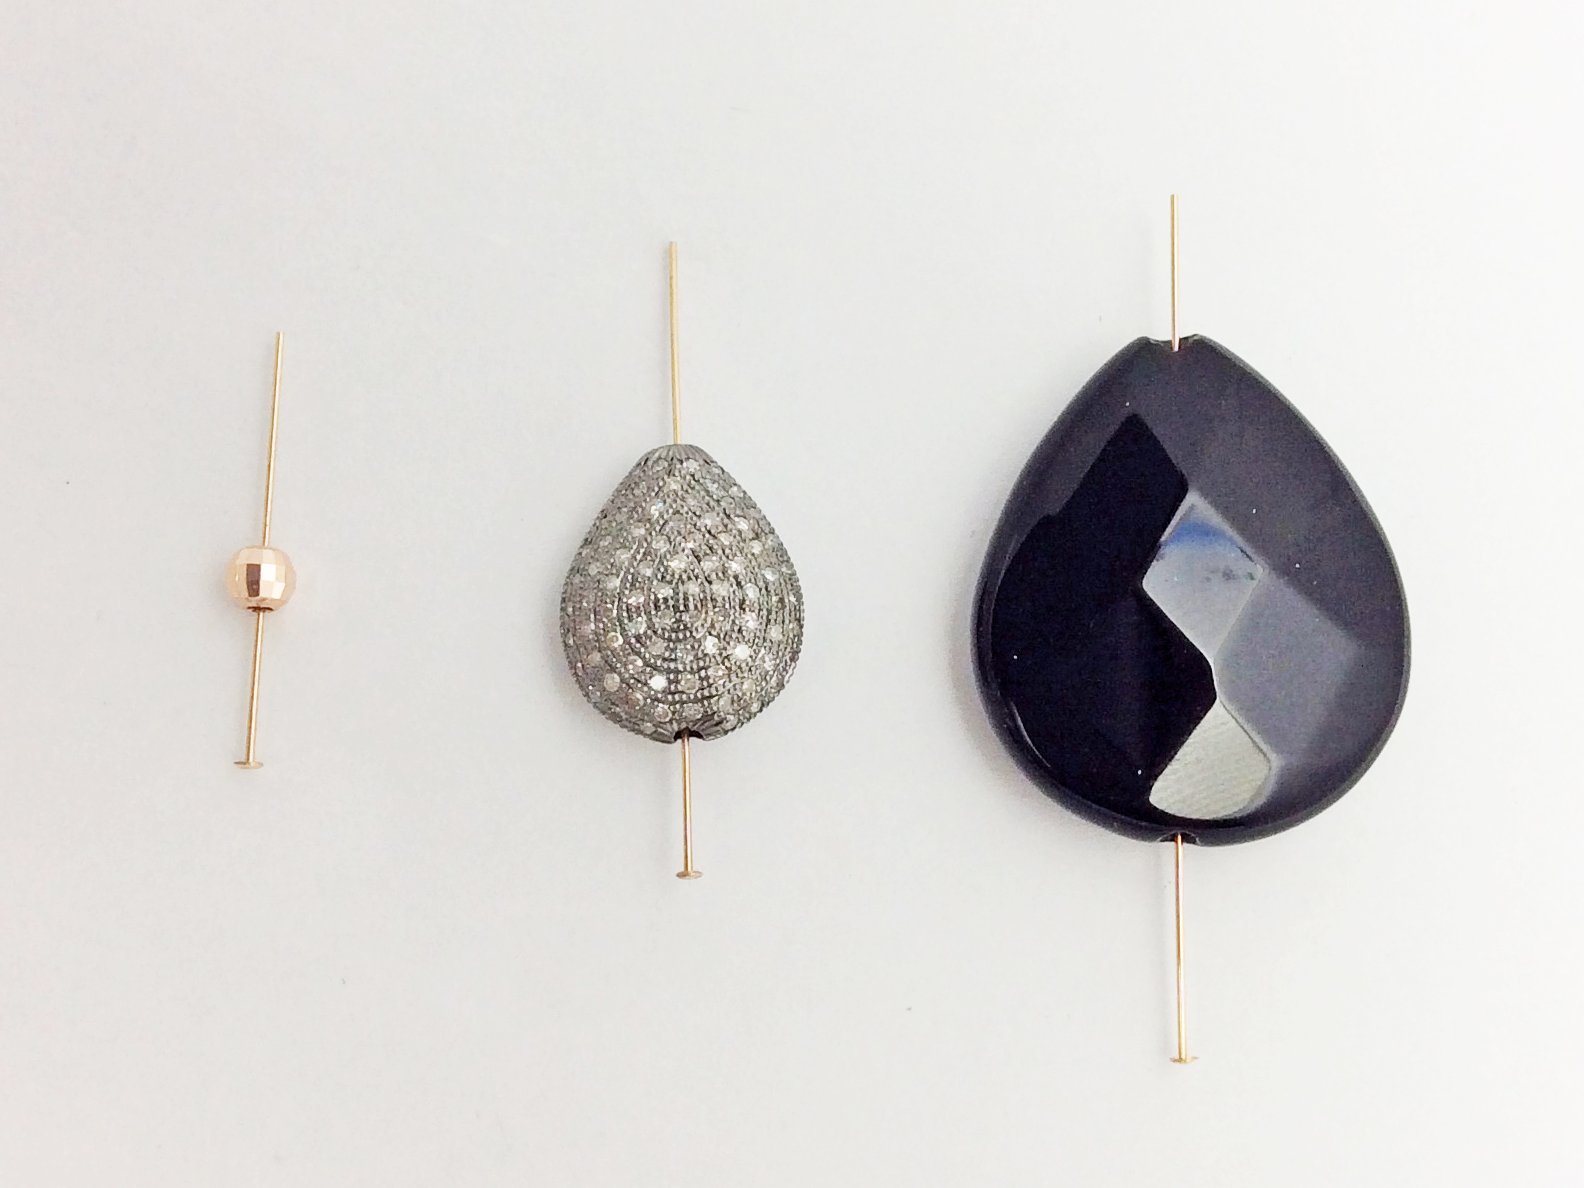
Headpins and Ballpins are pieces of wire that are cut to specific lengths and end with a flat head or round ball on one side. Headpins have two main dimensions, length and thickness. The first thing to consider is the length you will need to complete your wire wrap. The length you need depends on the size of your bead and how comfortable you are with wire wrapping in general. If you are a beginner or not very confident with wire wrapping, I would suggest getting headpins that are on the longer side to make sure you have enough room to work.
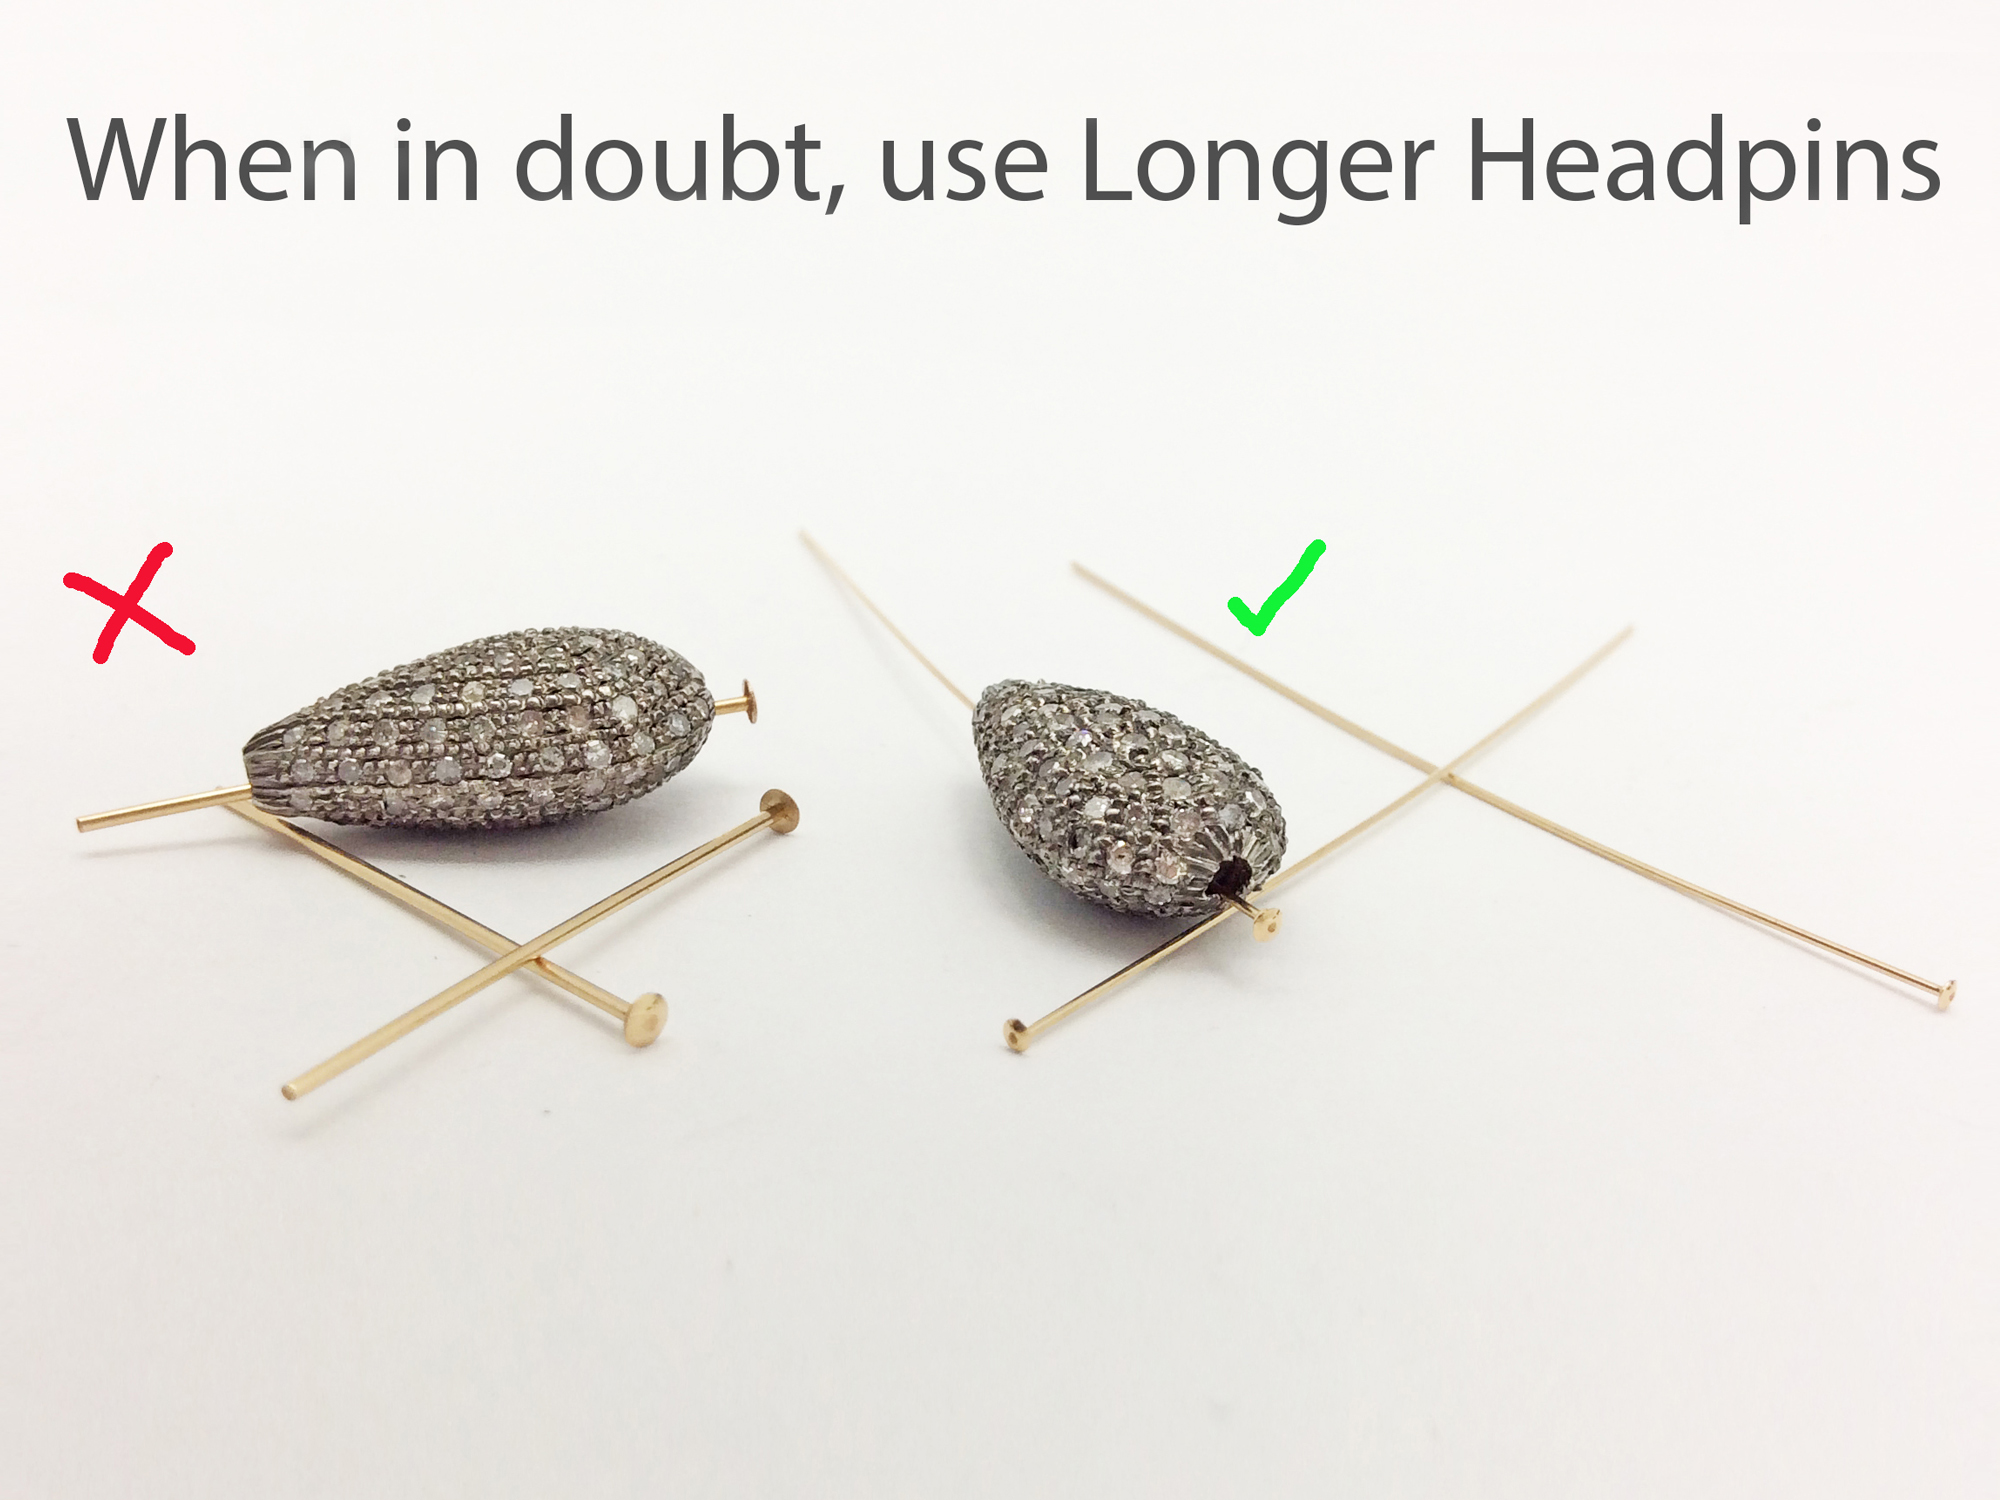
Once we know the length that we are working with, we can select the gauge. Obviously, the headpin has to fit into the hole of the bead without falling through. If the head of the pin falls through the bead hole, you can use a bead cap to increase the width of the bottom.
If you need to choose between two sizes that both fit, it comes down to your design and personal preference for what works best. For example, if you are wire wrapping a pendant onto a very dainty chain, I would use a thinner gauge and vice-versa.
Now for the easy part, the actual wire wrapping.
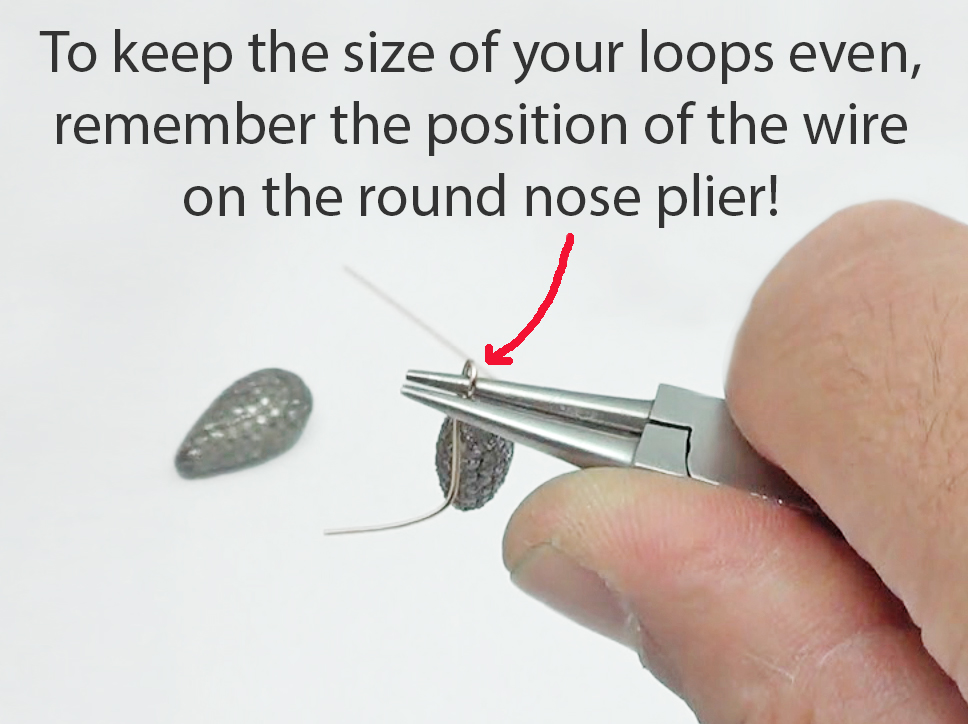
Thread the headpin into the bead and use your round nose plier to make a loop a couple of millimeters above the bead hole. The trick to making your next wire wrap match is to remember the position of the wire on your plier. Remember that spot and the spacing you left above the bead hole, because that is how you will keep the loop sizes consistent.
When you have your loop, slip it onto the piece you want to attach the bead to. Now you have an idea of how it will hang when its done. If you want to make adjustments, now is the time to go back and do them. If you like the way it looks, then we can go ahead and finish the wrap. Grab the loop with your flat nose and the end of the wire with your round nose, then coil the wire neatly around twice or three times. Either is fine, it mostly depends on what you think looks better. In general though, the thinner the wire, the more I recommend going with three coils. I am going to end my coil where the next one would have begun so it fits nicely, and cut the end with my wire cutter.
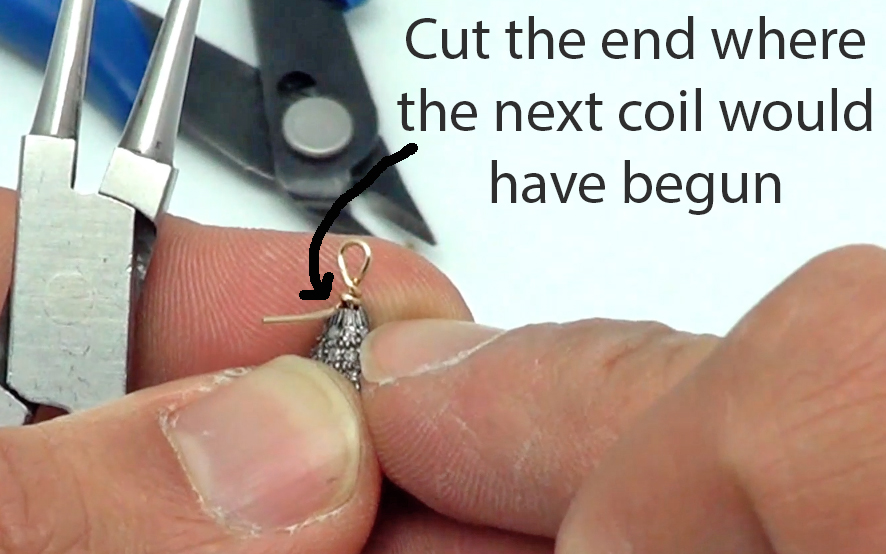
I mentioned this trick in my other tutorials, but it is very useful and is worth repeating. To get a nice and clean cut, use your cutter to just pinch where you want to cut, then bend it back and forth until it comes off. That way you get a more precise ending and your cutter does less work.
Now we have one side done!
I am going to quickly repeat all these steps to show you how to match this wrap for earrings but also just to review. I mentioned earlier that the trick to making two wire headpin wraps match is to remember the spacing above the bead and the position of the wire on the plier when you made your first loop. Try to make your loop as close to how you did it the first time around.
Looks pretty good right? This kind of technique all comes down to a few simple tricks. Once you have a method to keep everything even, matching your wraps becomes much easier, and if you practice at it, it will become automatic.
-Cyrus Nemani, Gempacked